How to Keep Your Backpack Dry in Heavy Rain: Covers vs Liners
A pack cover alone won't keep your gear dry in sustained rain. Pair a fitted rain cover with an internal waterproof liner or dry bags to protect your load.
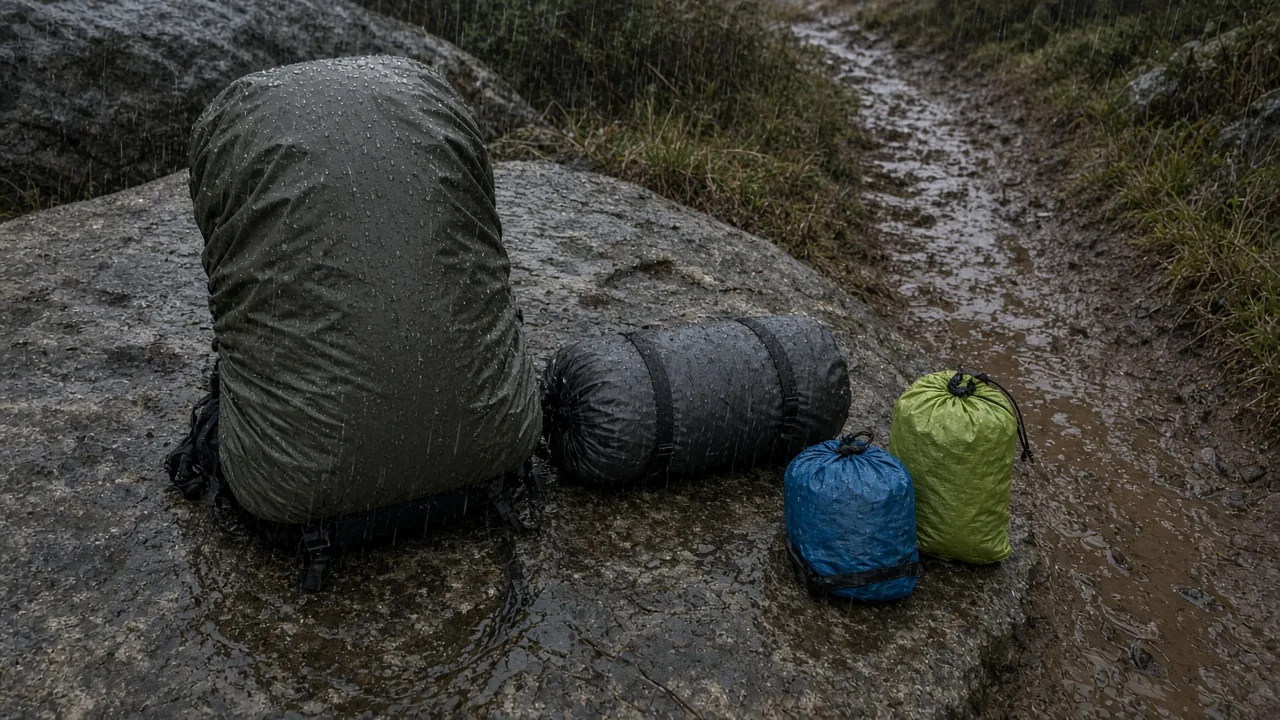
For sustained rain, a pack cover alone is not enough when you want to know how to keep your backpack dry in heavy rain. The most dependable approach pairs a fitted rain cover on the outside with an internal waterproof liner or dry bags on the inside. That combination handles both direct rainfall and the water that sneaks through gaps, seams, and openings.
How to Keep Your Backpack Dry in Heavy Rain: Layer Outside and Inside
Use an external cover to shed most of the water. Add an internal liner or dry bags to stop what gets past it. Covers are useful, but they are not a complete seal around your gear.
Why a rain cover alone can leak in sustained rain
A rain cover deflects most falling water, but it leaves openings around the shoulder straps, back panel, and top edge. During hours of steady rain, runoff can travel along those gaps and soak into the pack body. Even with a cover, water can enter from the side that sits against your back, especially where the harness meets the pack.
Think of a cover as the first layer, not the main waterproof barrier. Once the fabric of the pack gets wet, moisture can wick into seams and zippers. In cold conditions, that extra water weight and damp insulation can make the rest of your trip harder to manage.
How to line a backpack with a waterproof bag
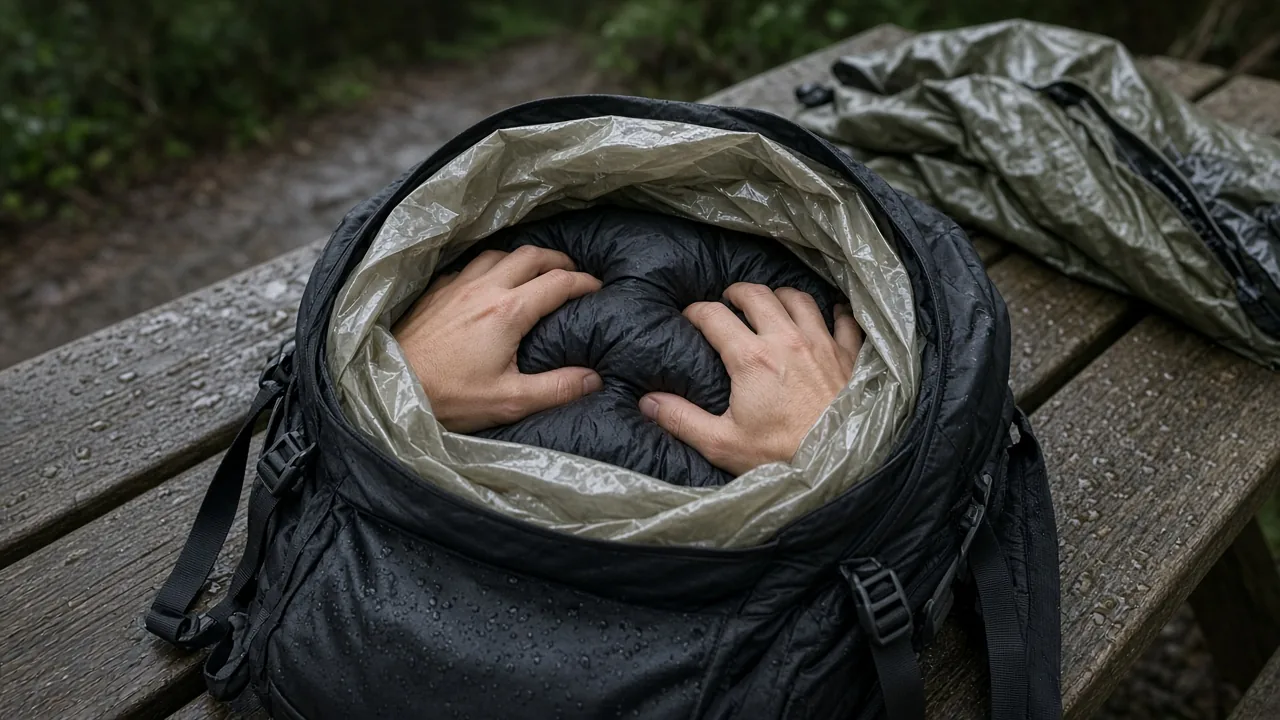
Put a large PU or PE waterproof bag inside the main compartment first. Pack your sleeping bag directly into it and press it down into the bottom of the pack. That forms a water-resistant bed for the rest of the load while also keeping the sleeping bag compressed.
Roll or fold the top of the liner closed before adding other gear. The liner does not need to look neat. It needs to stay closed and keep water away from the items that matter most: sleep insulation, dry clothing, and electronics.
Where pack liners beat trash bags
Trash bags are cheap and light, but they tear more easily around hard or sharp gear. A thicker waterproof sack is a better choice for anything that could puncture a thin liner, such as tent poles, cookware edges, or stakes.
PE zip-top bags work well for small items, and they are inexpensive to replace when damaged. For the main compartment, step up to a heavier PU or PE liner. The weight penalty is small, and the protection is much easier to trust on a rainy multiday trip.
Pick a Backpack Rain Cover That Stays Put
For packs around 60L or larger, choose a cover sized to the loaded pack rather than the empty pack. Look for straps, drawcords, or belt loops that keep the cover from shifting in wind. A loose cover rides up and exposes the back panel.
Which specs matter on a backpack rain cover
Fabric denier gives you a quick read on durability. A 30D or 40D ripstop nylon cover is lighter, while a 70D or 900D cover is heavier and more abrasion resistant. Internal coating, DWR, and hydrostatic head rating all affect how well the fabric resists water before it saturates.
Weight matters for backpacking. A difference of an ounce or two is minor by itself, but it adds up across a full kit. Also check whether the cover includes a stuff sack, because that keeps a wet cover from soaking the rest of your gear when you pack up after rain.
How to fit and secure a cover over a loaded pack
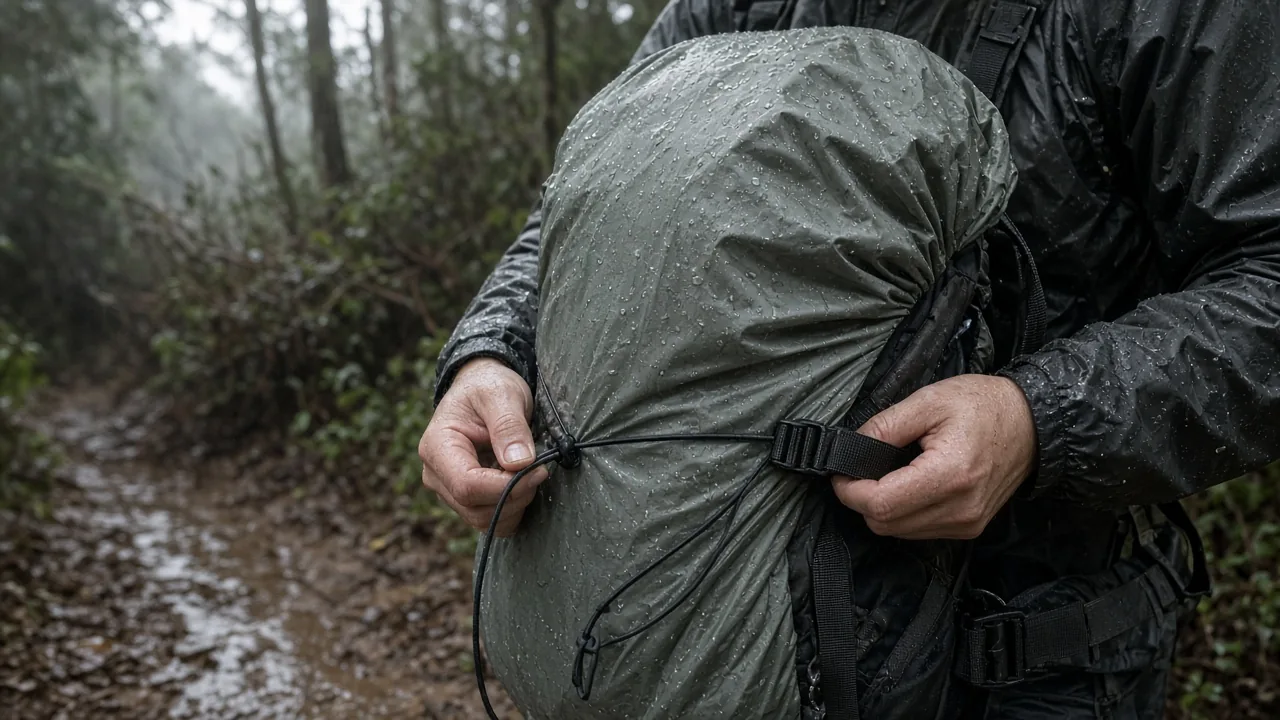
Match the cover size closely to the pack volume. A cover that is too large gathers water and catches wind. One that is too small will not stretch over the load and leaves gaps around the side pockets.
After pulling the cover on, use the drawcord or strap attachments to cinch it. Some covers include hip belt loops or rear strap hooks that keep the cover from riding up. Secure those snugly, but avoid over-tightening so hard that you damage the coated fabric.
Five rain covers compared by weight, fabric and fit
| Cover | Fabric | Weight | Water handling | Fit features |
|---|---|---|---|---|
| Sea to Summit | 30D ultralight nylon | About 2–4.6 oz | Silicone-coated nylon stuff sack | Sizes XS–L; compact packed size |
| The North Face | 70D nylon with PU coating | About 3–4 oz | 2,000 mm hydrostatic head; PFC-free DWR | Stowable; hydration port compatibility |
| Osprey UltraLight | 40D ripstop nylon | 3.2 oz | Durable ripstop fabric | Wraparound drawcord; hip belt attachment |
| Mountainsmith | 190T taffeta nylon | About 3.8–4.3 oz | Taped seams | Sizes XS–L; perimeter drawcord; stuff sack |
| Joy Walker | 900D blended fabric | 2.72 oz | PU coating; 3,000 mm hydrostatic head | Felt stuff sack included |
A 900D cover sounds strong, but the thicker fabric may not stretch as easily over an irregular load. The Sea to Summit cover is the lightest choice here, but thin 30D fabric needs more care around brush and rough contact. If your pack is heavily loaded and exposed, a cover with a stronger harness attachment may beat the lightest option.
Keep Electronics and Small Essentials Dry With a Second Layer
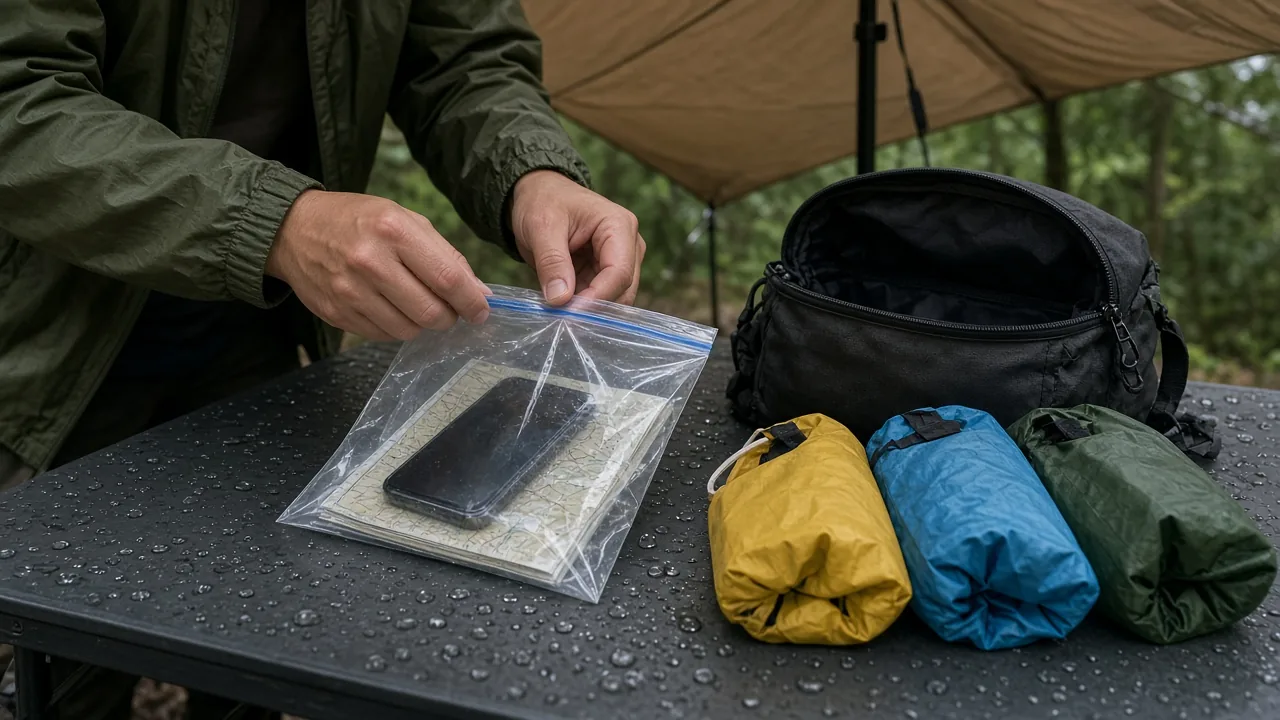
Even with a pack cover, hip belt pockets and top pockets are not sealed. They catch splash and runoff before the main compartment feels wet. Give small essentials their own protection.
Why small items fail first in heavy rain
Phones, batteries, maps, snacks, and headlamps usually sit in non-waterproof pockets. Rain hits those pockets directly, and water runs down the pack body into zipper seams. Open zippers during a quick lunch stop add another path for water to reach those items.
Small electronics fail quickly when damp. A dead headlamp or unreadable map can become more than an inconvenience if you are still miles from camp after dark.
How to pack electronics and maps without tearing bags
Seal electronics and paper items in one PE bag, then place that bag inside a second PE bag. Leave a little slack inside the bags so pressure from the pack does not stretch the plastic tight against sharp corners.
Keep the bag openings away from zipper paths. Pack zippers can slice thin plastic if the bag catches in the teeth. Tucking the sealed bags in the center of a top pocket or padded sleeve reduces that risk.
Use waterproof sacks as color-coded organization
Different colored dry bags let you separate sleep system, clothing, and cook kit without extra steps. One color can hold dry clothing, another the sleeping bag liner and electronics, and another the stove and food prep items.
That layout adds a second water barrier beyond the main pack liner. It also makes finding gear faster in low light or rain, when you want to minimize the time a pack cover is opened.
Pack the Whole Kit to Shed Water and Keep Load Stable
Wet weather makes external straps and loose items more likely to catch rain and brush. Keep the pack profile tight, and put water-sensitive gear where it is easiest to protect.
Where to put sleeping bag, tent and poles
Place compressible insulation in the bottom waterproof layer. A sleeping bag stuffed inside the liner at the bottom of the pack stays protected even if water puddles against the pack body. Light, compressible night items can sit near it.
Split tent body, fly, stakes, and poles inside the pack when possible. That avoids external moisture and lowers the chance of punctures from stakes or pole ends. If poles do go outside, keep them tightly strapped and away from the side pockets you access often.
How load position changes on wet or rough trail
On rough terrain, keep weight centered for control. A high load may reduce hunching on easier road or trail walks, but it can make downhill travel less stable. A shifting load is harder to manage when the ground is slick.
Heavy rain makes every foot placement less certain. A centered pack keeps your posture more predictable and reduces the small corrections that drain energy on a long day.
Adjust straps after packing for rain
Tighten the hip belt first so it wraps the iliac crest and stays put. Then snug the lower shoulder straps, followed by the upper shoulder stabilizers. Clip the sternum strap and pull it just enough to keep the shoulder straps from sliding. Finally, tighten the rear stabilizer if your pack has one.
The goal is a pack that pulls close and does not shift under the rain cover. Do not overtighten. The pack frame and back length still need to match your torso shape, or the best rain cover will not help with comfort.
Rain Cover vs. Pack Liner: How to Choose for Your Trip
Use a liner alone for light rain or short hikes. Add a cover for all-day heavy rain or brush. Car campers can favor simple heavy-duty dry bags instead of ultralight backpacking covers.
When a pack liner is enough
For day hikes or lighter rain, an internal liner and sealed small bags can keep essential gear dry with less weight and fewer steps. A liner costs almost nothing, and it is easy to replace if it tears.
If your route is short and you can reach shelter or a vehicle quickly, reducing gear loops on the outside matters more than a fitted cover. The liner handles most of the risk in that case.
When to use both
For multiday backpacking or all-day heavy rain, combine a fitted external cover with an internal liner or dry bags. The cover sheds most of the direct rain. The liner stops water that creeps inward around the back panel, straps, or zippers.
That setup adds a few ounces, but it protects gear that would be hard to dry overnight. Wet insulation can make a cold night much colder.
Car camping vs. backpacking
Backpackers should prioritize low pack weight and compact covers. A lighter cover and a single large liner usually save space when every inch inside the pack matters.
Car campers can use roomier dry duffels and heavier liners because trail weight matters less than setup convenience. A dedicated dry duffel for clothing or bedding can reduce setup time and keep gear organized at camp.
Final Check for Your Wet-Weather Kit
Before a rainy trip, check whether you are car camping or backpacking, how cold and wet it may get, and match your outer cover plus inner waterproof layer to the load you actually carry.
If you are traveling overnight in cold rain, prioritize a full liner, dry bags for electronics, and a fitted cover. If you are car camping close to shelter, a few sturdy dry bags may be enough. Always follow the manufacturer's instructions for stoves and fuel appliances, and never use a stove or heater inside your tent. A little extra waterproofing weighs less than replacing damaged gear or ending a trip early.
This article is general information about camping gear, not professional safety, medical, or wilderness training. Check fire restrictions, weather, and campsite rules before you go, and follow the manufacturer's instructions for your own equipment.
FAQ
Can a backpack rain cover alone keep my gear dry in heavy rain?
No. A rain cover deflects most falling water but leaves gaps around shoulder straps, the back panel, and the top edge, so water can still enter. Use an internal liner or dry bags as the main waterproof barrier.
Should I use a trash bag or a waterproof pack liner?
Trash bags are cheap and light, but they tear more easily around hard or sharp gear. For the main compartment, a thicker PU or PE waterproof liner is more dependable on a rainy multiday trip.
How do I pack electronics and maps to keep them dry?
Seal electronics and paper items in one PE bag, then place that bag inside a second PE bag. Leave a little slack and keep bag openings away from zipper paths to reduce the risk of punctures or tears.
When do I need both a rain cover and an internal liner?
For multiday backpacking or all-day heavy rain, combine a fitted external cover with an internal liner or dry bags. The cover sheds most direct rain, while the liner stops water that sneaks through the back panel, straps, or zippers.
How should I choose a rain cover size for a backpack?
Match the cover size closely to the loaded pack volume, not the empty pack. A cover that is too large gathers water and catches wind, while one that is too small leaves gaps and exposes side pockets.



