How to Treat Blisters While Hiking: A Practical Guide
Learn how to treat blisters while hiking with practical steps for hot spots, drainage, dressings, and infection signs. Includes a lightweight foot-care kit checklist for backpacking and car camping.
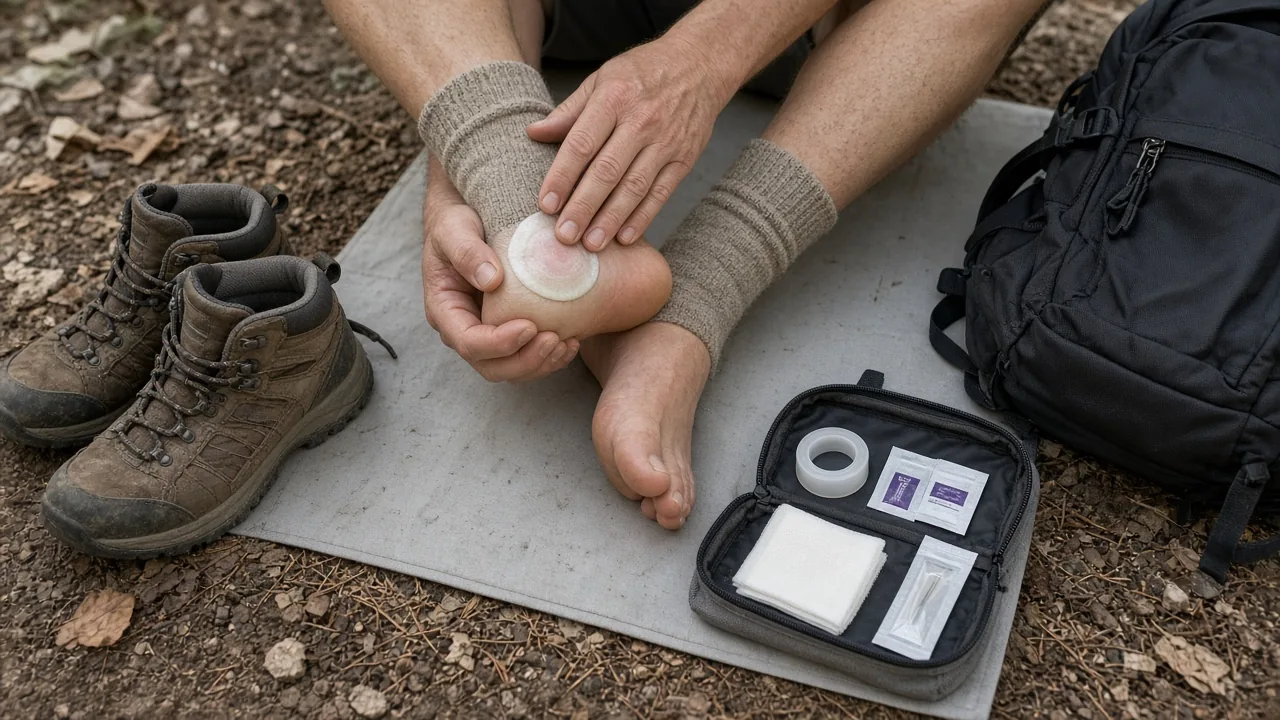
A blister can turn a good trail day into a slow, painful limp. Knowing how to treat blisters while hiking matters because the trail does not wait for your heels to heal. This guide shows how to prevent hot spots, treat small and large blisters, and recognize infection while hiking. Pack tape, hydrocolloid dressings, antiseptic wipes, a sterile needle, and dry socks before you start.
What Causes Hiking Blisters and What to Pack
Blisters form when repeated friction, moisture, and grit separate skin layers, so your first aid kit should stop friction and clean the area fast.
Friction, Moisture, and Grit: The Triggers
Heat and sweat soften foot skin. A seam, a wrinkle in your sock, or a few grains of sand then create rubbing at one small point. The outer skin layer lifts away from deeper tissue, and fluid fills the gap. That fluid is the body's cushion and protective response, but the underlying problem is shear force plus time.
Once your feet are wet and warm, the risk climbs quickly. Stream crossings, rain, and heavy sweat can all do it. Grit makes things worse because it acts like sandpaper between your sock and skin.
A Small Blister Kit for Hiking
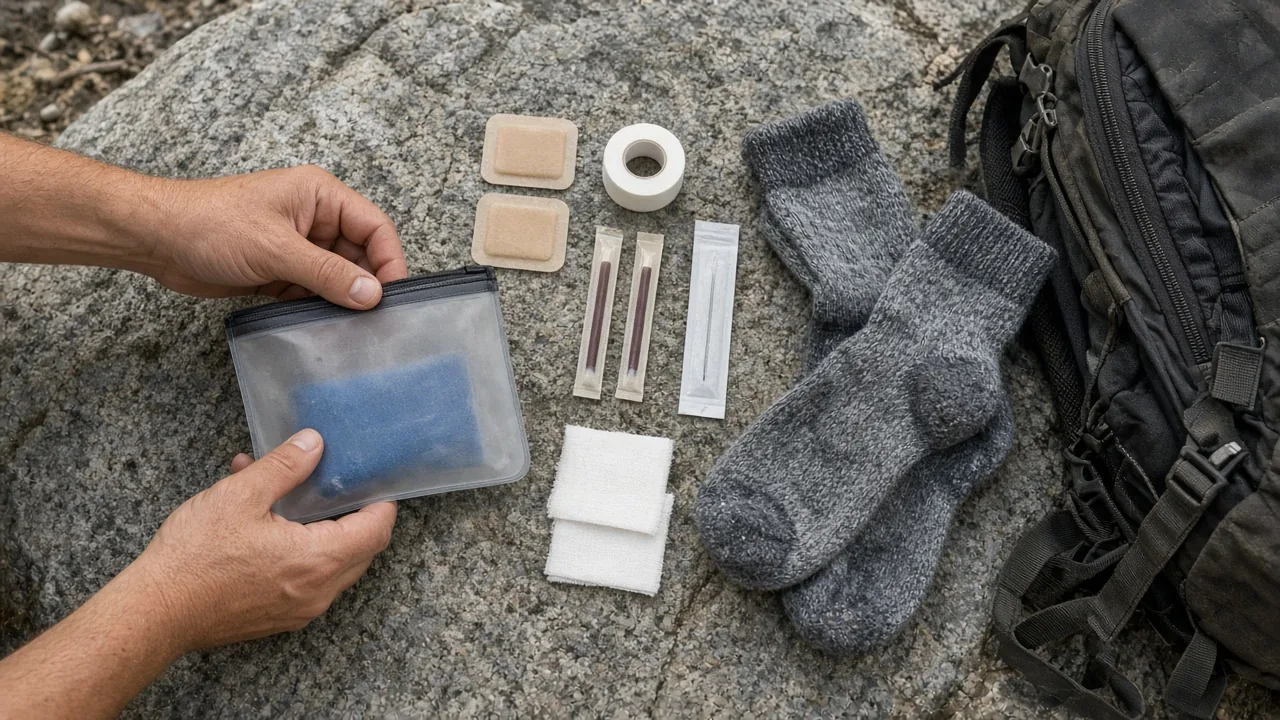
Keep a waterproof pouch under 200 grams with essentials. A working foot-care kit is not a full trauma kit. It needs to be small enough that you will actually carry it in your pack's top lid or hip belt pocket.
A practical blister kit includes iodine swabs, hydrocolloid dressings, athletic tape, a sterile needle, gauze, and dry socks. Iodine swabs clean the skin before you open anything. Hydrocolloid dressings protect and cushion the area. Athletic tape stops friction on hot spots. The sterile needle is only for draining a large, painful blister. Gauze covers torn skin when nothing else stays in place.
Dry socks belong in the same kit because every blister treatment fails if you put the same wet sock back over the dressing.
How to Prevent Blisters While Hiking
Stop early at the first hot or red spot, remove grit, dry your feet, change socks, and cover the area before a bubble forms.
Shoes and Socks That Reduce Friction
Wear boots or trail shoes half to one full size larger than your daily shoes. Your feet swell during a long hike, and toes jammed against the front of the toe box create both blisters and black toenails. A larger shoe also leaves room for a liner sock without making the fit too tight.
Break boots in before a long trip. New leather or stiff synthetic uppers bend at sharp creases that press into your foot. Short local walks let those creases soften in the right places.
Use two sock layers. A thin, quick-drying liner sock under a wool or hiking sock shifts friction to the space between the two socks instead of between sock and skin. The liner wicks moisture to the outer sock, where it can evaporate.
When to Stop for Hot Spots
A hot spot is a warning. It feels warm or tender, and the skin may look red but has not bubbled. That is the best moment to act because you still have a closed skin surface to protect.
If your foot feels hot or gritty, stop immediately. Take off the shoe and sock. Dry the skin with a spare bandana or let it air for a minute. Remove any sand, pine needle, or sock lint. Then apply athletic tape or a hydrocolloid dressing over the red area. Change into dry socks if the pair you are wearing is damp.
Treating hot spots early can prevent roughly 70 percent of blisters from forming. That is a strong reason to stop for two minutes instead of hiking another hour through pain.
How to Treat Blisters While Hiking: Step-by-Step
Small blisters under one centimeter can stay intact under a dressing. Large painful blisters need sterile drainage that preserves the skin roof.
When to Leave a Blister Alone
If a blister is small, not painful, and still closed, cover it with a hydrocolloid dressing and avoid popping it. The intact skin is the best natural barrier against bacteria. Popping a small blister creates an open wound where there was not one before.
A hydrocolloid dressing cushions the blister and absorbs a small amount of leakage if it breaks on its own. Check the edge of the dressing periodically, but leave it in place for as long as it stays stuck.
How to Drain a Large, Painful Blister
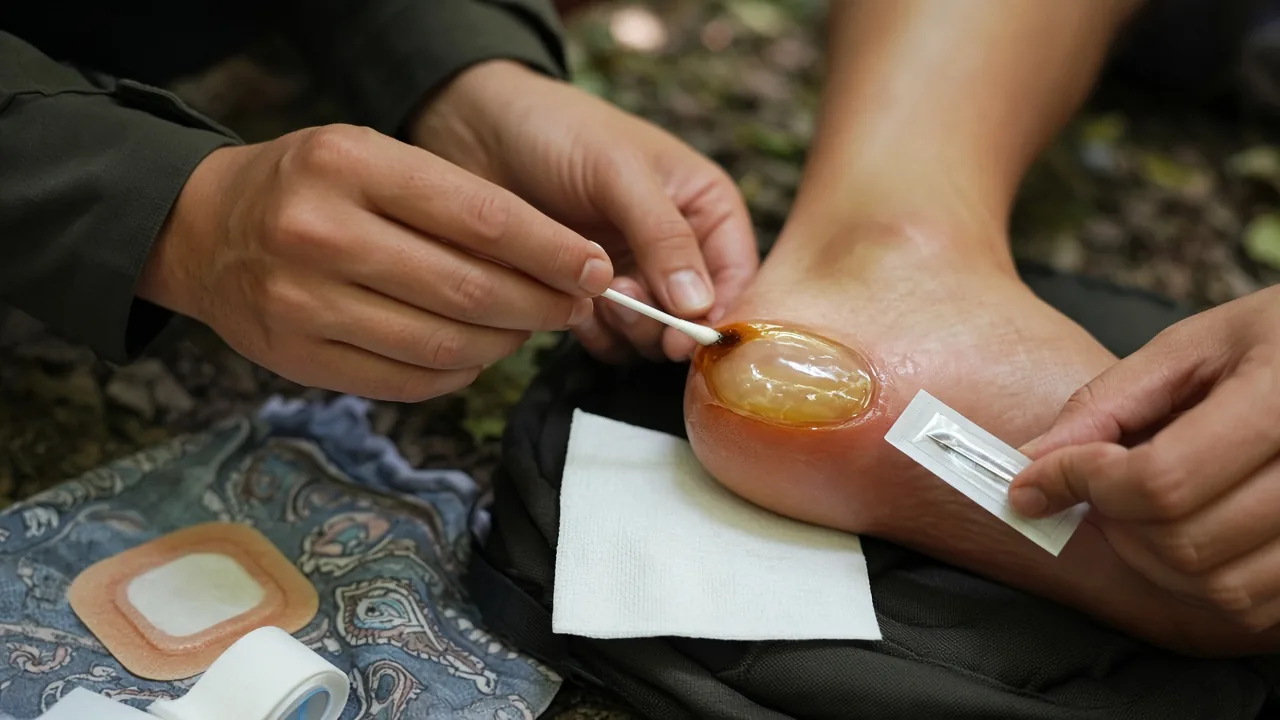
If a blister is larger than about one centimeter, tense with fluid, and painful enough to change your gait, draining it can help. Do it in camp or at a rest stop, not while walking.
Clean the skin with an iodine swab. Wipe the blister and the surrounding area, and let it dry. Use a sterile needle only. Puncture the blister at its edge, not through the center, so the roof skin stays as intact as possible. Press gently to let fluid drain onto a piece of gauze. Keep the roof skin in place. It protects the raw tissue underneath.
After draining, wipe the area with iodine again and cover it with a hydrocolloid dressing. The goal is to turn a painful fluid-filled bubble into a flat, protected wound that can heal.
How to Dress a Torn Blister
If a blister has already torn and the roof skin is gone, you are treating an open wound. Rinse it with clean water or antiseptic wash to remove debris. If there is a loose flap of dead skin, trim only the clearly detached edge, but try to preserve any living skin that can protect the area.
Apply antibiotic ointment and cover the spot with sterile gauze. Tape the gauze down so it does not shift inside your sock. Change the dressing daily, or more often if it gets wet or dirty. Inspect the wound each time for swelling, redness, or pus.
Common Blister Treatment Mistakes While Hiking
Avoid draining with a regular needle, tearing off skin, using ordinary bandages, and never use a stove or heater inside your tent to dry socks or warm up.
Why Regular Bandages and Non-Sterile Needles Fail
Ordinary bandages slide on foot skin. Sweat loosens the adhesive, and the bandage bunches or peels inside your sock. That turns the bandage itself into a new friction point. For blister coverage, use tape or hydrocolloid dressings that hold up to foot movement and moisture.
A non-sterile needle can push bacteria into the blister. The needle does not need to look dirty to be unsafe. Anything that has been in a pocket, repair kit, or toiletry bag is not sterile. Carry individually sealed sterile needles or a sealed sterile lancet in your blister kit.
Tent Safety While Drying Feet
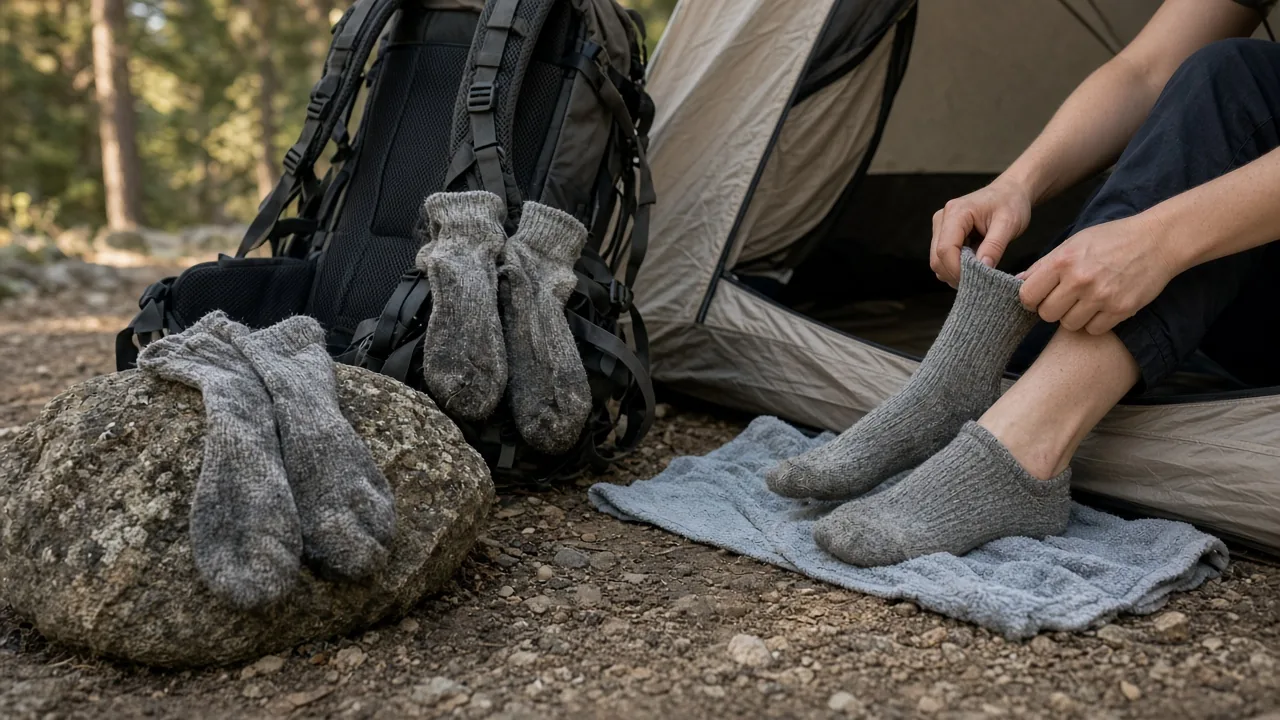
If you stop to dry boots or socks, do it outside or in a well-ventilated shelter. Never use a stove or heater inside your tent. Camp stoves produce carbon monoxide, and tents do not have enough ventilation to clear it. The fire risk is also severe because tent fabric burns fast and hot.
The same rule applies to charcoal, grills, lanterns, and any other fuel-burning device. Keep cooking outside and away from the tent entrance. Dry your feet with a towel, change socks, and warm up by moving or adding clothing. Do not try to solve cold or wet feet with a heat source inside the tent.
When to Stop Hiking and Get Medical Help
Stop and seek care if a blister or wound shows spreading redness, swelling, heat, pus, fever, or if it came from a dirty puncture.
Signs of Infection After Blister Treatment
Some redness around a fresh blister is normal, but it should stay small and stable. Watch for expanding redness, warmth, pus, or fever within a day or two. These are not normal healing signs. Red streaks moving up the foot or ankle also need medical attention.
A blister that comes from a dirty puncture, a deep cut, or a penetrating injury needs a different level of care. If the wound is deep, long, or heavily contaminated with soil, manure, or rust, it may need professional cleaning and tetanus evaluation beyond what a trail kit should handle.
Blister Kit Check: Car Camping vs. Backpacking
Car campers can carry a fuller kit. Backpackers should choose lightweight multi-use dressings, tape, and a few antiseptic wipes to save space.
What to Carry for Each Trip Type
For car camping, add extra gauze, bandages, scissors, and a larger tube of antibiotic ointment. Weight and bulk do not matter much when the kit stays in the trunk. A car kit can also include more variety, such as shaped bandages for cuts on fingers or hands sustained around camp.
For backpacking, every item must be small, light, and serve more than one foot-care need. A single roll of athletic tape can secure gauze, cover a hot spot, or reinforce a hydrocolloid dressing. Fewer, well-chosen items beat a heavy kit with supplies you will never open.
| Item | Car Camping | Backpacking |
|---|---|---|
| Hydrocolloid dressings | 4 to 6 in two sizes | 2 to 4 in multi-use size |
| Sterile gauze pads | 6 or more | 2 |
| Athletic tape | Full roll | Half roll, flattened |
| Iodine swabs or wipes | 10 | 4 to 6 |
| Sterile needle or lancet | 1 to 2 sealed | 1 sealed |
| Antibiotic ointment | Small tube | Single-use packet |
| Dry socks | 1 to 2 pairs | 1 pair |
| Scissors | Small set | Small folding scissors or omit |
| Shaped bandages | Include for hand cuts | Omit or replace with tape |
How to Store and Restock Your Kit
Keep the kit in a waterproof bag in your pack's top lid, where you can reach it without unpacking everything. A clear bag helps you spot supplies quickly. For car camping, store the larger kit in a dedicated box or dry bag in the vehicle.
Pack out used dressings, tape backing, and ointment packets. These belong in your trash bag, not on the trail. After each trip, open the kit and replace anything used. Iodine swabs dry out once opened, tape edges get dirty, and gauze packaging tears. Refill expired supplies before the next departure date.
Common Questions About Hiking Blisters
Hikers often ask whether to pop blisters, use liquid bandages, or rely on shaped bandages. Match the product to the wound condition.
Can I Use Liquid Bandages on a Blister?
Liquid bandages suit clean small cuts better than wet blister skin. On a draining or intact blister, the liquid seal can trap fluid and make the skin too wet. Hydrocolloid dressings provide more reliable protection on a draining blister because they absorb fluid while cushioning the area.
If you only have liquid bandage and you are still miles from camp, it can seal a clean, dry crack or small cut. It is not the first choice for most foot blisters because the foot keeps moving and the skin stays damp.
Do Shaped Bandages Help on Feet?
Shaped bandages help fingers and knuckles but still shift on foot skin. On hands, an H-shaped or butterfly bandage lets a joint bend without peeling off. On the foot, the same products do not stay in place when a sock and boot press against them.
For blisters, use tape or hydrocolloid dressings instead. Save shaped bandages for hand injuries in camp or car-first aid use, where a knuckle or fingertip needs coverage that flexes.
Before a hike, check the forecast and your footwear. Bring dry socks, tape, and hydrocolloid dressings for backpacking, or a fuller kit for car camping. Inspect your feet early, stop at the first hot spot, and you will keep a small problem from becoming the reason the whole trip shortens. If blisters are a recurring issue, also review your boots and socks against the conditions: heat, rain, stream crossings, and terrain all change how your feet hold up. Camp Kit Journal
This article is general information about camping gear, not professional safety, medical, or wilderness training. Check fire restrictions, weather, and campsite rules before you go, and follow the manufacturer's instructions for your own equipment.



