How to Pack a Cooler for Camping: Ice, Layers, and Drain Rules
Build the cooler from the bottom up with block ice, layer meat below produce, use a two-thirds ice ratio, and drain only the food cooler.
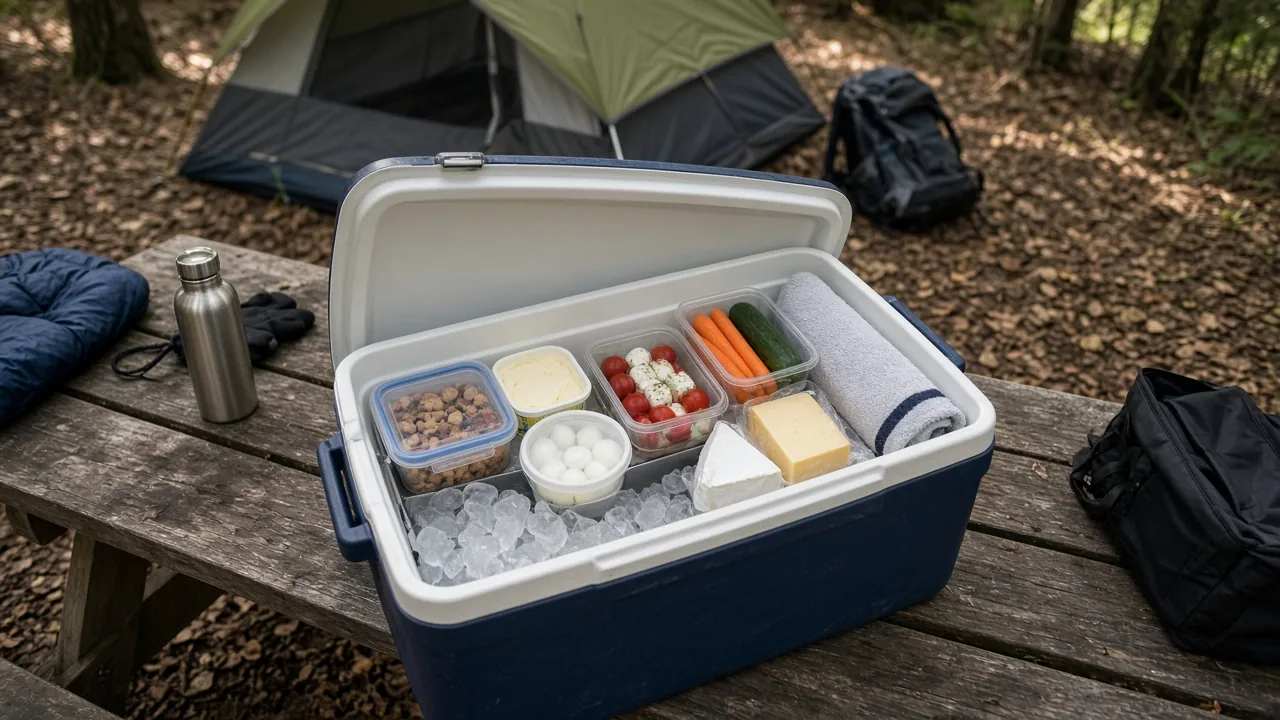
For car camping, a cooler is only as good as the way you load it. The practical approach to how to pack a cooler for camping comes down to a few measurable rules: use about two-thirds ice to one-third food, place dense block ice at the bottom, seal and layer meat below produce, fill air gaps, and drain only the food cooler. Get those details right, and you can keep food cold for a weekend instead of watching it swim in lukewarm water by Saturday afternoon.
How Should You Pack a Cooler for Camping in Layers?
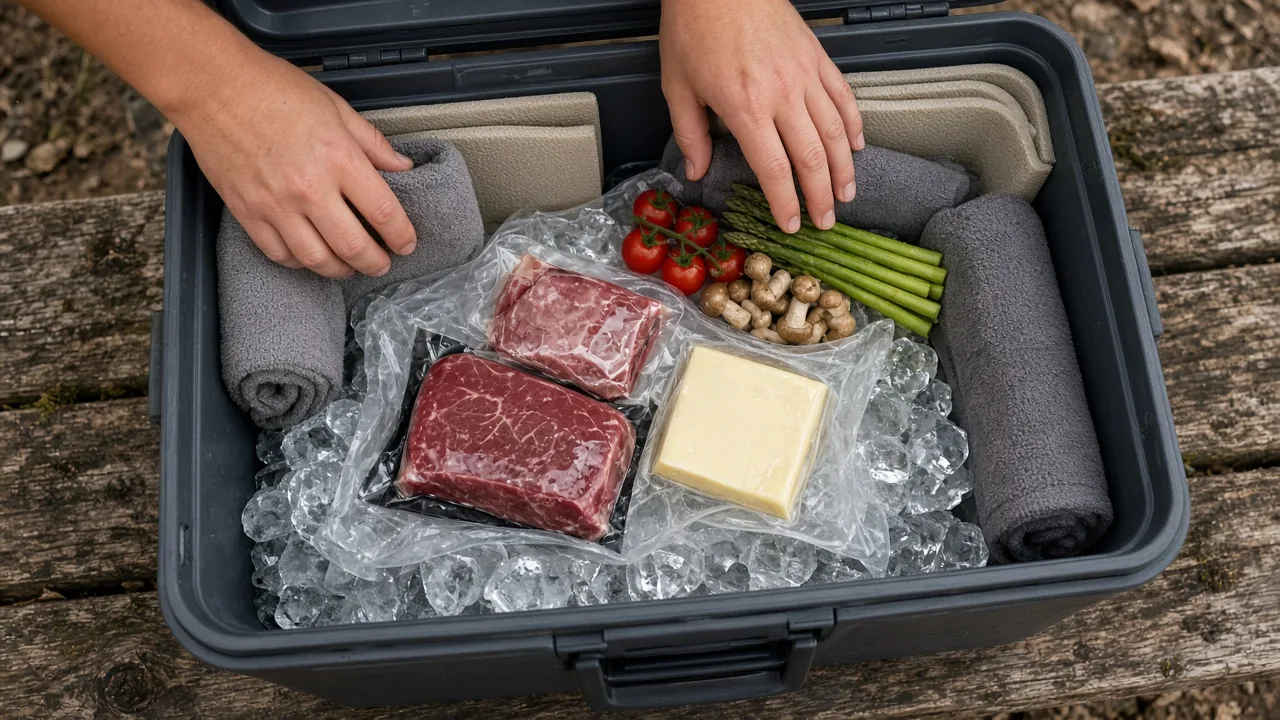
Build the cooler from the bottom up. Start with a base of block ice, not crushed ice. Lay a thin plastic or foam sheet over the ice, then stack sealed meat, dairy, and produce above it. Finish by filling remaining air space with closed-cell foam pads or rolled towels so cold air has less room to escape every time the lid opens.
Why put a barrier between block ice and food?
A plastic or foam sheet keeps sealed meat and dairy from sitting directly in meltwater while still letting cold transfer upward. Without that layer, thawing meat packages can soak, labels peel off, and produce gets waterlogged. The barrier does not stop chilling; it only separates food from standing water. Use a flexible cutting board, a thin foam mat, or even a folded trash bag as a washable separator.
What order works best for meat, dairy, and produce?
Keep frozen or raw meat nearest the ice, dairy in the middle, and delicate produce on top. Meat is the most temperature-sensitive item and benefits from the coldest zone. Dairy tolerates mid-level cold without freezing solid. Produce stays cool on the upper layer without getting crushed or frostbitten. Repackage loose items into bins or bags before stacking so nothing shifts into the ice zone.
What Is the Right Ice-to-Food Ratio for a Camping Cooler?
Start around two parts ice to one part food or drinks. That 2:1 range appears consistently in cooler guidance, including Yeti-style recommendations, and it matches the idea that ice is the primary temperature battery. If you pack more food than ice, the cooler cannot recover after long drives or repeated lid openings. The ratio can push higher in hot weather, but two-thirds ice is a solid baseline for a multi-day car camp trip.
What if ice crowds out food?
Use dense, pre-frozen food and fill air gaps with towels or foam. Frozen meat, pre-made chili, and frozen water bottles act as additional ice, so the 2:1 ratio still leaves usable capacity instead of wasted air. If the cooler feels half empty after loading food, add folded towels, foam blocks, or crumpled paper to fill the void. A tightly packed cooler holds temperature longer than one with dead space.
Should You Drain Melted Ice Water or Keep It?
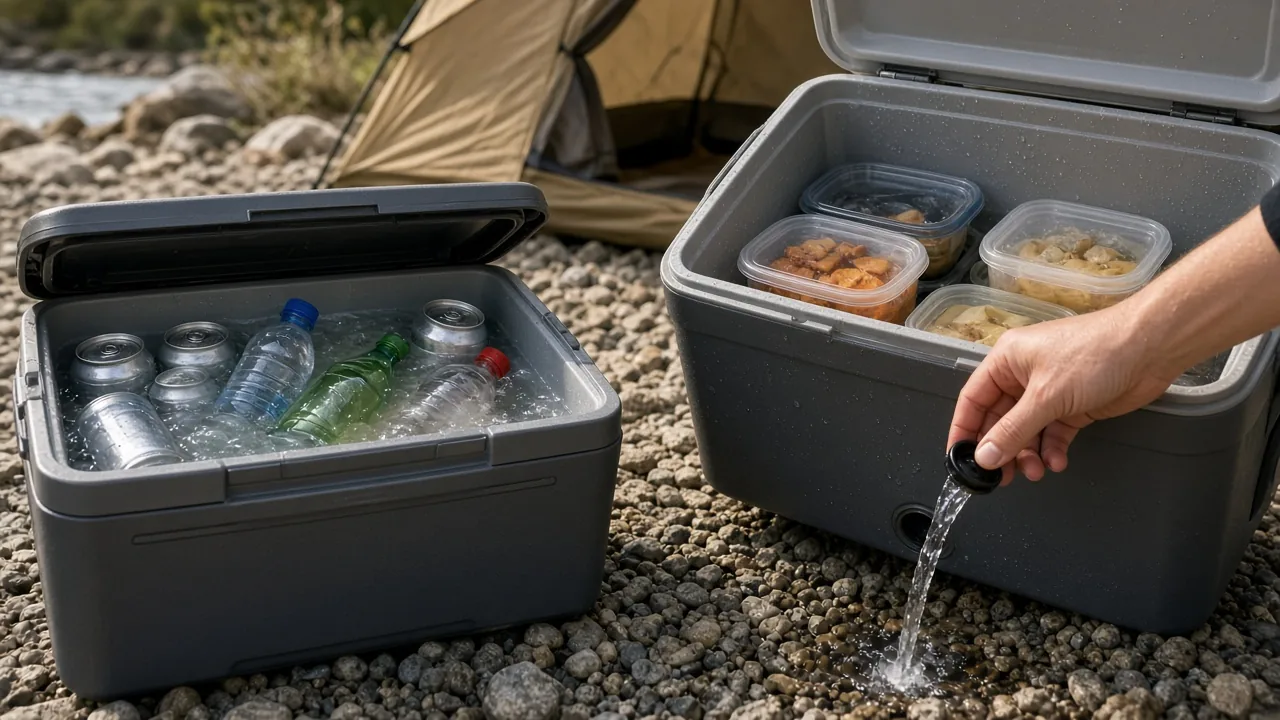
Split the advice based on what is in the cooler. Leave meltwater in a drink cooler because it is still near freezing and helps cool cans and bottles. Drain a food cooler unless everything inside is sealed in waterproof containers. Water conducts cold better than air, but it also creates a wet, messy environment for food. Think of it this way: drink coolers benefit from cold water, food coolers suffer from it.
How to Pack a Cooler for Camping in Hot Weather
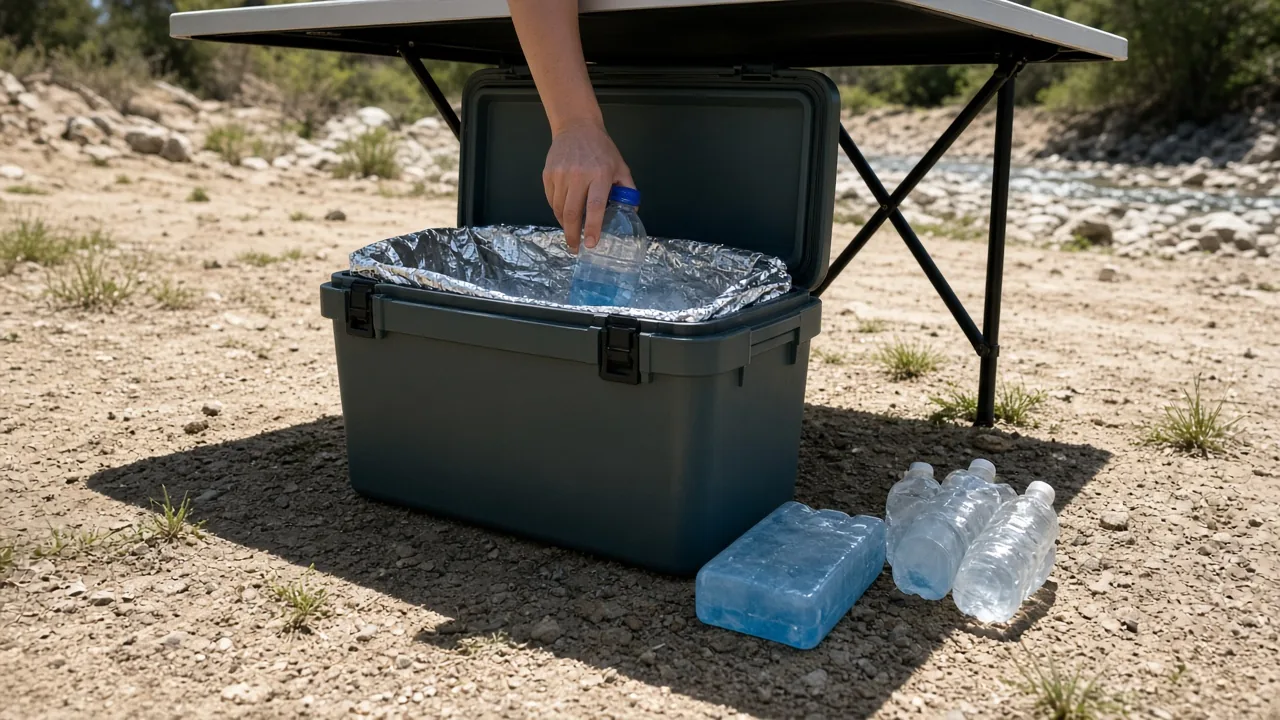
Pre-chill the box indoors the day before, freeze ice to about 0°F, keep the cooler shaded and ventilated, and open the lid only long enough to take one item. A warm cooler wall steals cold from your first load of ice. In direct sun, even a well-packed cooler can lose hours of performance. Park the cooler under a camp table, cover it with a reflective blanket, and keep it away from the hot metal floor of a parked vehicle.
How do you keep ice from melting on the drive?
Keep the cooler out of a hot parked vehicle until departure. A sealed car becomes an oven, and a cooler placed inside before you start driving already loses ice. Choose block ice or frozen bottles instead of crushed ice, because larger ice shapes melt slower. A 10-pound block will outlast a bag of cubes in the same cooler by a wide margin.
How Long Can a Non-Electric Cooler Keep Food Cold?
Real-world results vary, but a small 20-liter cooler has held interior air around 66°F after three hours outside at 84°F. That is still cool enough to keep raw meat outside the danger zone for a day trip, but it is not refrigerator-cold. Other reports and field experience suggest a well-insulated hard cooler can hold ice for three to four days with minimal opening, while a basic foam seafood box lasts about two days. Treat those numbers as upper limits, not guarantees.
When does a powered cooler make more sense?
For trips beyond about three days without ice resupply, a battery-powered cooler becomes more practical than rotating ordinary ice. A compressor-style powered cooler maintains a set temperature and uses no meltwater management, but it needs a charged battery or vehicle power, adds weight, and costs more. It is a different tool, not a direct replacement for a simple ice chest on a weekend trip.
Can You Use Frozen Water Bottles or Ice Packs Instead of Loose Ice?
Yes, and each option changes how the cooler behaves. Frozen water bottles add meltwater that can be drunk, which reduces waste. Gel packs reduce pooling and keep food dry. Solid block ice often lasts longer because it has less surface area per pound than bottles or cubes, and it should still sit at the bottom. Combine the two: block ice for the base, frozen bottles against the walls, and gel packs around delicate food.
How cold should ice or ice packs be before packing?
Freeze bottles and gel packs to about 0°F ahead of time. Ice that sits at 30°F barely above freezing carries much less cooling capacity than ice at 0°F, even though both look the same. A household freezer set to its coldest setting will get you there. Freeze everything for at least 24 hours before packing, not overnight, so the thermal mass is fully charged.
Do You Need a High-Performance Cooler or Can a Foam Box Work?
Foam seafood boxes are cheap and can last around two days, but they dent, crack, and lose their seal quickly. Hard plastic or expanded polypropylene, or EPP, boxes insulate more consistently for repeated use and handle being sat on or strapped down. For a single overnight or a day trip, a foam box is fine. For a three-day car camping setup with raw meat and dairy, a rotomolded or thick-walled cooler is the safer pick.
Who should pick a small hard cooler like the 20L COB20?
It fits one-day food freshness, can work as a camp seat or side table, and holds a 1.5-liter bottle horizontally. The small footprint also makes it easy to stash behind a front seat. However, its 20-liter capacity, or about 5.3 gallons, is too small for multi-day groups unless you pack nearly all ice and only a few meals. Treat it as a personal or couple’s day cooler, not a family weekend box.
Should You Use Separate Coolers for Food and Drinks?
Yes. A drink cooler is opened frequently, so its ice melts faster. Keeping drinks in their own box lets the food cooler stay shut longer and follow a food-only drain rule. If you put drinks and meat in the same cooler, every soda grab dumps warm air onto your raw chicken. Two smaller coolers beat one big mixed cooler for food safety and ice retention.
How Do You Protect Eggs, Produce, and Other Soft Items?
Use a hard egg carton or a sealed jar for cracked eggs. Pre-crack eggs into a Mason jar if you want to skip the carton, but keep the jar sealed and cold. Wrap leafy greens in paper towels to absorb excess moisture and delay wilting. Place loose produce in bins or mesh bags so it does not get crushed under heavier items. Never leave tomatoes and cucumbers loose at the bottom.
What Should You Check Before You Leave?
Check fire restrictions, campsite rules, and weather before the trip. Close the cooler drain plug and latch the lid so it does not pop open in the car. Verify the seal by pressing the lid closed; a proper latch compresses the gasket. And remember: never use a stove or heater inside your tent. Carbon monoxide builds up quickly and can be fatal, even with windows open.
Match the cooler to the trip. For car camping, use a hard ice-packed cooler with the two-thirds ice ratio and layer food carefully. For backpacking, weigh the bulk against pack weight, overnight lows, and possible rain before adding a lightweight insulated bag or bear-resistant food storage. If the forecast calls for three days of 90°F heat and no ice resupply, a powered cooler may earn its space in the vehicle. If you are hiking three miles to a shaded camp, skip the hard box entirely and carry a small insulated sack inside your pack.
This article is general information about camping gear, not professional safety, medical, or wilderness training. Check fire restrictions, weather, and campsite rules before you go, and follow the manufacturer's instructions for your own equipment.
FAQ
What is the best ice-to-food ratio for a camping cooler?
Start with about two parts ice to one part food or drinks. Use dense, pre-frozen food and fill air gaps with towels or foam to make the ice load go further.
Should I drain melted ice water from a camping cooler?
Leave meltwater in a drink cooler because it is still near freezing and helps chill cans and bottles. Drain a food cooler unless everything inside is sealed in waterproof containers.
How do I keep ice from melting on the drive to camp?
Keep the cooler out of a hot parked vehicle until departure, and use block ice or frozen bottles instead of crushed ice because larger ice shapes melt slower.
Do I need separate coolers for food and drinks?
Yes. A drink cooler is opened frequently, so its ice melts faster. Keeping drinks separate lets the food cooler stay shut longer, which is safer for meat and dairy and improves ice retention.



