How to Fix a Sleeping Pad Leak: Stop Slow Air Loss
A slow sleeping pad leak can be fixed by locating the pinhole with soapy water and sealing it with Seam Grip and Tenacious Tape. Learn the step-by-step repair and testing routine to avoid waking on the ground.
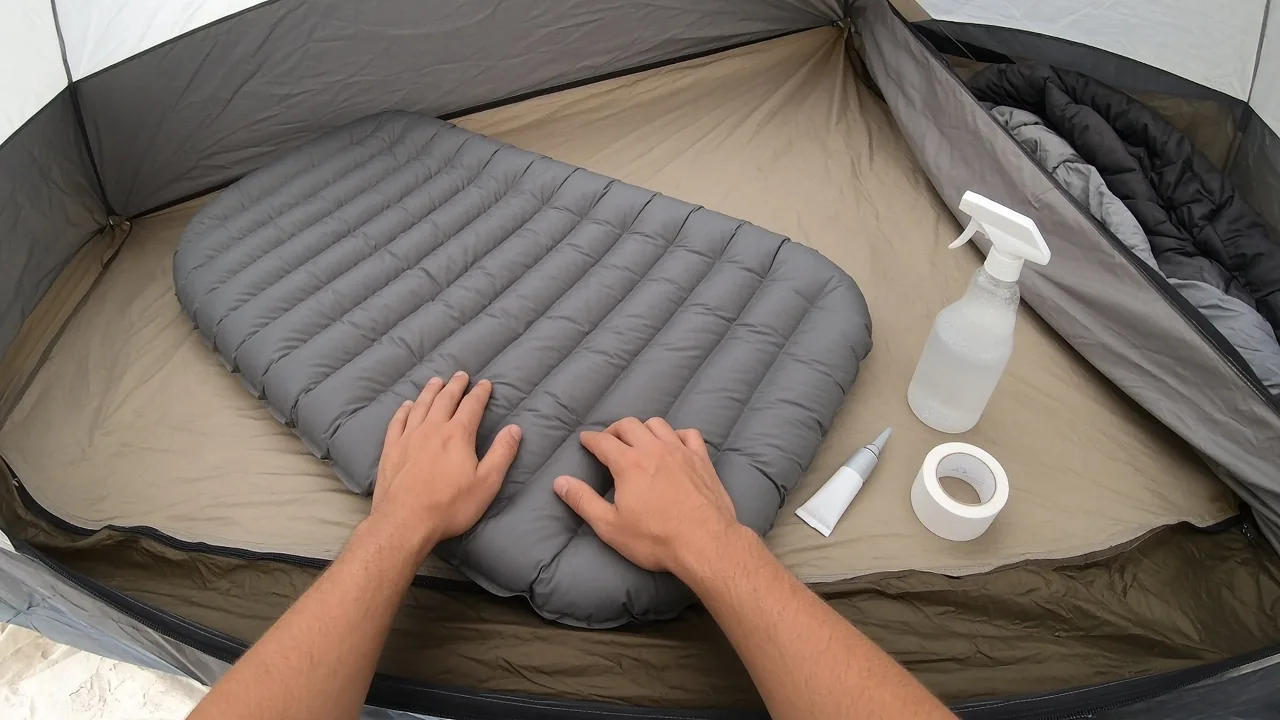
A slow leak does not mean you need a new pad. Learning how to fix a sleeping pad leak starts with soapy water to find the pinhole, then sealing it with Seam Grip and Tenacious Tape so you avoid waking on the ground. Most slow leaks lose air over several hours rather than suddenly, which makes them easy to miss until a cold or hard spot forms under your hip during the night. The repair itself is simple, but locating a tiny hole takes more patience than the patching.
Why a Slow Sleeping Pad Leak Is Hard to Find
Slow leaks are frustrating because a pad can feel fine at night and lose enough air by morning to let your body contact the ground. The real problem is that the leak doesn't announce itself with an obvious hiss or a visible puncture. Instead, the pad gradually softens while you sleep, so the failure only becomes clear when you are already tired and uncomfortable.
What a Pinhole Leak Does Overnight
A pinhole leak may take all night to deflate the pad fully. You may not notice anything wrong when you inflate it at camp or even after you lie down. By early morning, though, the pad has lost enough air that your shoulder or hip presses against the ground. That slow pressure loss can be more annoying than a fast leak because it fools you into trusting the pad right up until it fails.
The overnight pattern also makes diagnosis confusing. You might blame the cold ground, a lumpy campsite, or your sleeping position before suspecting the pad. A good habit is to inflate the pad at home and leave it for several hours. If it feels softer in the morning, treat it as a leak even if you cannot see any damage.
Why the Bathtub Method Often Fails
For very small pinholes, dunking the pad in a bathtub rarely works. The issue is water pressure and pad buoyancy. An inflatable sleeping pad resists being pushed underwater, and you usually cannot press it deep enough to force air out of a slow leak at a rate that creates visible bubbles. Many campers have spent a long time rotating and pressing a pad underwater without finding anything.
The bathtub method also gets messy with a full-size pad, and wetting the entire pad can make the next repair step harder. A targeted soapy water spray puts the bubble-forming film right on the suspect area, which is far more useful for the kind of leak that only weeps air under pressure.
How to Find a Sleeping Pad Leak With Soapy Water
Soapy water reveals slow leaks that a bath test misses, and it gives you a clean, marked spot to repair. The idea is simple: inflate the pad, coat the surface with a soap film, and watch for growing bubbles. The soap lowers the surface tension of the water, so even a weak air stream can form a visible cluster of foam.
Mix the Soapy Water Spray
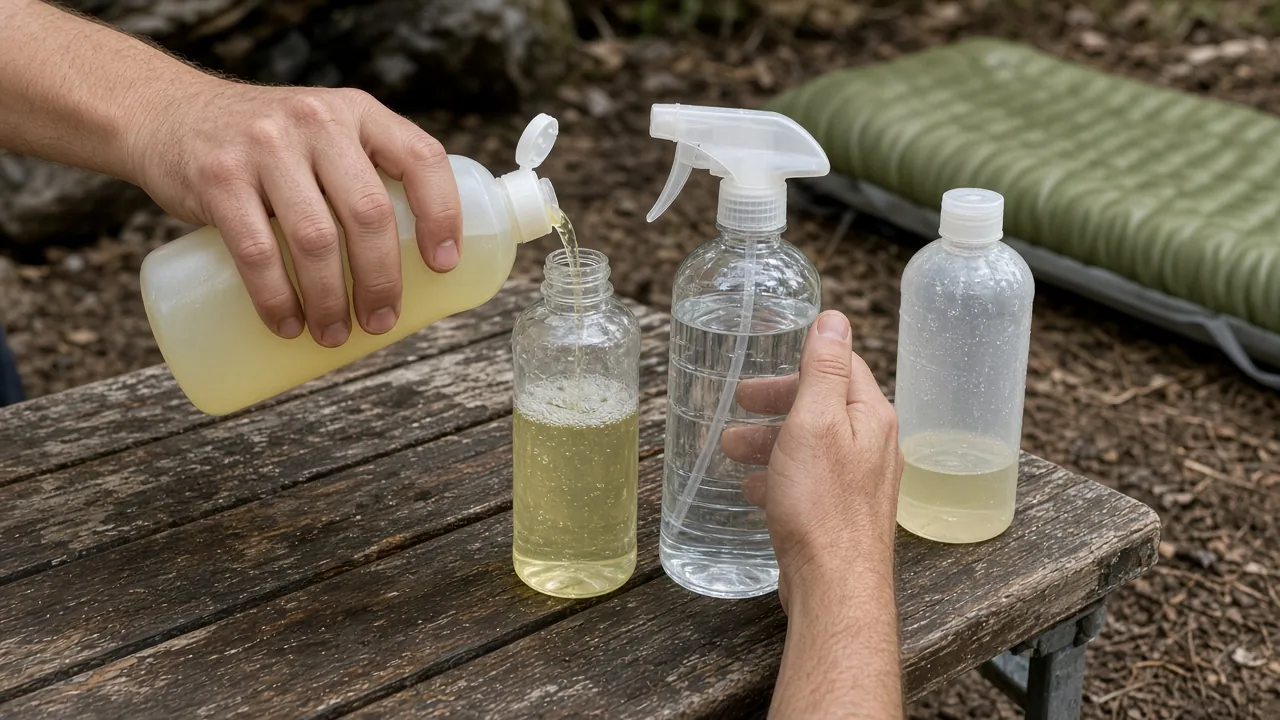
Combine roughly 2 tablespoons of dish soap with water in a spray bottle. You don't need an exact ratio down to the drop, but a stronger solution helps. A heavier wet coat makes pinhole bubbles easier to see than a light mist, because the soap film needs enough thickness to trap the escaping air. Shake the bottle gently rather than creating a foam inside it.
If the spray feels too thin and runs off immediately, add a little more soap. The goal is a liquid that clings to the pad surface long enough to respond to air movement. Use plain dish soap rather than detergents with bleach or heavy fragrances that could leave residue on the pad fabric.
Spray, Wipe, and Mark the Spot
Start with the pad inflated to normal firmness. Spray the suspect area generously, but don't just watch the spray droplets. A helpful trick is to spread the soap film with a wet towel like you would frost a thin layer of icing. That evens out the coating and makes it easier to see a bubble cluster form instead of watching individual drops.
Wait 1 to 2 minutes. A slow leak may take a few seconds to build up enough air to push the soap into a visible bubble. Once you see a steady bubble cluster, mark the location while the pad is still wet. A permanent marker works on most dry surfaces, but tailor's chalk can be easier to see and reapply when the fabric is damp. Mark a circle around the hole so you don't lose it after the pad dries.
If Bubbles Still Don't Show
Some pinholes are too small or the pad's texture breaks up the film. If the soapy water doesn't reveal a leak, hold the pad near your nose or face and move slowly along the surface. The skin on your face, especially around the nose and lips, can feel a faint stream of air that your hands miss. Work in a quiet, still room so drafts don't confuse you.
When you feel escaping air, mark that area and re-spray it with soapy water. Sometimes the second application shows bubbles once you already know the general location. Another option is to add more air pressure to the pad before spraying, but don't overinflate it. You want enough pressure to push air out without stressing the seams or valve.
How to Fix a Sleeping Pad Leak: Sealant, Tape, or Both
Once you find the hole, a small Seam Grip patch with Tenacious Tape over it is a reliable field repair for most pinholes and slow leaks. The glue fills the opening and bonds to the pad material, while the tape spreads stress across a slightly larger area and protects the sealant while it cures. Using both products is better than relying on either one alone for a leak that only appears after hours of pressure.
Deflate and Clean the Repair Area
Open the valve and press out all the air before you begin. Working on a deflated pad lets you flatten the leak site and prevents air from pushing through the wet adhesive as it sets. Press the pad flat on a table or floor, then wipe the leak site with rubbing alcohol. Alcohol removes skin oil, sunscreen, and trail dirt that can weaken the bond.
Let the alcohol dry completely before adding glue. If the pad surface is textured, wipe in one direction and then again with a clean section of cloth or paper towel. A clean repair area is more important than a fast repair, because adhesive that peels off means you have to find the pinhole a second time.
Apply Seam Grip Around the Pinhole
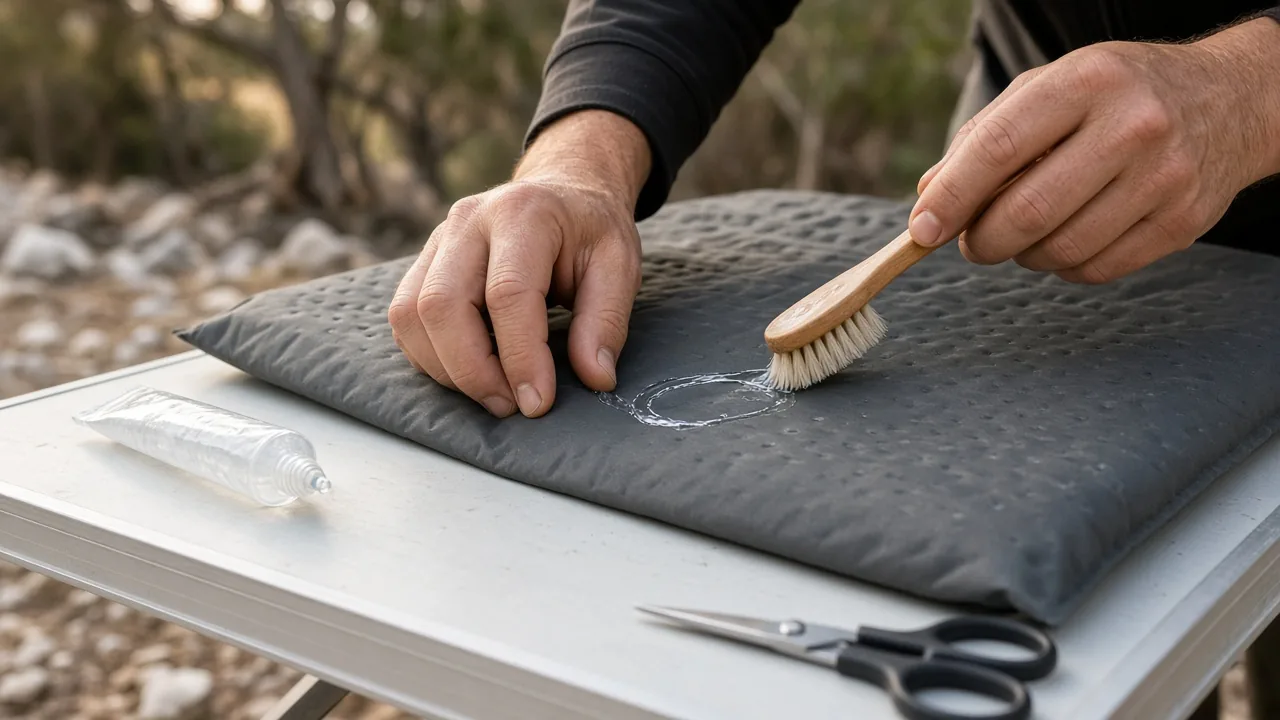
Spread a small amount of Seam Grip over about a 0.5 to 0.75 inch circle around the hole. You don't need a huge blob. Keeping the patch area small helps the pad roll and flex normally instead of creating a stiff spot that cracks later. Use a brush, toothpick, or the tube tip to push the sealant into the pinhole and smooth it thin.
A thin, even coat works better than a thick one. If the first layer doesn't fully cover the hole, add a second thin pass rather than piling on more glue. Seam Grip remains workable long enough to spread it, but you should move deliberately once the pad is prepped.
Add Tenacious Tape for Reinforcement
Cut a piece of Tenacious Tape a little larger than the glue circle and press it firmly over the wet Seam Grip. The tape works as a mechanical cover that resists very slow leaks better than tape alone would, because the glue underneath fills the hole and the tape holds the repair together during flexing. Center the tape so the edges extend beyond the sealant.
Press from the center outward to squeeze out air bubbles and seat the adhesive. If the pad has a fabric face, rub the tape with a thumbnail or the back of a spoon. The goal is full contact, not just a light stick. Let the tape follow the pad's natural shape while the glue is still wet.
Cure Overnight and Test Before Packing
Wait at least overnight, or up to a full day, before inflating the pad again. The sealant needs time to cure under the tape, and inflating too soon can force air through the uncured repair and create a new channel. Set the pad somewhere clean and flat where nothing will press on the patch.
After the cure time, inflate the pad indoors and leave it for several hours or overnight. Check firmness in the morning. If it has softened noticeably, reapply soapy water to find any remaining leak and repeat the repair. A properly cured patch should hold normal sleeping pressure without weeping.
When to Use Glue Alone vs. Tape Plus Sealant
Glue alone can seal a known hole, but glue plus tape resists very slow leakage and minor movement better than a standalone patch. The decision comes down to how sure you are about the hole, how clean the surface is, and how much flexing the pad will do.
| Method | Best for | Limits |
|---|---|---|
| Glue alone | A confirmed, clean pinhole with no flap or tear | May still weep air over hours if the hole is irregular or the surface flexes |
| Tape only | Very short-term field repair | Pre-cut patches often fail on slow leaks without sealant underneath |
| Seam Grip plus tape | Slow or irregular leaks, fabric-faced pads, cold-weather reliability | Slightly stiffer repair area and longer cure time |
Plain Glue Repairs for Known Pinholes
A small dab of adhesive injected or spread over a confirmed hole can seal it, but an even thin coat works better than a thick blob. The glue needs to penetrate the opening, not just sit on top of the pad like a cap. If the hole is small and the surrounding surface is clean and flat, glue alone can work.
The benefit of glue alone is a softer, more flexible repair. The downside is that the glue is fully exposed to abrasion and movement. For a pad that gets rolled and stuffed into a backpack, that exposed patch can wear faster. Save this method for holes in low-wear areas or for a quick repair when you plan to add tape later.
Seam Grip and Tape for Slow or Irregular Leaks
Using both products suits very slow leaks and small uneven punctures because the tape adds flex and the glue fills the opening. This double-layer repair is the better choice when the pinhole took hours to find or when the pad surface is textured, coated with dirt, or exposed to cold ground. The tape covers the sealant while it cures and protects it from peeling at the edges.
If the hole is not perfectly round, or if there are tiny cracks radiating from it, the combination also spreads stress across a larger area. That matters on inflatable pads where the fabric flexes each time you move in your sleep. A thick glue-only patch can crack at the edges, while tape plus a thin glue layer moves with the fabric.
Why Patches Still Leak and How to Avoid Common Mistakes
Most repeat leaks come from poor surface prep, relying only on tape, or testing before the sealant cures. Slow down and clean the pad first. A leaking patch doesn't usually mean the product failed. More often, the adhesive never had a fair chance to bond.
Skipping Alcohol Prep or Losing the Mark
Without rubbing alcohol or a clear mark, adhesive can peel off damp or dirty fabric, and the leak can disappear before you apply glue. Camping pads pick up oils from hands, dust from the ground, and residue from sunscreen or bug spray. Adhesive that sits on top of that film will eventually lift.
Mark the leak while you can still see it. If the mark fades after the pad dries, re-wet the area with the soapy spray and look for the bubble cluster again. Don't rely on memory, especially if you stop for a meal or pack the pad before repairing it.
Trusting a Peel-and-Stick Patch Alone
A pre-cut patch may still weep air over hours if you just press it onto an unprepared surface. These patches can be convenient, but they often fail on slow leaks because the adhesive doesn't fill the tiny opening. The air pushes under the patch edge until it finds a way out.
If you use a peel-and-stick patch, bond it with Seam Grip in a thin coat rather than pressing it onto bare fabric. Apply the sealant around the hole, then put the patch over it while the glue is still wet. That converts a simple sticker into a reinforced seal.
Rushing the Cure or Using Heat to Dry It
Adhesives need time and still air to cure. Inflating the pad too soon or rolling it up before the sealant sets can reopen the leak or smear the patch. Never use a stove or heater inside your tent to speed drying. That creates a serious fire and carbon monoxide risk, and the heat can also damage pad materials.
The safest approach is to let the repair cure overnight at room temperature in a well-ventilated area. If you're at camp and must repair in the field, choose a dry, shaded spot and give the sealant as many hours as possible before you inflate the pad under body weight.
How to Field-Test a Repaired Sleeping Pad
Before you pack, test the repair overnight and bring a small sealant-and-tape kit so a slow leak does not ruin a trip. A patch that holds for 30 minutes can still fail under eight hours of pressure and temperature change. The only way to trust it is to test under conditions close to actual use.
Inflate the Night Before
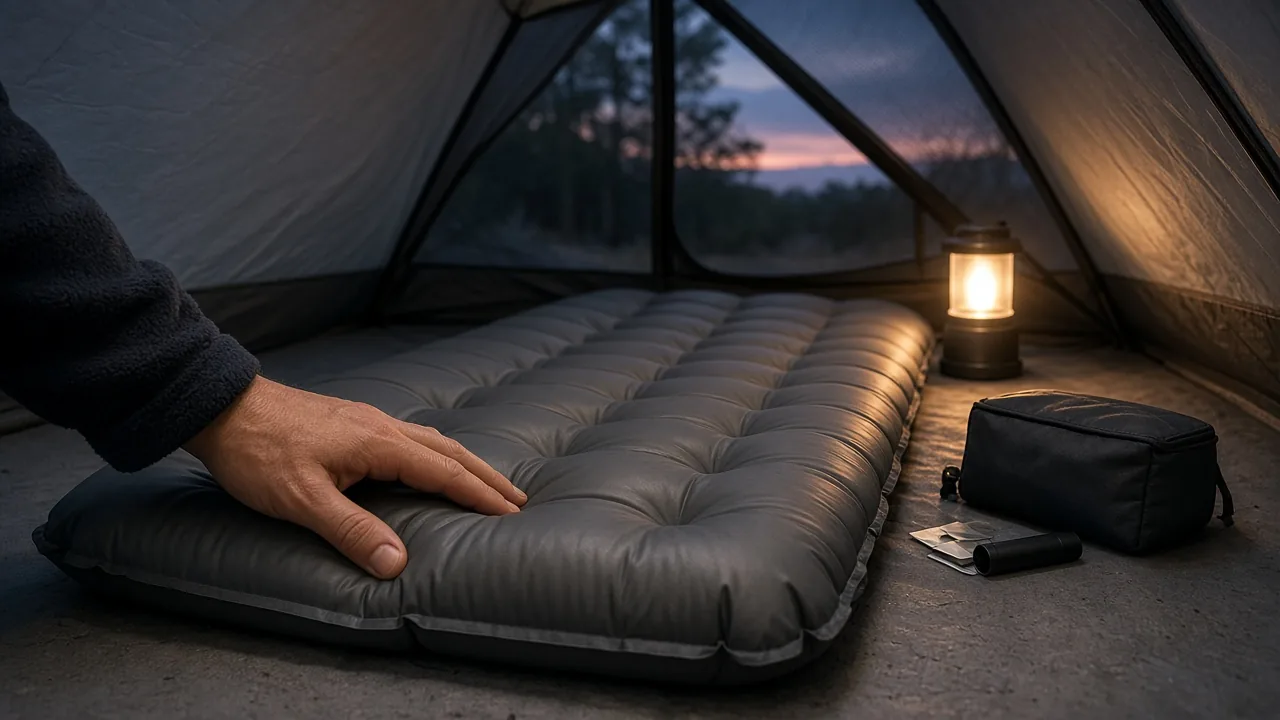
Inflate the repaired pad indoors the evening before a trip and check firmness in the morning. If it has softened, reapply soapy water and repeat the repair. This overnight check catches the exact failure mode that causes slow leaks in the first place: gradual pressure loss while you sleep.
Set the pad on a clean floor rather than over a sharp object or rough surface. If the room temperature drops overnight, that is actually useful, because a cooler pad will show whether the patch can handle mild contraction. A good repair should hold firm enough that you don't feel the floor through the pad.
Pack the Repair Kit and Check Again
Carry a small tube of seam sealer and tape in your repair kit, and check the pad at camp before you commit to sleeping on it. The trail can introduce new punctures from tent floors, pine needles, or grit carried into the sleeping bag. Inflate the pad after setting up the tent and leave it while you organize the rest of camp, then check before dark.
For backpacking, keep the kit small and store it with your other repair items. For car camping, you can bring a larger bottle of soapy water and a more complete kit without worrying about weight. The key is to have the supplies accessible before you are tired and ready to sleep.
A slow leak is repairable if you find the exact pinhole and give the sealant time to cure. Before a trip, weigh the repaired pad against whether you are car camping or backpacking, how cold the night will be, and whether rain is expected, then pack a sealant-and-tape kit so you can recheck and re-seal it in the field. A simple kit and an overnight test can mean the difference between sleeping on a reliable pad and waking up on the ground.
This article is general information about camping gear, not professional safety, medical, or wilderness training. Check fire restrictions, weather, and campsite rules before you go, and follow the manufacturer's instructions for your own equipment.
FAQ
How do I find a slow sleeping pad leak?
Inflate the pad, spray soapy water on the surface, spread it into a thin film, and watch for growing bubble clusters. Mark the spot while it is still wet, or use your face to feel for a faint air stream if bubbles don't show.
Can I fix a sleeping pad leak with tape only?
Tape alone can work as a very short-term field repair, but pre-cut patches often fail on slow leaks because the adhesive doesn't fill the tiny hole. For a reliable fix, use a thin coat of Seam Grip under Tenacious Tape.
Why does my sleeping pad still leak after patching?
Most repeat leaks come from poor surface prep, relying only on tape, or inflating before the sealant cures. Clean the area with rubbing alcohol, let it dry, and wait overnight before inflating and testing.
How long should I wait before inflating a repaired sleeping pad?
Wait at least overnight or up to a full day for the Seam Grip to cure under the tape. Inflating too soon can force air through the uncured repair and create a new channel.
How do I test a sleeping pad repair before a trip?
Inflate the repaired pad indoors the evening before and check firmness in the morning. If it has softened, reapply soapy water to find any remaining leak and repeat the repair.



