How to Build an Emergency Blanket Shelter That Retains Heat
A reflective blanket alone won't keep you warm, but rigged as a low, taut shelter with ground insulation, it can trap body heat. Learn what materials you need and how to build the shelter step by step.
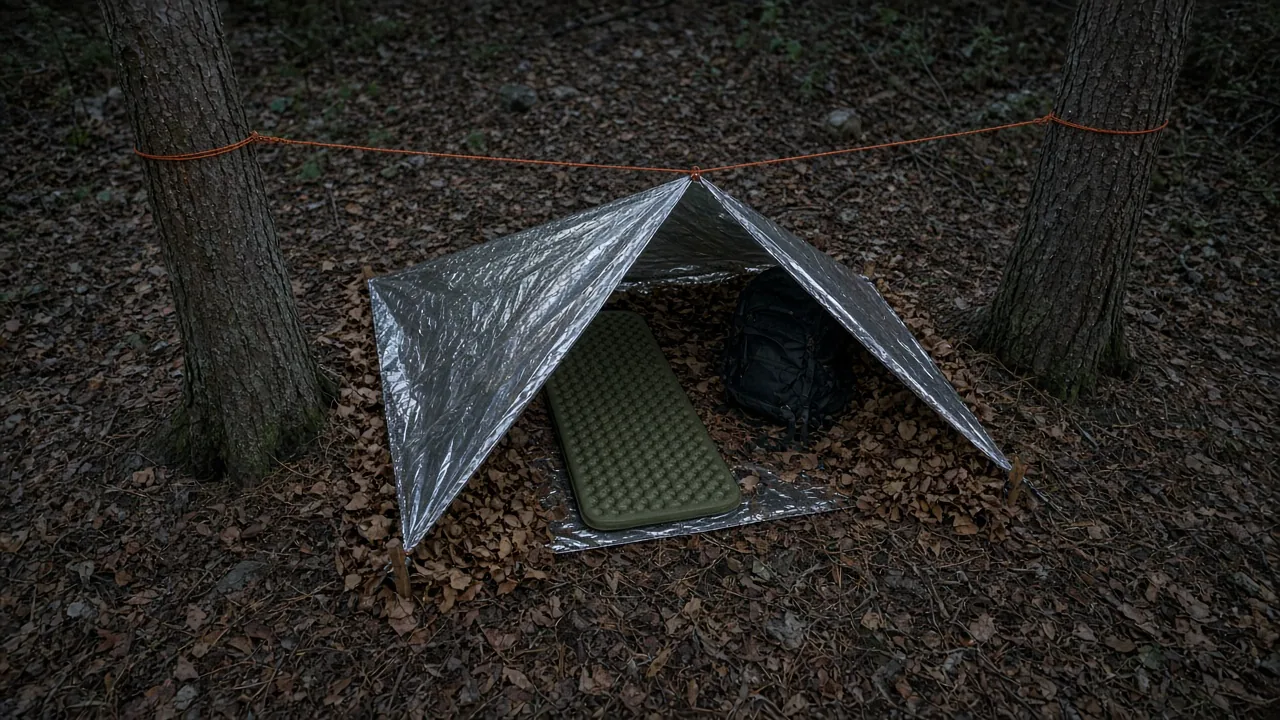
If you're traveling light but want a backup plan for cold, windy weather, learning how to build an emergency blanket shelter is a practical skill worth having. A reflective blanket alone won't keep you warm, but combined with a taut ridgeline, good site selection, and proper ground insulation, it can trap a surprising amount of body heat in a small space. You'll need a reflective emergency blanket, 30–40 feet of paracord, gloves, stakes or sticks, and leaves, pine needles, or a foam pad to keep the cold ground from pulling heat away.
What You Need to Build an Emergency Blanket Shelter
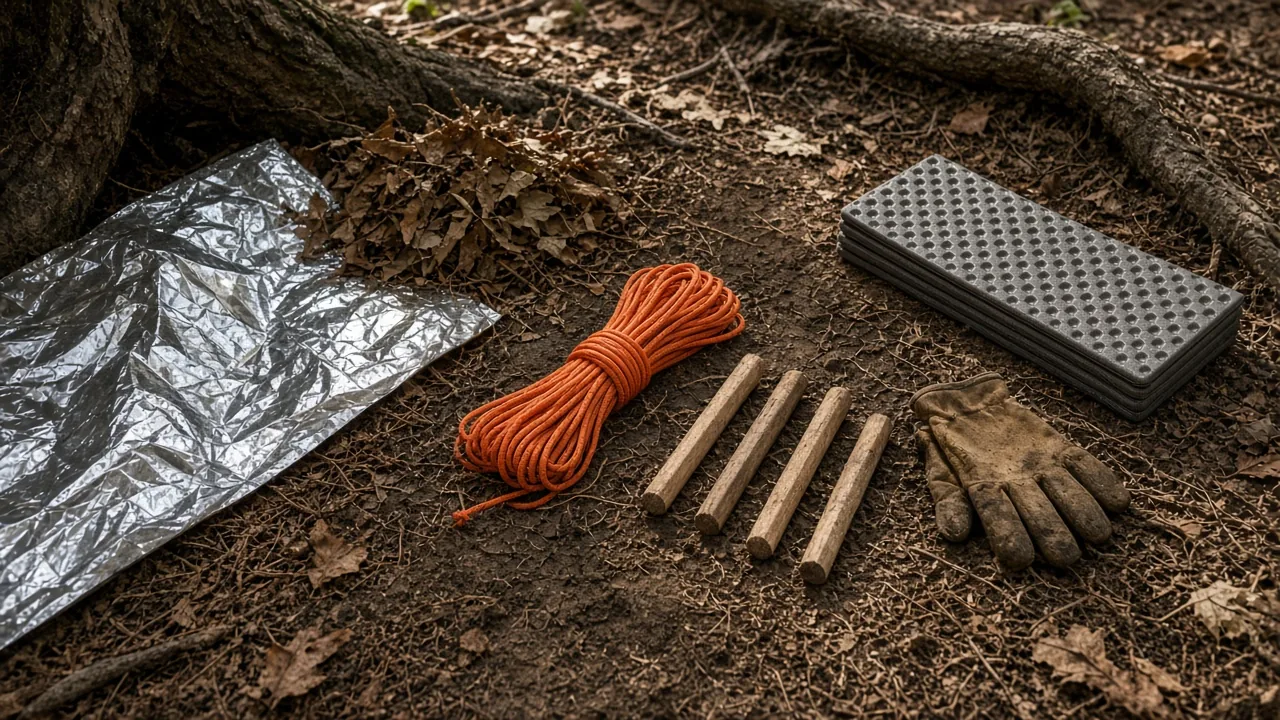
Before you start cutting cord or looking for trees, gather the right materials. A basic kit includes a reflective emergency blanket, 30–40 feet of paracord, four to six stakes or sturdy sticks, and gloves to protect your hands while working with cord and cold surfaces.
Ground insulation matters just as much as the shelter itself. Thick leaves, pine needles, a closed-cell foam sit pad, or a combination of these can make a significant difference in how much heat you retain overnight. The ground pulls heat from your body faster than the air does in many cold conditions, so a dry insulating layer under you is not optional.
If you carry a second emergency blanket, bring it too. Two blankets let you create a more stable triangular structure with better coverage than a single sheet draped over a line.
Choose the Right Emergency Blanket for Cold-Weather Shelter Building
Not every reflective blanket behaves the same way. A basic reflective space blanket weighs about 2 ounces and compresses down to roughly the size of a deck of cards, which makes it an easy addition to a backpacking kit. It reflects body heat and doubles as a bright signaling panel.
A packable camping quilt adds more weight and bulk but gives you a more durable, comfortable backup. The Wise Owl Outfitters Toasty Traveler, for example, weighs 18 ounces and carries a 40-degree Fahrenheit rating. It uses 20-denier ripstop nylon with a DWR coating and includes quick clasp snaps, so you can wear it hands-free around camp. It won't pack down as small as a space blanket, but it fills a different role.
Emergency Space Blanket vs. Packable Camping Quilt
The table below compares the two options for cold-weather shelter and backup warmth.
| Feature | Emergency Space Blanket | Packable Camping Quilt |
|---|---|---|
| Weight | About 2 oz | 18 oz |
| Packed size | Very small, pocket-sized | Larger, about the size of a compressed sleeping bag |
| Temperature rating | No standalone rating; reflects existing heat | 40°F rating for the Toasty Traveler |
| Durability | Tears easier under tension | 20D ripstop nylon with DWR coating |
| Best use | Emergency shelter, signaling, backpacking backup | Car camping, camp warmth, milder overnight backup |
| Visibility | Often bright reflective silver or orange/yellow | Depends on color, generally less reflective |
A space blanket reflects heat and is highly visible for rescue, but it tears easier under stress and wind. The ripstop quilt is more durable and comfortable, which makes it a better car-camping backup than an ultralight backpacking choice. Neither one is a substitute for a properly rated sleep system in freezing conditions.
How to Build an Emergency Blanket Shelter: Site Selection and Framework
Start by choosing a spot out of the wind. Look for natural windbreaks such as dense tree cover, a low ridge, or a cluster of shrubs, but avoid camping in a depression where cold air settles. You'll want two trees roughly 6–10 feet apart and enough clear ground between them to lie down with a little extra space.
Keep the shelter low and small. A lower, tighter shelter traps warm air closer to your body and reduces the volume of cold air you have to heat. The structure will hold more warmth if the ridgeline sits around waist height or lower rather than at chest height or higher.
String a Ridgeline Between Two Trees
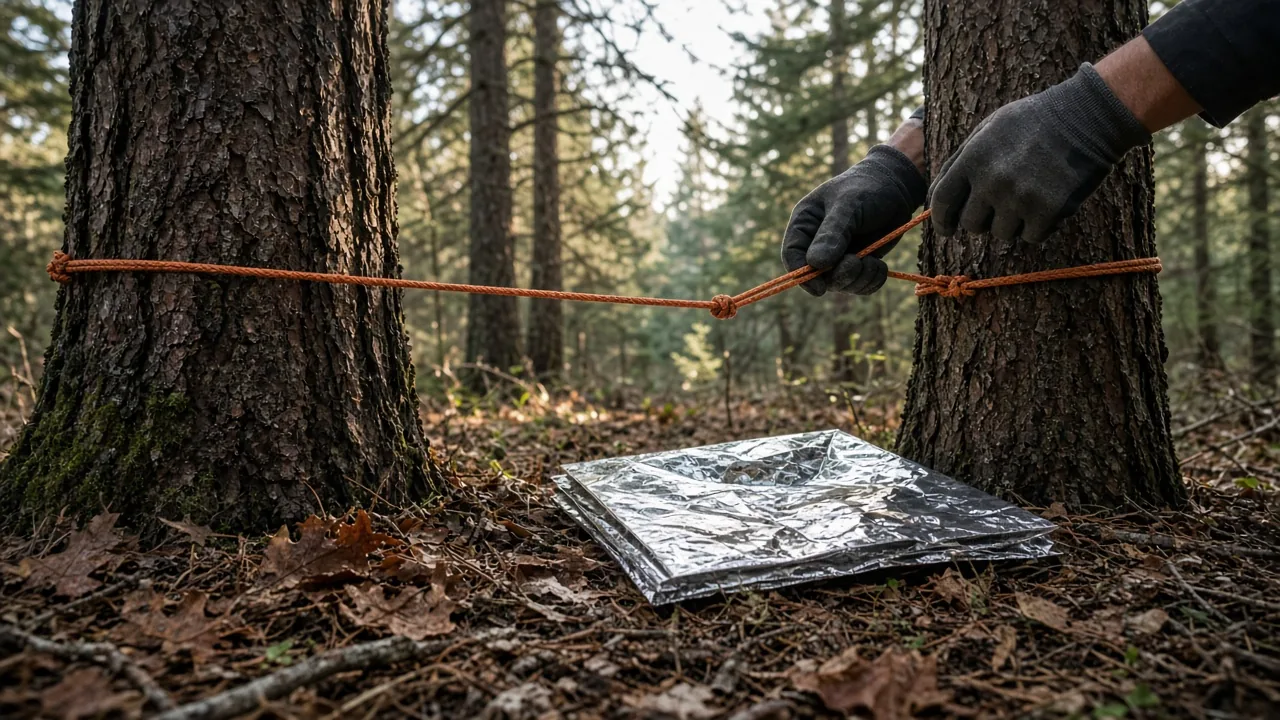
Run a length of paracord between the two trees and tension it so it stays taut under the blanket's weight. A trucker's hitch works well for getting a tight line, but two half-hitches will also hold if you pull the slack out before tying.
Keep the line below chest height. That lower profile reduces wind exposure and makes the blanket envelope smaller, which means less air inside to warm. Test the line by pressing down on it with one hand before hanging the blanket. If it sags more than an inch or two, retension it.
Insulate the Ground Before You Hang the Blanket
The ground extracts more body heat than the air in most cold-weather situations, especially at night. Before you build the shelter walls, spread a thick layer of leaves, pine needles, dry grass, or a closed-cell foam pad where your torso and hips will rest.
If you use natural material, pile it several inches thick and compress it lightly before adding more. The goal is to create a dry barrier between your body and the earth, not just a thin scattering of leaves. For added insulation, place a foam sit pad or the back panel of a backpack under your core. Even a small pad under the pelvis and shoulders can reduce conductive heat loss.
Secure the Emergency Blanket into a Low Triangular Shelter
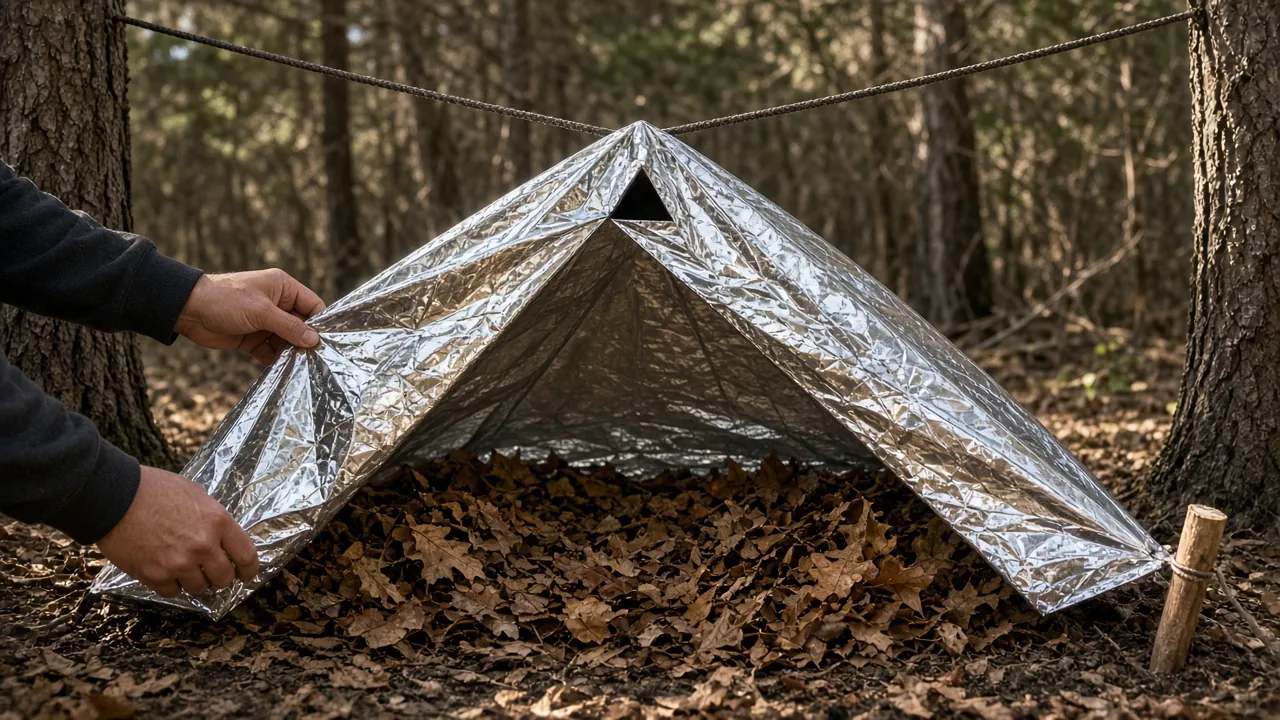
With the ridgeline up and the ground insulated, you can build the shelter itself. If you have two blankets, tie each corner of one blanket to a stake or stick and rig it so it hangs vertically or at a slight angle behind the ridgeline as a back wall.
Then drape the second blanket over the ridgeline and anchor its four corners outward to the ground or to nearby roots and branches. The result is a low triangular or A-frame shape: one blanket creates the back panel, and the second forms the sloped roof and sides. If you only have one blanket, drape it over the line and anchor all four corners outward, accepting that the ends will have smaller openings.
Anchor Corners and Seal Edges with Leaves or Snow
Pull each corner tight before you stake it. Loose corners billow in wind and let heat escape. Use small stones stacked on top of the fabric, or tie short cord loops through the blanket corners and stake them into soft ground.
Once the blanket is anchored, pile leaves, pine needles, or snow along the bottom edges to block drafts. This seals the gap where cold air tends to flow in along the ground. Leave a small high vent somewhere near the peak so moisture from your breath can escape. If you seal every gap completely, the inside surface will likely frost over as your breath condenses and freezes.
Add Heat Retention Layers and Manage Condensation
Inside the shelter, put your sleeping pad or more leaves between you and the ground before you lie down. Then add an extra blanket, jacket, or second emergency blanket over your sleeping bag or clothing to reflect heat back toward your body. The reflective surface works best when there is an air gap between it and your body, so avoid letting it press flat against your skin or sleeping bag.
Condensation is a real problem in low, sealed shelters. As you breathe, you release warm moisture into the air. In cold temperatures, that moisture condenses on the inside of the blanket and can freeze. Keep a small vent open near the top, and avoid tightening every edge to the point where no air moves at all. A little airflow costs some heat but reduces the risk of frost forming on the blanket and dripping or falling on you.
Troubleshooting: Wind, Condensation, and Poor Heat Retention
If wind enters the opening, turn the shelter's entrance away from the prevailing wind. Use your backpack or a pile of leaves to block the gap without sealing it completely. The pack can sit just outside the opening and redirect airflow.
If the inner surface turns icy, increase ventilation. Ice accumulating inside means you've trapped too much moisture. Open the high vent a little more, or loosen one corner slightly to let humid air escape while still blocking ground-level drafts.
If you're still cold despite the shelter, check the ground insulation first. Add more leaves or move to a thicker layer of natural material. Then check for drafts along the edges. Even a small gap near your feet can pull warmth out faster than the blanket reflects it back. Close those gaps with leaves, snow, or a pack, and make sure the reflective surface is not crushed flat against your body.
Never use a stove or heater inside your tent or inside this kind of enclosed blanket shelter. Fuel-burning appliances produce carbon monoxide and create a serious fire risk in small, enclosed spaces that are not designed for them.
When an Emergency Blanket Shelter Makes Sense for Car Camping vs. Backpacking
For car camping, weight and pack size are less of an issue. A heavier insulated camp blanket like the Toasty Traveler is a more comfortable backup than a thin space blanket. It can serve as a camp blanket, a throw for sitting outside on cool evenings, or an extra layer in the sleeping bag on mild overnight trips. The trade-off is that it takes up more space in the car or bin.
For backpacking, a pocket-sized space blanket is worth the minimal weight for an emergency layer or shelter component. It can cover you during an unplanned night out, wrap around a sleeping bag for extra reflected heat, or act as a signaling panel. It is not a substitute for a warm sleep system. In freezing temperatures with wet or windy conditions, a space blanket alone will not keep you warm through the night, and you should plan your sleep system according to the forecast low.
Check the overnight low and rain chance before you decide what to bring. If the forecast calls for mild, dry conditions and you want a backup that weighs almost nothing, a space blanket and cord make sense. If temperatures could drop below freezing or rain is likely, a bulkier insulated quilt or a four-season sleeping bag is the safer choice. Follow campsite rules and Leave No Trace practices: pack out all cord, blanket fragments, and stakes, and stick to durable surfaces where possible to avoid damaging the ground.
For car camping, carry the insulated blanket. For backpacking, pack the space blanket and learn the shelter build before you need it. The skill costs a few feet of paracord and a little practice, but the setup can make a cold, windy spot far more bearable when plans change.
This article is general information about camping gear, not professional safety, medical, or wilderness training. Check fire restrictions, weather, and campsite rules before you go, and follow the manufacturer's instructions for your own equipment.
FAQ
What materials do I need to build an emergency blanket shelter?
You need a reflective emergency blanket, 30–40 feet of paracord, four to six stakes or sturdy sticks, gloves, and ground insulation such as leaves, pine needles, or a closed-cell foam pad.
How do I choose the best site for an emergency blanket shelter?
Pick a spot out of the wind with natural windbreaks like dense tree cover or shrubs, and look for two trees roughly 6–10 feet apart. Avoid depressions where cold air settles and keep the ridgeline around waist height or lower.
How can I prevent condensation inside the shelter?
Leave a small high vent near the peak so moisture from your breath can escape. If ice forms on the inside, increase ventilation by opening the high vent more or loosening one corner slightly.
Is it safe to use a stove or heater inside an emergency blanket shelter?
No. Never use a fuel-burning stove or heater inside an enclosed blanket shelter because it produces carbon monoxide and creates a serious fire risk.



