How to Build a Camping First Aid Kit Without Overpacking
Learn how to build a camping first aid kit that matches your route and group size, with a lightweight core of wound care, medications, blister supplies, and personal info.
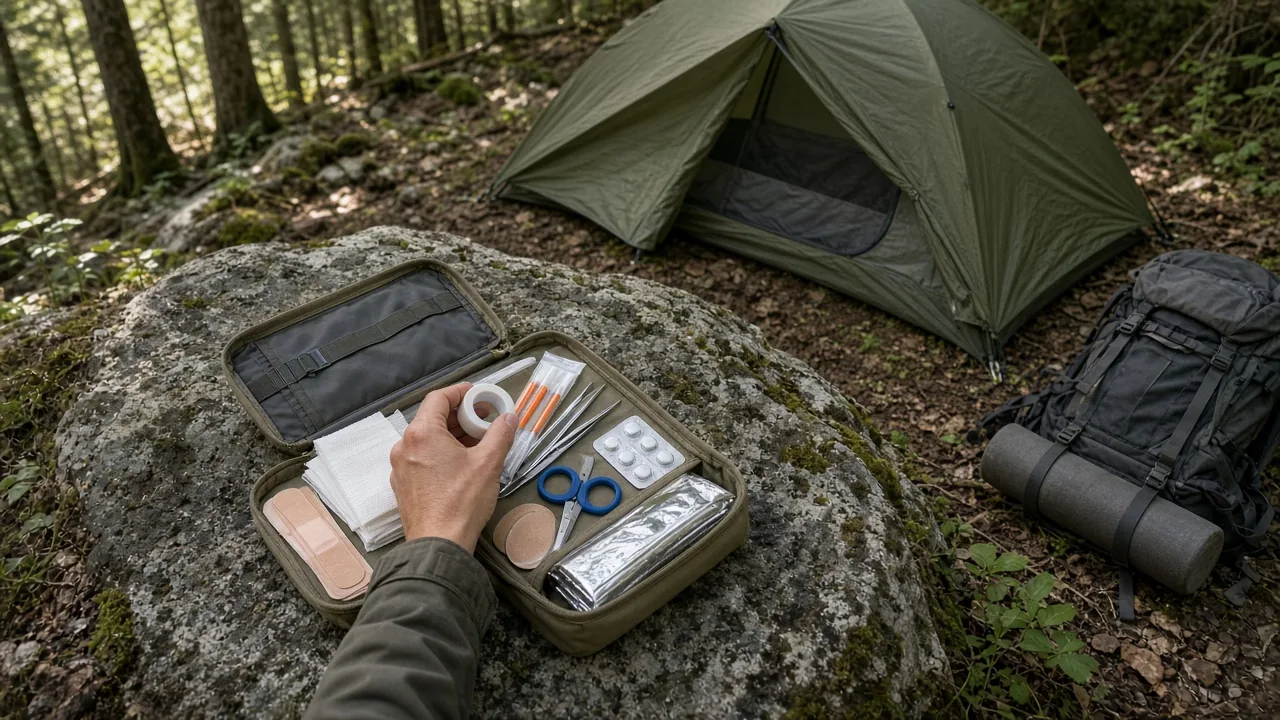
A prepacked camping first aid kit usually carries too much of what you won’t need and misses a few things your specific trip will demand. The better approach is to build a small wound-care core, then add only what your route, weather, and group size actually require. That keeps the kit light enough to bring on every overnight, not just the trips where you have extra room. Here’s how to build a camping first aid kit that fits your plan instead of forcing you to carry a generic home medicine cabinet into the woods.
What Should a Camping First Aid Kit Cover?
A useful camping first aid kit plans around likely injuries and illness, not every possible emergency. For most car camping and backpacking trips, the common problems are cuts, blisters, sprains, allergies, diarrhea, sunburn, and cold-and-wet exposure. Build the kit around those first. A home medicine cabinet tries to cover everything and ends up heavy, disorganized, and hard to use under stress.
One useful way to plan is to sort possible problems into three buckets: common illness, sudden illness, and trauma. Common illness includes stomach trouble, headaches, cold symptoms, and mild allergic reactions. Sudden illness covers things like a severe allergic response or a fainting episode, which you can’t fully treat in the field but should be able to recognize and respond to. Trauma means bleeding, burns, sprains, fractures, and other physical injuries. Assign a few items to each bucket, then stop adding when the basics are covered.
Car Camping vs. Backpacking First Aid Priorities
Car camping lets you carry a larger, more organized kit without much penalty. A clear pouch with labeled pockets, a full roll of tape, bulky dressings, and stock bottles all fit easily in a vehicle. For backpacking, weight and packed size matter more, so choose compact formats and leave the oversized gear behind or in the car. A backpacking kit should hold only what you can use quickly with one hand while the other hand applies pressure to a wound.
A team or group kit can ride in the car or in a basecamp bin. Individual hikers then carry a smaller personal kit with wound care, blister supplies, and a few doses of common medication. That split keeps everyone from hauling duplicate tools and keeps the group’s total medical weight down.
The Three Injury Categories to Plan Around
Before opening a storage bin or shopping for supplies, write down what the trip actually looks like. A weekend car-camping trip with kids in warm weather produces different risks than a solo backpacking route with cold rain and river crossings. The three-bucket method works because it forces you to decide what’s realistic for the route rather than packing by anxiety.
For each bucket, assign a small set of items. Illness may need antihistamine, anti-diarrheal medicine, and pain relief. Sudden illness may require an emergency contact plan and a personal info card. Trauma needs bandages, gauze, tape, wound closure strips, and a way to stop heavier bleeding. This structure also makes restocking easier because you can check each bucket instead of digging through a mixed pouch.
How to Build a Camping First Aid Kit Step by Step
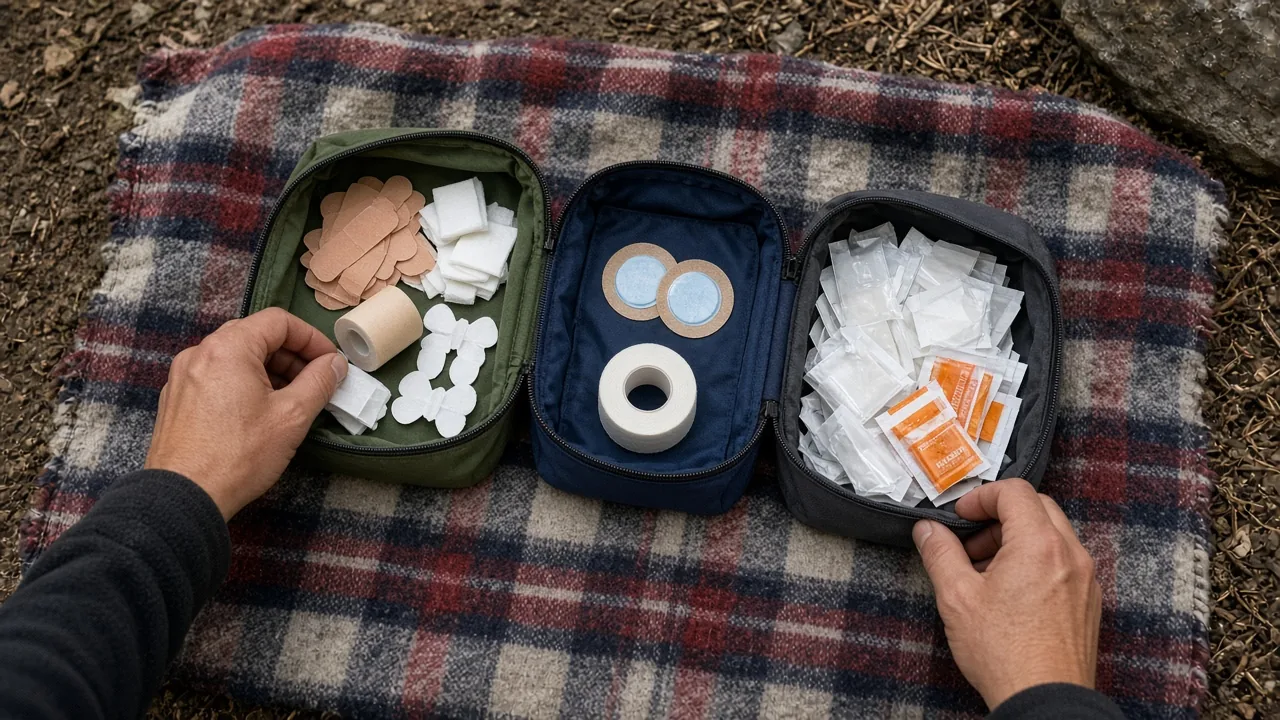
Start with wound care and bleeding control, then add medication, blister care, and a personal information card. Once the contents are set, use labeled pockets or a kit map so you can find supplies without dumping everything onto the ground. A disorganized kit adds delay when you are treating a bleeding cut in low light or half-dark.
Start With Wound Cleaning, Closure, and Bleeding Control
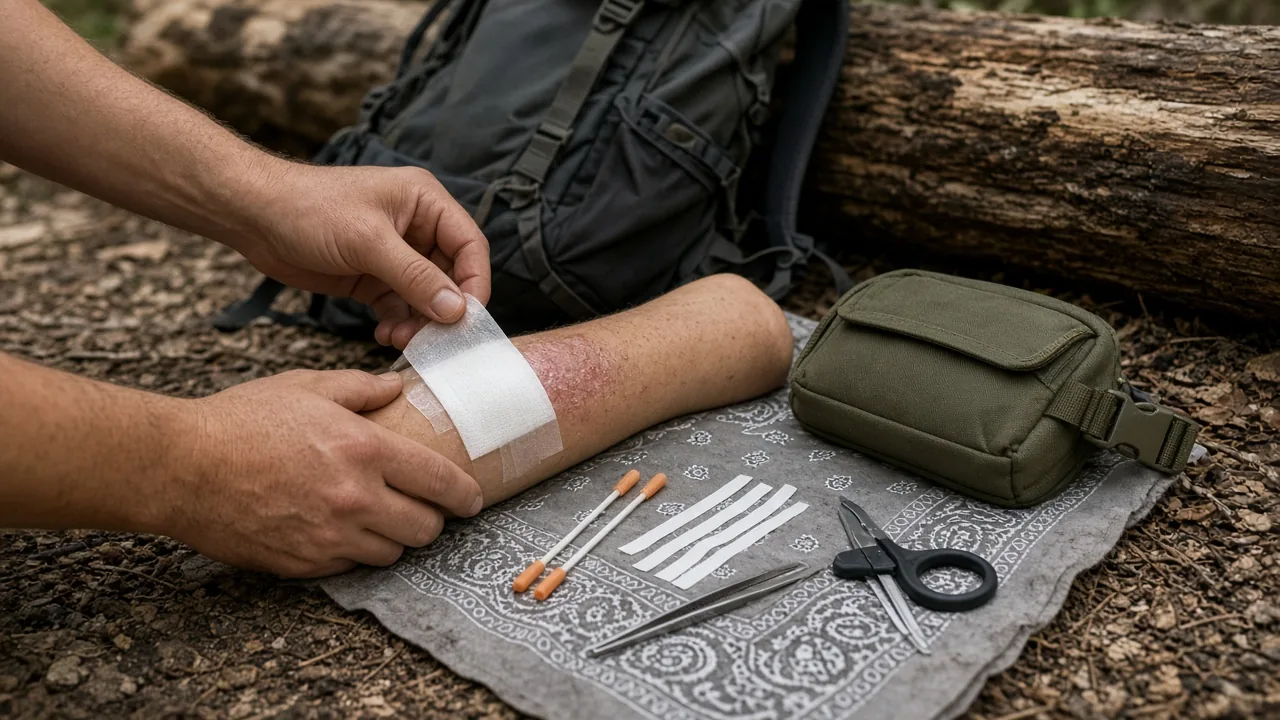
The core of any camping first aid kit is wound care. Pack adhesive bandages in several sizes, iodine swab sticks or mini wipes for cleaning, wound closure strips, sterile gauze, and a small roll of medical tape. A one-inch-wide by ten-yard-long roll of tape can secure a large dressing, wrap a twisted ankle, or hold a splint in place. Include a hemostatic powder or gauze if you know how to use it; it’s a small, light way to address serious bleeding that many people forget.
Also pack tweezers and small EMT shears. Tweezers remove splinters and ticks. Shears cut clothing away from an injury without pulling fabric across a wound. Skip a tourniquet unless you have proper training and understand the risk of leaving one on too long. An untrained person can do more harm with a tourniquet than without one.
Add Medications, Blister Care, and Personal Info
Carry small amounts of medication for allergy, pain, fever, diarrhea, and stomach trouble. Unit-dose pills or small foil packs take up less space than stock bottles and let you restock by replacing only what you used. Label each medication clearly with its name and purpose, especially if someone else may be digging through your kit.
Blister care belongs in every backpacking kit. Moleskin or pre-cut blister pads treat hot spots before they become open wounds. A small roll of athletic tape can also cover friction points on heels or toes early in a hike. Add a personal information card listing health conditions, allergies, current medications, and emergency contacts. Write the card in plain English and keep it in a clearly marked pocket so a hiking partner or responder can find it without searching.
Keep Survival Items in a Separate Pocket or Separate Bag
Opinions differ on whether survival gear belongs inside a medical kit. The more practical rule is to keep it physically separate from medical supplies, whether that means a dedicated pocket or a different bag altogether. A whistle, emergency blanket, and fire starter serve a different purpose than gauze and antihistamines. If they share the same pouch, they bury the bandages and slow you down.
For cold-weather warmth, rely on layers, shelter, and an emergency blanket if needed. Never use a stove or heater inside your tent. Fuel-burning appliances produce carbon monoxide and create fire risk in an enclosed space. If a trip involves real cold exposure, add an emergency blanket as a separate item, not as a reason to pack more medical bulk.
Lightweight Choices That Prevent Overpacking
Weight control is not about carrying less care; it’s about carrying the same care in smaller, lighter forms. Check every item before it goes in. Some organizers weigh over 400 grams empty, which is nearly a pound before you add a single bandage. For backpacking, that’s too much for an empty pouch. A heavy, overstuffed kit can also become the thing you leave behind on the lightest trips, which defeats its purpose.
Use Single-Use and Compact Treatment Formats
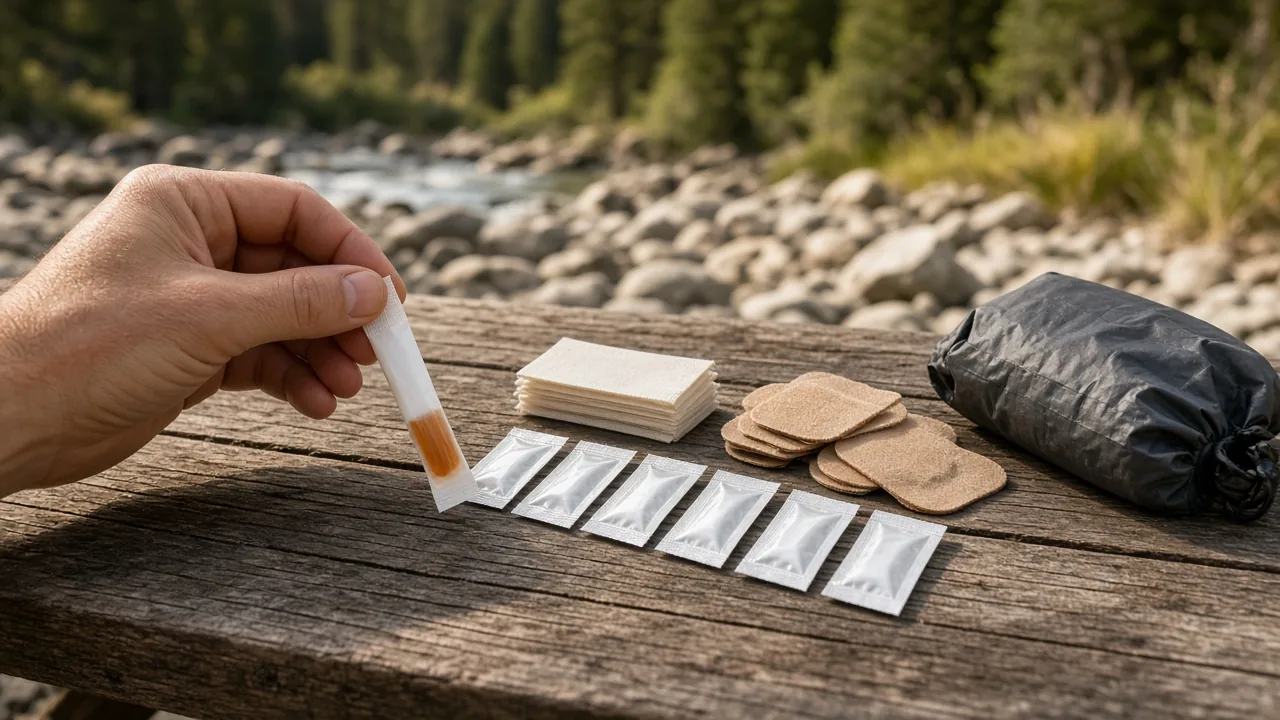
Iodine swab sticks work like small ampoules: break the marked end and the liquid flows into the swab tip. They weigh a few grams each and remove the need for a bottle of liquid antiseptic. Iodine wipes can be diluted with clean water in a pinch to rinse a wound more thoroughly. Unit-dose pill packs, folded tape, and pre-cut moleskin do the same job while removing packaging weight and bulk.
What to Leave in the Car or Team Kit
Bulky splints, large trauma dressings, and stock medication bottles fit better in a car or group kit. An individual backpacking first aid kit should hold only what one person can use quickly and carry without noticing the weight. A compact roll of tape and a folded SAM-style splint can handle many sprains, so a full rigid splint can stay in the vehicle for car camping or basecamp use.
Weigh the Empty Organizer Before You Fill It
Some organizers offer excellent internal organization but carry a heavy frame of fabric and zippers. Weigh the empty pouch before deciding. If an empty organizer weighs more than about 200 grams, the organization may not justify the weight for backpacking. A simple zip pouch or dry bag with a few labeled smaller bags inside can do the same job for less weight and lower cost.
Common Mistakes When You Build a Camping First Aid Kit
Most overpacked camping first aid kits come from three habits: mixing survival gear into medical supplies, carrying expired or untested items, and assuming a bigger kit is automatically safer. Each mistake adds weight and slows response, and each is easy to fix once you see it.
Mixing Survival Gear Into the Medical Kit
If you carry survival items, place them in a separate labeled pocket instead of letting them hide bandages and medications. Some hikers prefer a completely separate bag so that medical response and survival response don’t compete for space. Either system works, but the separation must be clear enough that a tired, cold, or injured hiker can find what they need without thinking.
Carrying Expired or Untested Items
Check expiration dates before each season and replace used supplies as soon as you return from a trip. Medications lose potency over time, and adhesive products lose stick. Do not rely on a tourniquet or hemostatic product you have not read about or practiced with. The first time using a piece of trauma gear should not be during a real emergency. Read the instructions, open the package once so you know how it works, and replace it if you can’t use it confidently.
Treating a Bigger Kit as Safer
More supplies can make it harder to find the right dressing when seconds matter. A larger kit also increases the odds of leaving it behind on a lightweight trip or a short day hike. A smaller, current kit that you know how to use is often more useful than a heavy kit with items you’ve never opened. If an item doesn’t match the trip’s likely injuries, leave it in the car or at home.
Pre-Trip Checklist for a Lighter, Trip-Specific Kit
Before you go, check the forecast, route length, group members, and expected overnight low. Remove anything that doesn’t match these conditions and restock what you used last time. A trip-specific camping first aid kit is not a static object; it changes with the season and the plan.
Match the Kit to Weather and Route
Cold, wet trips may add an emergency blanket and extra blister care because wet feet blister faster and hypothermia risk rises. Hot, dry trips may need more electrolyte packets, sunburn care, and insect sting treatment. River crossings and rough trails might call for a folding splint or extra wound closure strips. The kit should reflect the highest-likelihood problems on that specific route, not the worst-case scenarios you can imagine.
Restock, Relabel, and Record
Replace used medications, update the personal info card if anything changed, and relabel pockets when contents move. If you clear space by removing cold-weather items for a summer trip, write down what you took out so you can add it back in fall. A small notebook entry or phone note takes seconds and prevents you from discovering a missing item on the trail.
A small, current, trip-specific camping first aid kit beats a heavy general kit on both car camping and backpacking trips. Before you zip the bag, check each item against your plan, the expected overnight low, and the rain chance. If an item doesn’t fit those conditions, it belongs in the vehicle or the gear bin. Pair the medical kit with a lightweight dry sack or a spare packing cube, and you’ll have a system that slides into any pack without taking over the whole trip.
This article is general information about camping gear, not professional safety, medical, or wilderness training. Check fire restrictions, weather, and campsite rules before you go, and follow the manufacturer's instructions for your own equipment.
FAQ
What should a camping first aid kit include?
It should include wound cleaning and closure supplies, bandages, tape, blister care, a few common medications, and a personal info card. Plan around common illness, sudden illness, and trauma, then stop adding once the basics are covered.
How do I keep a camping first aid kit lightweight?
Choose single-dose pills, iodine swab sticks, folded tape, and pre-cut blister pads. Leave bulky splints, large dressings, and stock bottles in the car or team kit, and weigh the empty organizer before filling it.
Should survival gear go inside the medical kit?
No, it is better to keep survival items like a whistle, emergency blanket, and fire starter in a separate pocket or separate bag. This keeps them from hiding bandages and medications when you need quick access.
How often should I restock a camping first aid kit?
Check expiration dates before each season and replace used supplies as soon as you return from a trip. Update the personal info card and relabel pockets when contents change.
Is a bigger camping first aid kit safer?
Not necessarily. A larger kit can make it harder to find the right dressing quickly and increases the chance you will leave it behind. A smaller, current, trip-specific kit that you know how to use is often more useful.



