Hiking Blister Kit Checklist: Prevent and Treat Foot Hot Spots
Build a small hiking blister kit for prevention and treatment, and learn what to carry for day hikes, backpacking, and car camping.
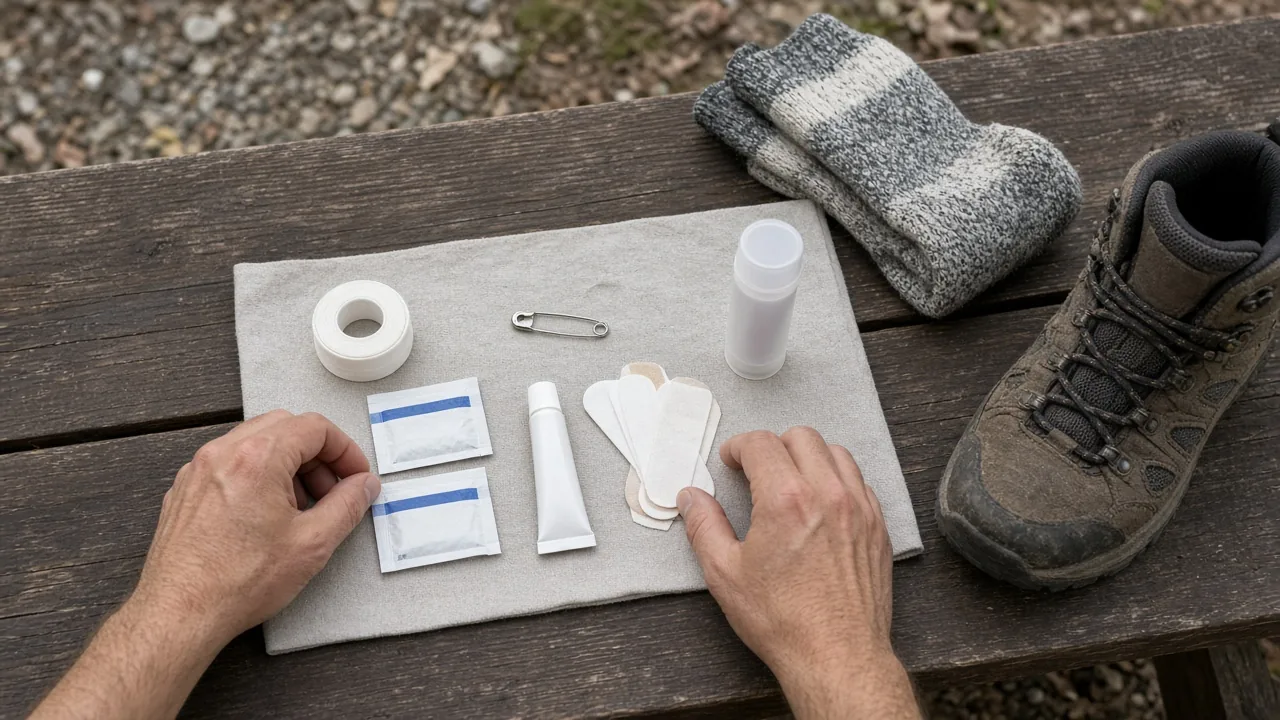
A hiking blister kit belongs in your pack because pressure, heat, and moisture turn small hot spots into trip-ending limps faster than most hikers expect. The good news is that a compact hiking blister kit checklist puts prevention and treatment within reach. Build a small DIY kit around tape, antiseptic, and spare socks, then use it at the first sign of heat or redness. A prebuilt kit is convenient but only useful if you verify its contents match your trip.
Why a Hiking Blister Kit Belongs in Your Pack
Foot blisters form when pressure, heat, and moisture work together against your skin. On a long hike, your feet swell and rub inside shoes that fit fine at the trailhead. Hot spots start as warmth and redness, but once a fluid-filled blister forms, every step becomes painful and infection risk rises.
A small foot-care kit lets you stop and treat a hot spot before it becomes a full blister. That one action can be the difference between finishing your route comfortably and limping back to the car. Foot care is one of the most practical forms of first aid for day hikers and backpackers alike.
Your Hiking Blister Kit Checklist: Prevention vs Treatment
A useful checklist splits supplies into two jobs: preventing friction before skin breaks and treating blisters after they form. Each phase calls for different items. A tube of antibiotic ointment will not prevent a hot spot, and an anti-blister stick will not clean a torn blister.
Prevention items: anti-blister stick, flat tape, and non-cotton socks
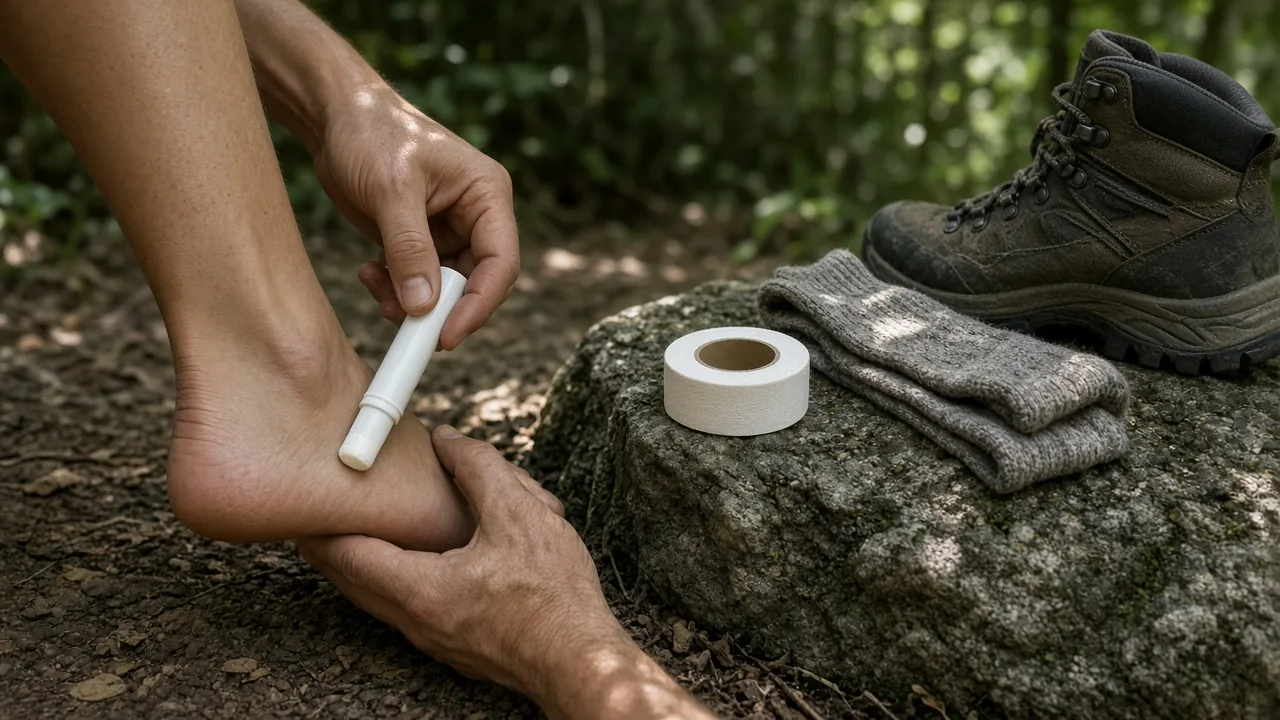
Prevention starts with reducing friction and keeping feet dry. Carry an anti-blister stick for known rub zones such as heels and toe pads. Apply it before you start walking and reapply it when you notice pressure returning.
Flat tape, such as cloth athletic tape or moleskin, works quickly on early redness. Press it smooth over the area before a blister forms. The point is to shift friction from your skin to the tape surface.
Non-cotton socks are just as important as tape. Wool and synthetic blends wick moisture and dry faster than cotton. Extra pairs let you swap to dry socks when heat and moisture build. Some hikers also prefer toe socks to reduce friction between toes.
Treatment items: antiseptic wipes, a sterilizable pin or needle, antibiotic ointment, and blister bandages
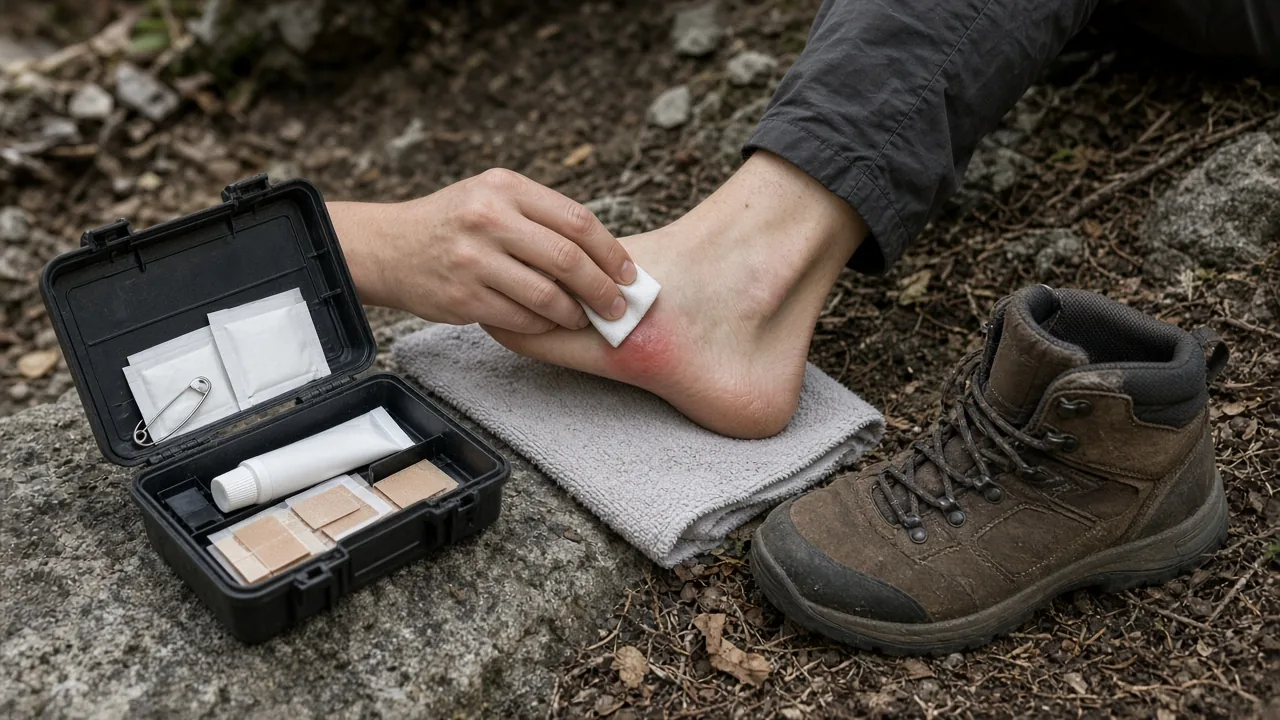
Once a blister has formed, the job changes to cleaning, draining, and protecting. Antiseptic wipes clean the skin and lower infection risk before you touch the area. Alcohol wipes also sterilize a pin or needle.
A sterilizable pin or safety pin lets you drain larger, painful blisters without ripping the skin. Puncture at the base, let fluid drain, and keep the roof skin intact. After draining, apply antibiotic ointment to the area.
Cover the blister with a blister bandage or tape. A cushioning bandage protects the drained blister from repeated pressure. In a pinch, cloth tape plus gauze also works.
Container choices: hard case vs zip-top bag
A hard case protects small items and often includes a belt loop or internal straps to keep supplies organized. That convenience costs weight and pack space. A zip-top bag is lighter and easier to stash, but it offers less protection for needles, small scissors, or blister stick tubes.
Use a hard case when easy access and organization matter more than weight. Use a zip-top bag for lightweight day hikes and backpacking trips where every ounce counts.
Prebuilt Blister Kit vs DIY Kit: Compare Coverage and Bulk
A prebuilt kit is quick to buy and already organized, but the listed contents do not always match what arrives. Some kits advertise blister plasters and arrive with fewer plasters or different dressings than expected. Always open the case and check before your trip.
A DIY kit assembled from a general first-aid list can be trimmed to your trip length, shoe type, and known foot problems. It takes a few extra minutes at home, but you will not carry items you cannot use.
Prebuilt kits: verify the contents before you go
A typical prebuilt blister kit may include a hard case, belt loop, anti-blister stick, cleansing wipes, blister plasters, and fabric bandages. That is a solid foundation for a day hike if the contents are present and in good condition.
However, some hikers report that the contents differ from the listing or that key items such as blister plasters are missing. Treat a prebuilt kit as a starting point, not a finished product. Check every compartment, replace anything expired or damaged, and add tape if the kit lacks it.
DIY kits: flexible but easy to overpack
A DIY approach works well if you already own first-aid supplies. Start with a four-category method: medications, wound care, tools, and other items. Then trim to what matters for feet.
A tight DIY blister kit might hold cloth tape, a few blister bandages, antiseptic wipes, a safety pin, and a small antibiotic ointment tube. From the general first-aid list, that is enough for most foot problems. Scissors and tweezers help with trimming tape and removing debris, but they are not always necessary.
Where each fits: day hikes, backpacking, and car camping
For day hikes and lightweight backpacking, a small DIY zip-top kit often beats a bulky hard case. You need quick access and low weight. A few flattened supplies weigh less than a full case with internal straps.
For car camping, a prebuilt or beefed-up hard case becomes more practical. You have room to store larger dressings, scissors, and extra bandages in the vehicle. The hard case protects those items from gear shifting in a trunk or bin.
How to Use the Kit: Hot Spot Care and Blister Treatment
A blister kit only works if you stop and use it early. Check your feet at the first sign of warmth, rubbing, or pain. Waiting until the next break gives the blister time to form.
Also remember that camping safety rules still apply during foot care. Never use a stove or heater inside your tent, including to dry socks or boots. Carbon monoxide and fire risk make that unsafe. Dry feet outside or in a well-ventilated area, and use dry socks from your pack.
At the first sign of redness
Stop as soon as you feel a hot spot. Remove your sock and boot, and wipe the red area dry. If the skin is only warm and red, press a piece of flat tape or moleskin over the entire area.
Make sure the tape lies flat with no wrinkles. Wrinkled tape creates its own friction point. Recheck the spot at your next break and reapply tape if it has lifted.
When a fluid-filled blister has formed
Clean the skin around the blister with an antiseptic wipe or soap and water if available. Sterilize a pin or needle with alcohol. Puncture the blister near its base, then gently press to drain fluid.
Keep the roof skin in place instead of pulling it off. That layer protects the raw skin underneath. Apply a thin layer of antibiotic ointment, then cover with a blister bandage or tape.
Do not drain blisters that are small and painless. Leave them intact and cover them with a cushioned bandage. Draining is for blisters that are large, tight, or causing pain with every step.
After treatment: clean, dry, and recheck
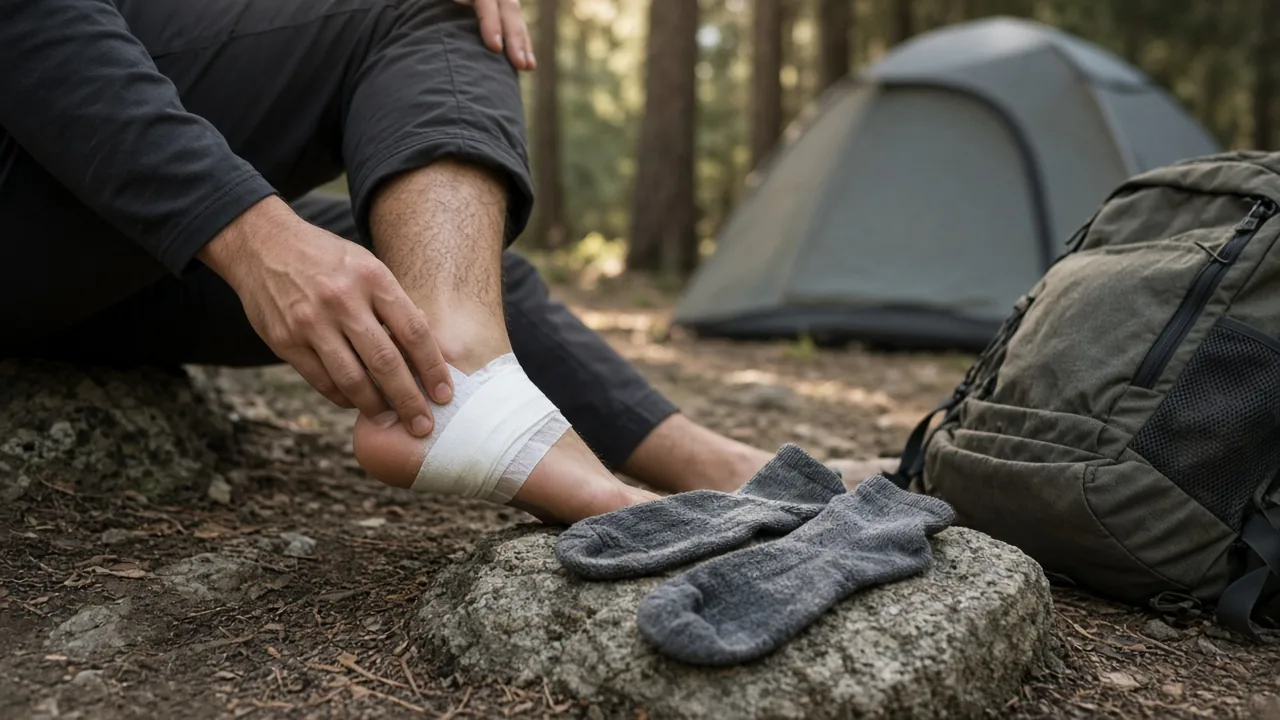
At camp, wash your feet if water is available and it is safe to do so. Dry them thoroughly, especially between toes. Put on clean dry socks and keep your wet socks separate.
Inspect the treated spot before bed and again in the morning. The overnight rest helps the skin recover, but tomorrow's hike will still test the area. Re-tape before starting if the spot looks red or fragile.
Day Hike vs Backpacking vs Car Camping: What to Actually Carry
The right blister kit size depends on trip length and pack capacity. A day hiker in a 10–25 liter pack needs a compact response kit. A backpacker needs daily foot hygiene supplies. A car camper can store a fuller kit without worrying about every ounce.
Day hike checklist: tape, antiseptic, one spare sock pair, tweezers
For most day hikes, carry flat tape, a few antiseptic wipes, one spare pair of non-cotton socks, and small tweezers. This set fits a 10–25 liter daypack and covers the most likely foot problem: an early hot spot.
Pack water as well. For a relaxed short hike, 1–1.5 liters is a reasonable starting point. For a standard day hike, 1.5–2.5 liters. For a high-output day, 2.5–3 liters. Also tell someone your route and expected return time.
Backpacking checklist: more sock changes and daily foot hygiene
On multi-day trips, feet stay damp longer. Bring extra non-cotton socks and rotate them so you start each day dry. Some hikers carry five pairs for extended trips, washing feet and socks when streams or campsite water allow.
Add a small wash option, such as a bandana for wiping feet or a few spare wipes for cleaning. Dirty, damp skin breaks down faster. Daily foot care prevents blisters from compounding day after day.
Car camping: keep a fuller hard-shell kit in the vehicle
Car camping lets you keep a hard case or small first-aid box in the vehicle without weight penalty. Add larger adhesive bandages, scissors, antibiotic ointment, and general first-aid items such as pain relievers and a thermal blanket.
Store the kit in a protected spot so dirt and gear do not crush it. A hard shell or sturdy zip bag works well in a trunk or storage bin. Check it before each trip season.
相关表格:不同行程的水泡应急包配置
| 使用场景 | 预防携带 | 处理携带 | 容器与说明 |
|---|---|---|---|
| Day hike | Tape, one spare non-cotton pair, small anti-blister stick | Small antiseptic wipes, 2 blister bandages, safety pin, small antibiotic ointment | Keep in a stamped zip-top bag inside a 10–25 liter daypack |
| Backpacking | More than one spare sock rotation, tape, anti-blister stick | Wipes, sterilizable pin, blister bandages, antibiotic ointment, small tweezers | Less container weight; daily cleaner/bandana helps |
| Car camping | Same as day hike, plus extra socks in the vehicle | Larger bandages, scissors, ointment, a small selection of general first-aid medicines | A hard-shell or sturdy zip bag in the vehicle works well |
常见读者问题
How many pairs of socks should I bring? It depends on trip length. A day hike may only need one spare pair, but a multi-day trip benefits from several dry rotations. Wet socks are a leading cause of foot breakdown.
Do I really need a prebuilt kit? Not always. A DIY kit with tape, wipes, a needle, ointment, and a few bandages handles most foot trouble. Prebuilt kits help when you want a ready-made, organized container, but check the contents before you rely on it.
Is it okay to just cover a blister without draining it? Yes, if it is small and not causing major pain. Clean and cover it with a cushioned bandage. Only drain large, tense, painful blisters using a sterilized needle and clean hands.
Before you go, check the forecast, local rules, and whether you are car camping or backpacking, then build the smallest kit that covers your foot-care gap. Pair it with broken-in shoes and non-cotton socks. A little tape and a dry pair of socks can keep one hot spot from deciding which side of the trail you walk on.
This article is general information about camping gear, not professional safety, medical, or wilderness training. Check fire restrictions, weather, and campsite rules before you go, and follow the manufacturer's instructions for your own equipment.
FAQ
What should I do at the first sign of a hot spot?
Stop, remove your sock and boot, wipe the area dry, and press a piece of flat tape or moleskin over the entire red spot. Make sure the tape lies flat with no wrinkles.
How many pairs of socks should I bring?
It depends on trip length. A day hike may only need one spare pair, but a multi-day trip benefits from several dry rotations.
Do I really need a prebuilt blister kit?
Not always. A DIY kit with tape, wipes, a needle, ointment, and a few bandages handles most foot trouble. Prebuilt kits are convenient but you should check the contents before relying on them.
Is it okay to just cover a blister without draining it?
Yes, if it is small and not causing major pain. Clean and cover it with a cushioned bandage. Only drain large, tense, painful blisters using a sterilized needle and clean hands.



