Camping First Aid Kit Must Haves: What to Pack First
A basic camping first aid kit should focus on wound care, blister prevention, and personal medications. Learn when to add trauma supplies, splints, and waterproof storage for cold or remote trips.
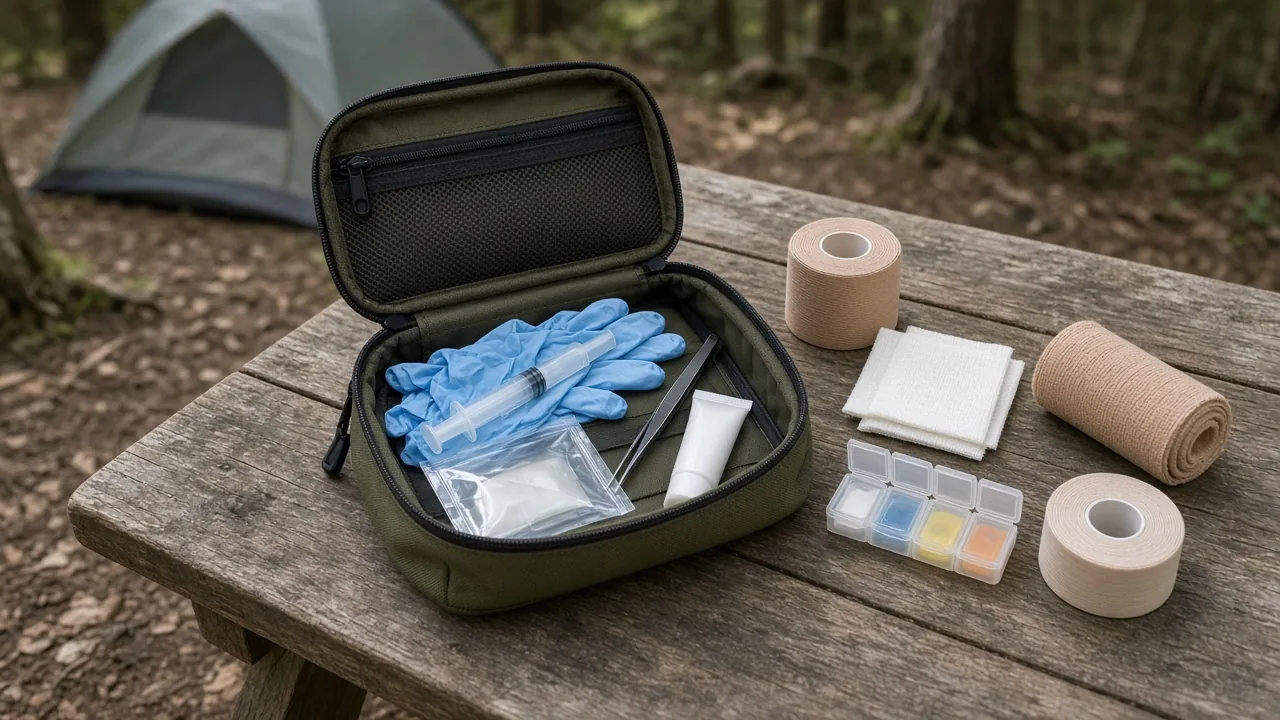
A basic camping first aid kit should start with ten essential supplies for wound care, blisters, and medication, then add insulation, splints, or larger quantities only when your trip demands it. Building from those camping first aid kit must haves keeps your pack manageable while still covering the most common trail injuries.
Camping First Aid Kit Must Haves: What to Pack First
Start with ten items that handle the problems you're most likely to encounter: medical gloves, an irrigation syringe with clean water, tweezers, antibiotic ointment, hydrogel dressings, kinesiology tape, bandages and gauze, athletic tape, elastic wrap, and your personal medications. This baseline works for day hikes, overnight backpacking trips, and car camping weekends without adding unnecessary pack weight.
Wound cleaning and infection control
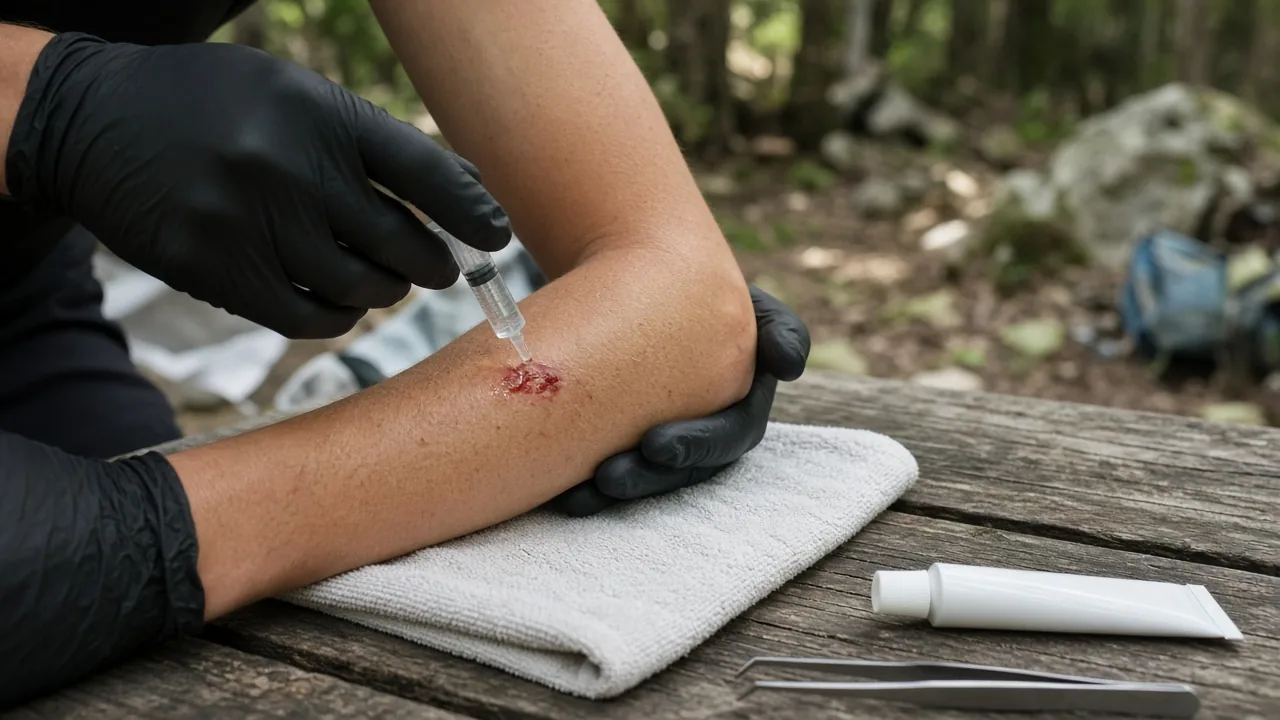
Choose a small-tip irrigation syringe because the narrower opening produces more pressure when you squeeze, which helps flush sand, dirt, and debris out of a cut without scrubbing. Keep it next to the gloves so you can put on a pair before touching someone else's blood or body fluids.
For infection control, pack a tube of antibiotic ointment instead of multiple single-use foil packets. A tube is easier to open with one hand while wearing gloves, and you can apply a thin layer without fumbling with torn wrappers in the wind.
Tweezers are the third piece of this setup. Use them to pull splinters, cactus spines, or small pieces of glass that irrigation alone won't remove. Look for tweezers with a sharp, angled tip rather than the flat cosmetic style, because they grip tiny objects more reliably in low light.
Blister care and hot-spot protection
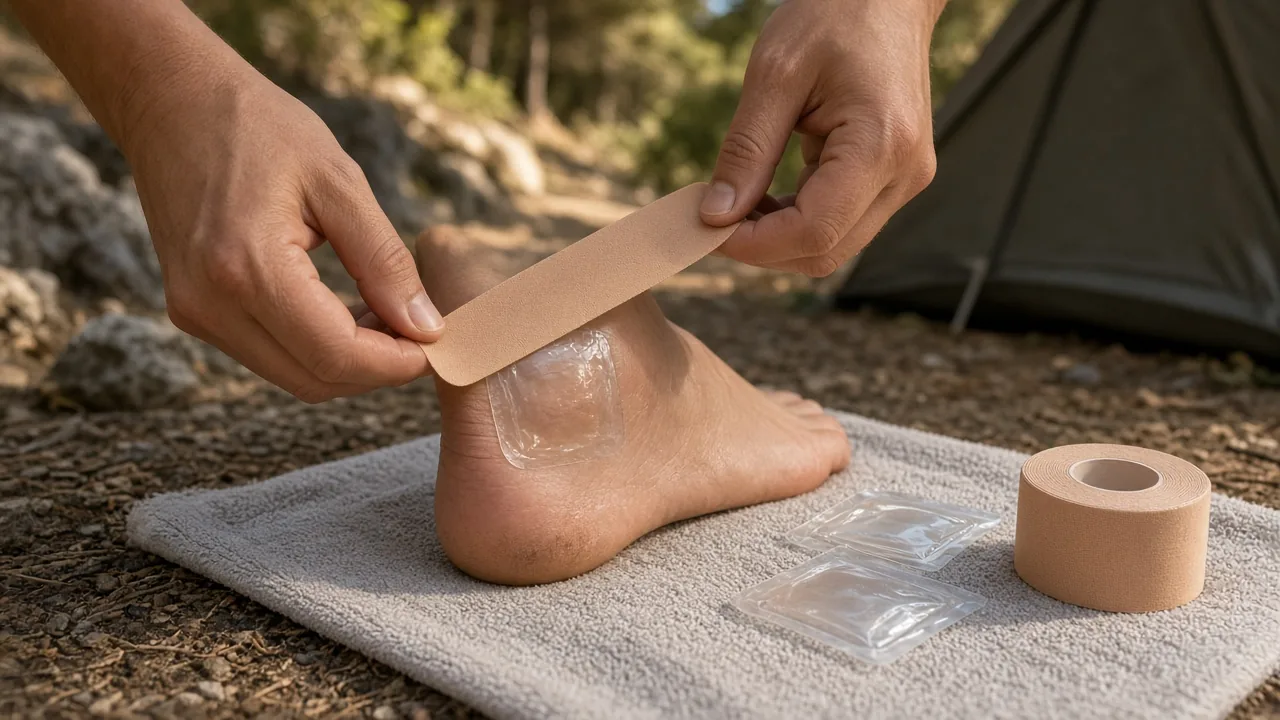
Blisters and hot spots are some of the most common problems for hikers, especially with new boots or uneven trails. Carry hydrogel dressings in at least two or three sizes—small ones for heel rubs, larger ones for palm-sized areas. They stick firmly, keep the wound moist, and stay transparent so you can check healing without peeling them off.
Pair hydrogel dressings with a roll of smooth, thin kinesiology tape. If you feel a hot spot forming before the skin breaks, cover the area with kinesiology tape to reduce friction. The same tape can hold a hydrogel dressing in place, so you don't need a separate adhesive layer.
Ointments, antihistamines, and pain relief
Your personal prescriptions come first, in their original bottles or a clearly labeled pill case. Add over-the-counter antihistamines for allergic reactions to insect stings or unfamiliar plants, plus a pain reliever and an anti-inflammatory such as ibuprofen. Take all of these only according to the package directions, and store them away from heat and moisture.
Don't skip the antihistamine even if you don't normally have allergies. A trail-side reaction can happen to anyone, and an oral antihistamine can buy time while you decide whether to hike out. A small tube of hydrocortisone cream can help with mild skin reactions, though it's not a substitute for oral medication in a serious reaction.
Add a space blanket and skin salve
Two low-cost items from a basic outdoor emergency kit are worth considering if you expect cold rain, high wind, or a long day with no way to dry out. A space blanket packs down to about the size of a wallet, costs a few dollars, and works as an extra insulation layer, waterproof cover, temporary ground sheet, or emergency sleeping bag liner.
An emergency skin salve is optional but useful if you tend to get insect bites, chafing, dry winter skin, or sunburn. The cream-style formula goes on thicker than a lotion and soothes itching without feeling greasy. Keep it away from your eyes and lips. This is not a replacement for a dedicated burn dressing—if you get a serious burn, follow appropriate first aid protocols and seek help.
Strengths and Limits of the Basic Kit
This baseline keeps pack weight low and covers common trail issues, but it does not include larger trauma supplies or enough quantities for multi-day remote trips. Knowing where that line sits helps you decide what to add next.
What works well
The ten-item setup is lightweight, multi-use, and easy to assemble. It matches the injuries you're most likely to see on a day hike or a short car camping trip: small cuts, blisters, mild sprains, headaches, and allergy symptoms. You can fit everything into a quart-size dry bag and still have room for a compact first aid manual.
Most pieces serve more than one purpose. Kinesiology tape covers hot spots and holds dressings. Elastic wrap supports a rolled ankle or adds pressure to a bleeding wound. Athletic tape can build a finger splint, secure gauze, or mark a trail junction if you get turned around. That versatility keeps the kit lighter without making it weaker.
Where the baseline falls short
A ten-item list is a starting point, not a complete wilderness trauma kit. If you're far from roads or cell service, the same kit that works for a local trail may be too thin. Immediate gaps to think about include scissors for cutting tape and clothing, a SAM-style splint for rigid joint support, and a tourniquet for severe bleeding on remote sections.
Burn treatment is another common gap. The basic ointment helps with small skin irritations but not with hot-water spills from a camp stove or a mishandled pot. A dedicated burn gel or hydrogel burn dressing adds bulk but belongs in any kit for a trip where you'll be cooking over open flame. Stronger pain medication is a personal call—talk to your doctor before carrying anything beyond what's labeled for home use.
When to Add More Gear for Car Camping, Backpacking, or Cold Weather
Add items based on trip length, weather, distance from help, and group size. Car campers can carry more comfort supplies because weight and pack size hardly matter; backpackers need to trade comfort for lighter, multi-use pieces.
Car camping vs backpacking
For car camping, add the heavier items you'd leave behind on a trail. Scissors make cutting tape, gauze, or clothing much faster than a multi-tool. A SAM splint adds rigidity for wrist or ankle injuries without taking up much space in a vehicle bin. A more complete medication pouch can include extra antihistamines, anti-diarrheal tablets, and anything specific to your group.
For backpacking, keep the original ten-item core and choose a few add-ons that serve two purposes. A buff or bandana can be a bandage, a sling, or a water pre-filter. Kinesiology tape can partially replace athletic tape for small dressings. If you're counting ounces, each item should earn its place by solving at least two likely problems.
Here's a quick comparison to guide what goes into the kit for either style:
| Kit type | Typical weight | Core setup | Waterproofing approach | Best for |
|---|---|---|---|---|
| Basic day hike | Light: fits in a quart dry bag | 10-item list | Roll-top dry bag | Short trails, close to help |
| Car camping | Medium: fills a small storage bin | 10-item list plus scissors, SAM splint, burn dressing | Hard plastic case with gasketed lid | Group trips, convenience |
| Backpacking | Light: under 1 lb | 10-item list, multi-use items only | Roll-top dry bag | Fast, light travel |
| Cold, wet, remote | Medium: adds space blanket, splint, tourniquet | 10-item list plus trauma supplies | Dry bag or waterproof case | Long evacuations |
Cold, wet, or remote trips
A space blanket becomes more important as the temperature drops or rain moves in. It reflects body heat when wrapped around the shoulders, and it works as a waterproof ground sheet if you need to sit out a storm. Keep it in an outside pocket so you can reach it without unpacking everything else.
Never use a stove or heater inside your tent. Carbon monoxide builds up quickly in a closed space, and a fuel spill or tipping pot can turn a shelter into a fire hazard. If you're cold overnight, use a warmer sleeping bag or pad, not a combustion heater. Check fire restrictions and weather before the trip, and pack a waterproof layer if the forecast calls for rain.
Group size and kids
When you travel with other people, pack extra bandages, child-dose medications, and duplicate personal items. An injury doesn't always happen to the person carrying the first aid kit. If you're the only one with antihistamines or pain relievers and you get separated, the rest of the group still needs access to supplies.
For kids, add smaller bandage sizes and medications dosed for their weight. Children also tend to need more blister care because their shoes don't always break in properly before a trip. If anyone in the group has a known allergy or medical condition, carry at least two copies of the relevant medication in different packs.
Training matters more than gear
Extra tools only help if you know how to use them. A tourniquet applied incorrectly can cause more harm than good, and a SAM splint doesn't do much if you're not sure how to pad and secure it. Wilderness first aid courses teach you to assess an injury, improvise with what you have, and decide whether to stay put or evacuate.
Before spending money on more gear, schedule a weekend course. Learn how to wrap a sprain, clean a wound under field conditions, and recognize the early signs of hypothermia or heat illness. The confidence from training carries more weight than any single item in your kit. For medical emergencies beyond basic first aid, know how to contact local emergency services or a designated rescue line.
How to Organize, Waterproof, and Check Your Kit
Store items in a dry bag or waterproof pouch to keep bandages and medications sterile, and repackage small amounts of common medications in a labeled pill case for quick access. A well-organized kit saves you from rummaging through loose supplies when someone is already bleeding or limping.
Protect supplies from water
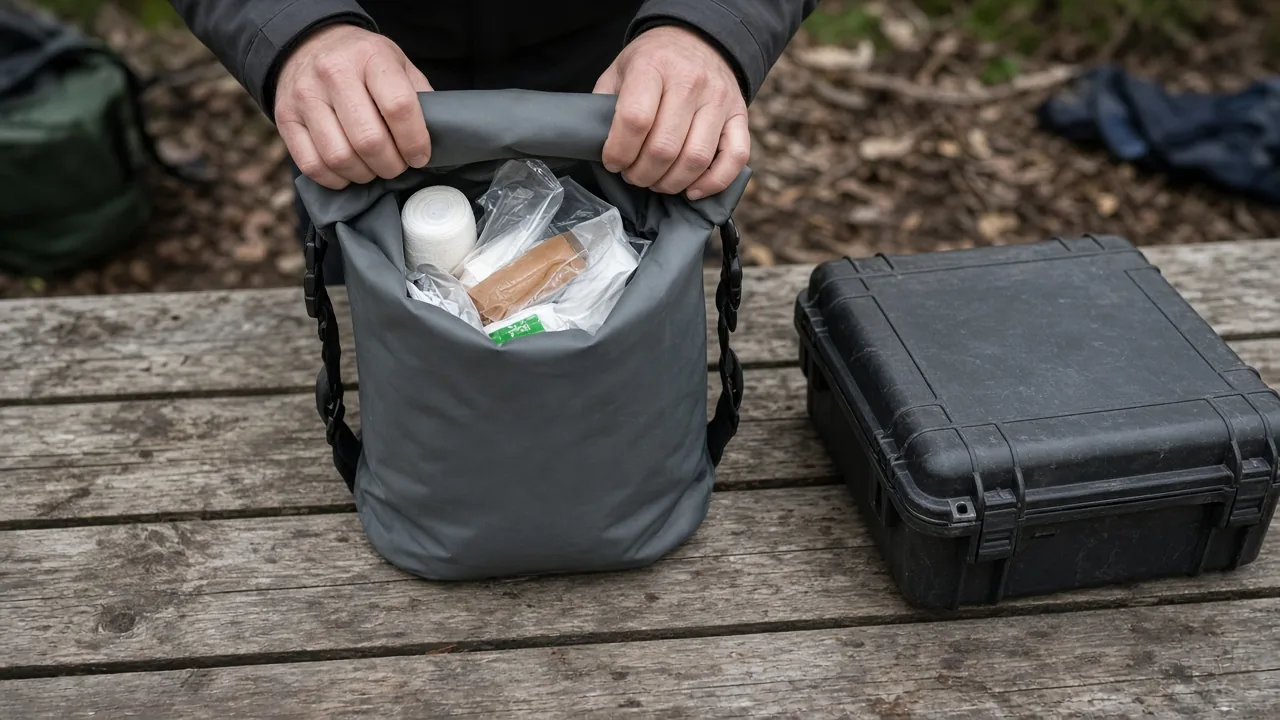
A dry bag keeps your kit from getting soaked, which preserves sterility and function. If bandages and gauze get wet inside their packaging, they lose their sterile barrier and can introduce bacteria into a wound. This matters most on river crossings, rainy backpacking trips, or any time your pack takes a dunk.
Roll the top of the dry bag carefully and squeeze out excess air before sealing. For car camping, a hard plastic case with a gasketed lid works well and stays open while you work. Whichever style you choose, keep it in the same place every trip so anyone in your group can find it fast.
Repackage and label personal medications
Use small pill boxes to separate daily medications from emergency doses, and label each section clearly. Write the medication name, dose, and expiration date on a piece of tape stuck to the inside lid. If you take something every day, keep a separate supply in your pack liner so you don't have to break into the first aid kit each morning.
When repackaging, don't mix different tablets in the same compartment. Some medications look alike, and a mistake can be serious in the backcountry. Keep prescription medications in their original bottles if you're flying or crossing borders, because a labeled bottle can save you from confusion at security.
Check expiration dates each season
Review ointments, medications, and tape at the start of each season, and replace anything expired or damaged. Adhesive products break down in heat, and the glue on hydrogel dressings or kinesiology tape loses its grip after a winter in a hot garage. Ointments separate or change texture when stored too warm.
Set a reminder for the start of spring and the start of fall. Pull every item out of the dry bag, check the dates, test the tape with a quick pull, and restock anything you used on the last trip. If a tube or bottle looks swollen, cracked, or discolored, throw it out. A dry bag or hard case that keeps moisture out is the most useful companion to your kit. Before each trip, check whether you are car camping or backpacking, how cold and wet the forecast looks, and who is coming along, then add a space blanket, larger trauma supplies, or extra medications only if those conditions justify the weight.
Camp Kit Journal
This article is general information about camping gear, not professional safety, medical, or wilderness training. Check fire restrictions, weather, and campsite rules before you go, and follow the manufacturer's instructions for your own equipment.
FAQ
What are the ten essential items in a camping first aid kit?
Medical gloves, an irrigation syringe with clean water, tweezers, antibiotic ointment, hydrogel dressings, kinesiology tape, bandages and gauze, athletic tape, elastic wrap, and personal medications.
How can I prevent and treat blisters while camping or hiking?
Cover hot spots with smooth kinesiology tape before the skin breaks, and use hydrogel dressings in a few sizes if a blister forms. Hydrogel dressings keep the wound moist and transparent so you can check healing without removing them.
When should I add a splint, tourniquet, or burn dressing to my kit?
Add these on remote trips far from roads or cell service, or when cooking over open flame. A SAM-style splint supports joint injuries, a tourniquet addresses severe bleeding, and a dedicated burn dressing helps with camp-stove spills.
How do I keep camping first aid supplies dry and organized?
Store everything in a roll-top dry bag or a hard plastic case with a gasketed lid. Keep the kit in the same place each trip, and squeeze excess air from the dry bag before sealing.
Do I need first aid training before going camping?
Training matters more than gear. A wilderness first aid course can teach you how to wrap a sprain, clean a wound, use a splint or tourniquet safely, and decide whether to evacuate.



