Best Telescoping Camping Lantern: Budget vs Premium
A budget telescoping camping lantern covers most tables, tents, and small sites, while a premium model fits large groups, selectable side panels, and compact packed size. Match the light to your group size and camp tasks.
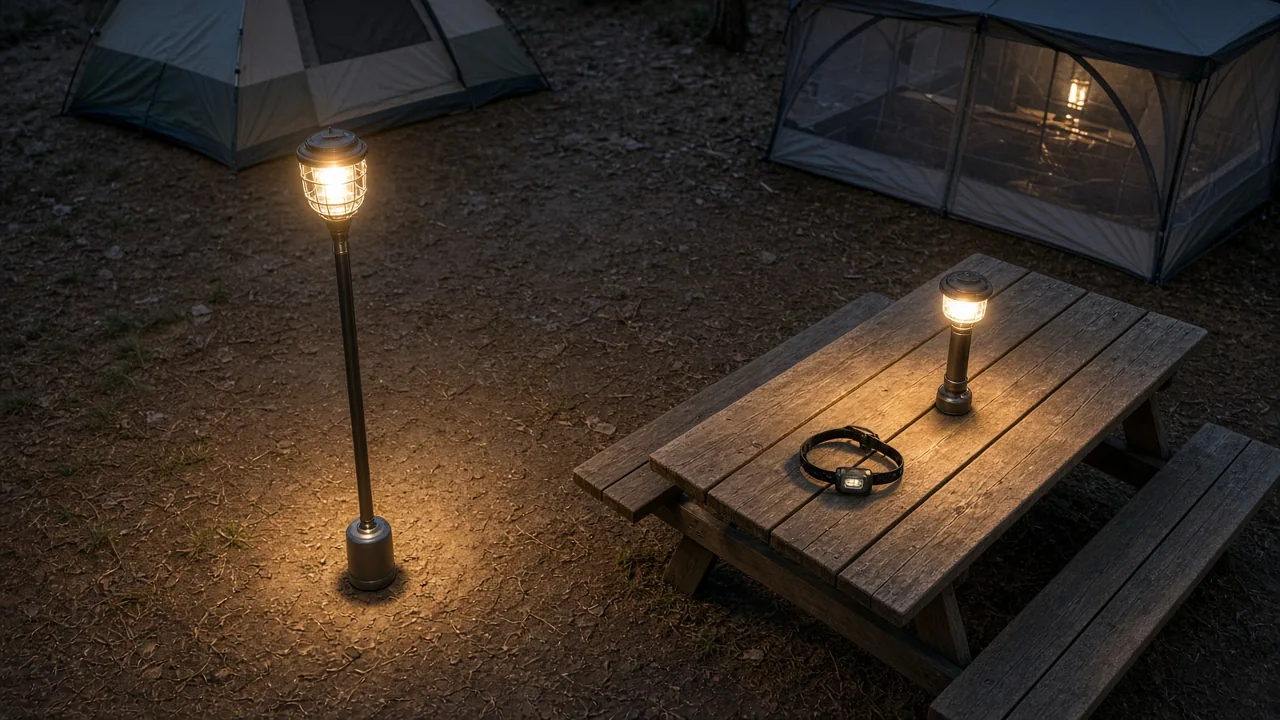
The best telescoping camping lantern for your car camping setup is the one that matches the lighting job, not the tallest pole or the highest price. A budget telescoping LED lantern handles most tables, tents, and small sites when paired with a headlamp. A premium model earns its place when you routinely light large group areas, want selectable side panels, or need a more compact packed size and finer control. Start with how you will use the light.
Start With the Lighting Job, Not the Price Tag
Decide whether the light is mainly for inside a tent, cooking at a table, or lighting a whole group area. That choice sets realistic brightness, height, and beam needs.
A lantern that works well inside a 2- or 3-person tent may feel weak at a group dinner table. A lantern bright enough for a wide kitchen area may be too harsh when collapsed on a picnic table. In car camping, weight is less important than stability and easy setup, so you can choose a larger base without the backpacking penalty.
For most car campers, the practical range is 100 to 200 lumens. Use about 100 lumens in a tent or at a small table, 200 lumens for cooking and group meals, and more only when lighting a large open area.
Telescoping Lantern Specs That Change Camp Setup
Before choosing between budget and premium, look at the specifications that change how a lantern feels and performs in camp.
Height and Light Spread
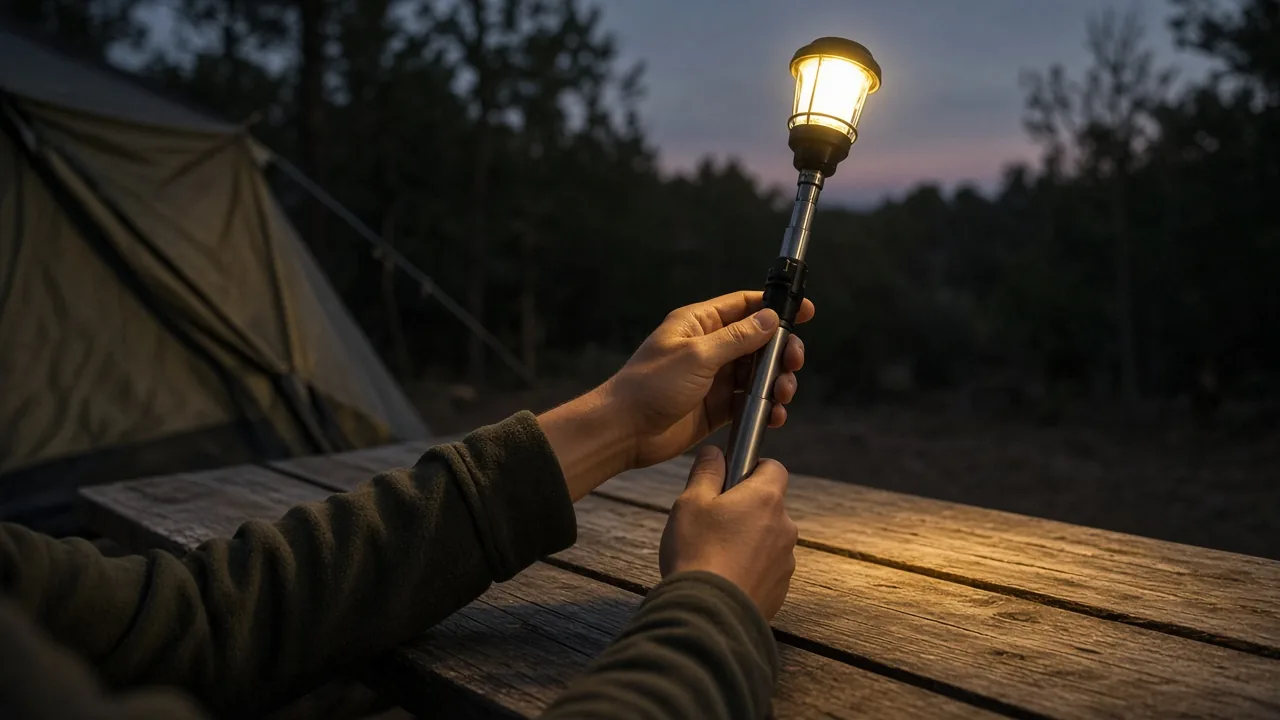
Taller poles raise the light above eye level and reduce hard shadows, but they are not automatically better.
A telescoping lantern that extends to 10 feet can light a broader area and keep the brightest part above your sight line. A 6.3-foot pole is easier to manage around a table and less likely to flex in wind. Rather than assuming taller is better, match the height to your camp footprint.
Brightness and Runtime
Use brightness as a guide, but check runtime at a low or medium setting. High output drains LED batteries quickly.
A budget telescoping lantern may list 40 hours of low-mode runtime, while a premium model may list about 45 hours. That difference matters on a multi-night trip if you are not recharging daily. Lumens tell you how much light you get; runtime tells you how long that light stays useful. For tent or table use, 100 to 200 lumens is enough. For a large open camp, 500 to 1,000 lumens may be justified, but you will likely trade runtime.
Light Color and Modes
Warm or neutral white covers most camp tasks: cooking, reading, packing, and moving around tables. Warm light reduces glare and feels less harsh after dark.
Amber light placed away from seating pulls insects from your area. Red protects your night vision for midnight tent checks without making you wait for your eyes to readjust. Avoid the common mistake of treating red as an insect repellent. It is not. Amber is the color that reduces insect attraction.
Water Resistance and Charging
Look for an IPX4 rating or better. IPX4 means the lantern can handle dew and light rain from any direction. That is enough for most car camping. If you expect prolonged wet weather or a damp riverside site, choose a higher rating.
Check whether the light has USB-C charging, solar charging, or a replaceable battery option. USB-C is the most convenient for car camping because you can recharge from a vehicle or battery pack. Solar is a useful backup but can be slow in tree-covered camps.
Budget vs Premium Telescoping Camping Lanterns: Side-by-Side
Here is how a budget telescoping camp lantern and a premium telescoping camp lantern compare across the specs that matter for car camping.
| Spec | Budget telescoping lantern | Premium telescoping lantern |
|---|---|---|
| Max height | 10 ft (about 3 m) | 6.3 ft (about 1.9 m) |
| Color modes | Cool, neutral, and warm white | White, amber, and red |
| Side-light control | Diffused whole-panel output | Select 1, 2, 3, or 4 side panels |
| Low-mode runtime | About 40 hours | About 45 hours |
| Base footprint | Expanding legs with reflective strips; wider base can become a trip hazard | Compact base that stows easily |
| Detachable lamp design | Pop-out lamp body | Twist-off lamp body |
| Real-world coverage | Lights one large picnic table or small activity area; tighter light spread reduces light pollution | Lights about two campsites; roughly double the light for large groups and night use |
The budget model is taller and simpler. The premium model is shorter but offers more control and a smaller base. The premium also adds selectable side panels, so you can aim light toward the kitchen and away from sleeping areas. The budget light uses a simple diffuser, which spreads light evenly but without that directional control.
One control difference matters in practice. A budget model may include a magnetic remote that adjusts brightness, warm/cool color, and power. A premium model may require a smartphone app for full control. If you do not want another Bluetooth device at camp, the budget remote feels faster.
Where a Budget Telescoping Lantern Fits
A budget telescoping lantern covers solo cooking, table games, and small sites well. It is especially effective when paired with a headlamp or a second light to reduce shadows.
The taller pole helps keep light above eye level at a shared table. Collapse it fully and it becomes a soft table lamp with a diffuser that keeps the light from glaring into your eyes. For a small kitchen area, one budget lantern plus a headlamp gives you two light sources, which cuts the hard shadows that a single overhead light creates.
A budget lantern also works if you camp in tighter, established sites where light spill matters. A tighter beam spread keeps light on your table rather than washing into neighboring camps.
Where a Premium Telescoping Lantern Fits
A premium model makes more sense for large groups, open camps, and users who want selectable side panels, higher output, app control, and a compact packed size.
If you regularly set up a wide camp kitchen for six or more people, a premium lantern can light roughly two campsites at once. That is twice the real-world coverage of a budget model. You can turn on only one or two side panels, which is useful for reducing glare or directing light away from tents.
The compact base also fits better in a trunk bin or on a narrow shelf. Long-term support can be another reason to choose premium. Some premium brands have a record of replacing failed units years after purchase without asking for the old light back.
How to Choose the Best Telescoping Camping Lantern for Your Trip
Match the lantern to your group size, weather, and typical camp tasks rather than buying the brightest or tallest option by default.
Match Light to Group Size
For two or three people at one table, a diffused 100-to-200-lumen light is enough. A large group or wide kitchen area benefits from higher output or several lights placed around the perimeter.
If you have six or more people spread across two tables, one 200-lumen lantern may leave the far end in shadow. In that case, two budget lights or one premium light with higher output will work better. The goal is even light where people cook, eat, and move, not a single hot spot.
Plan for Bugs, Night Vision, and Glare
Collapse the lantern for a soft table light. Keep red light near the tent. Place amber light away from seating to draw insects away from your cook area and table.
A fully extended lantern can glare into your eyes from across a small site. Lowering it or using a warm mode reduces that effect. If you get up in the middle of the night, use a headlamp with a red light, not a bright white lantern. Red preserves your night vision, so you can find gear without waking everyone or losing your dark adaptation.
Think About Packed Size and Setup
In a car, trunk space and setup speed matter more than saving ounces. Choose a base that fits your bin or shelf and deploys without tools.
A telescoping lantern with a wide expanding base may take up more room than a compact premium base. Measure how much space you have next to your camp kitchen gear. Whichever style you choose, the pole should extend and retract without catching on dirt or sand. Store the light in a dry section of the car, not under a cooler that can leak.
Set Up, Use, and Store a Telescoping Lantern Safely
A telescoping lantern is simple, but a tall pole can tip, glare, or block a walkway. Set it up with that in mind.
Stake or Weight the Base
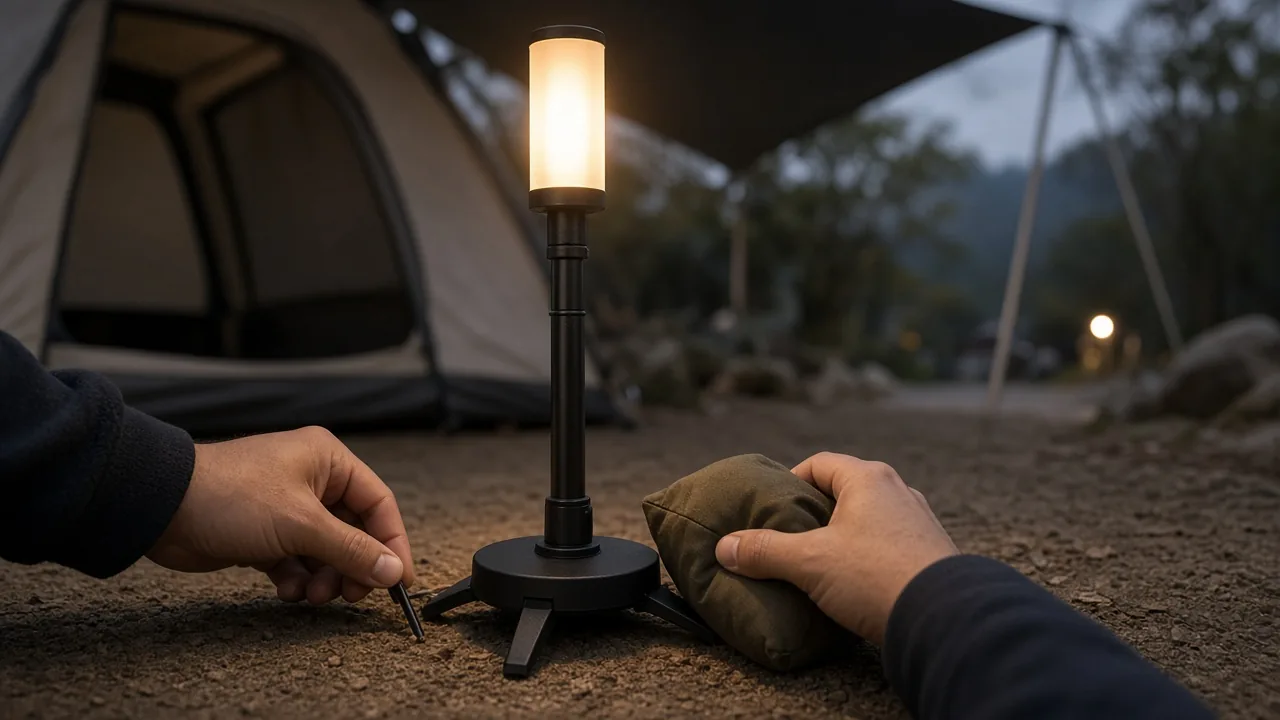
Use the included stake or a weight on soft ground. Place the legs outside walkways to keep the pole from tipping or tripping someone.
On turf or packed soil, a stake keeps the base steady. On a sandy or rocky surface, a small sandbag or a bundle of tent stakes works. Keep the tripod legs out of paths between tents and the kitchen. Reflective strips on some bases help people see the legs after dark, but do not rely on them alone.
Detach the Lamp Body Under a Canopy
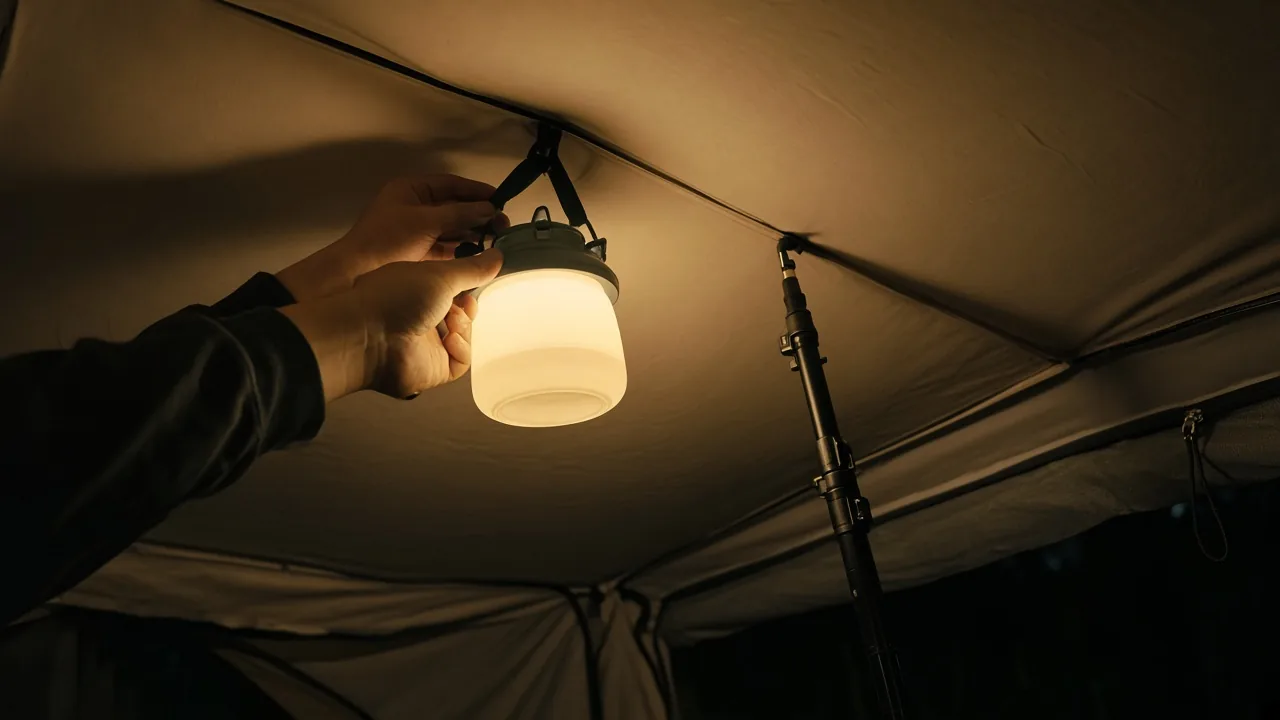
Remove the lantern head and hang it inside a canopy or tent to avoid a center pole in the cooking area. The diffuser softens close-range light.
Most telescoping lanterns have a detachable lamp body. A budget model may pop out, while a premium model may twist off. Once detached, you can hang the light from a tarp ridge or a tent loop. That keeps the pole out of the way and puts light exactly where you need it for cooking or reading.
Never Use a Stove or Heater Inside Your Tent
Never use a stove or heater inside your tent. Operate fuel appliances outdoors away from tents and vehicles, and follow the manufacturer’s instructions.
Carbon monoxide and fire risk are the main reasons. Even a brief use inside a tent can create a dangerous gas build-up. Cook, boil water, and run any heater outside and at a safe distance from tent fabric and guylines.
Clean, Dry, and Recharge Before Packing
Wipe moisture and sand from pole joints, dry the diffuser, and recharge the battery so the lantern is ready for the next trip.
Grit in the telescoping sections can cause binding. Dampness left inside the lamp body can lead to corrosion or clouded lenses. After cleaning, open the light or set it on a dry shelf for a few hours. Recharge to full or near full before storing, because a stored dead battery may lose the ability to hold a charge.
Verdict: Budget or Premium for Your Car Camping Kit
Most car campers should start with a budget telescoping LED lantern and a headlamp. Upgrade to premium when you routinely light large areas, want selectable side panels, or need a compact base and long-term support.
A budget lantern with a taller pole and warm light covers solo cooking, small group meals, and tent-side tasks. If shadows or whole-site lighting become a regular problem, buy two or three budget lights rather than one premium. Several lights around camp eliminate harsh shadows better than one bright source.
A premium telescoping lantern is worth the extra money for a large group, open camp, or overland-style basecamp. You get higher output, amber and red modes, side-panel control, and a base that packs down small. It also makes sense if you want long-term replacement support and do not mind using an app for advanced controls.
Before you go, check whether your next trip is car camping or backpacking, how cold and wet the night may be, and whether you need table light or whole-site coverage. Pack a headlamp as a backup. Check fire restrictions, campsite rules, and the forecast, and store food in a bear-safe way where required.
This article is general information about camping gear, not professional safety, medical, or wilderness training. Check fire restrictions, weather, and campsite rules before you go, and follow the manufacturer's instructions for your own equipment.
FAQ
What is the best telescoping camping lantern for most car campers?
Most car campers should start with a budget telescoping LED lantern paired with a headlamp. Upgrade to premium when you routinely light large areas, want selectable side panels, or need a compact base and long-term support.
How many lumens do I need in a telescoping camping lantern?
Use about 100 lumens in a tent or at a small table and about 200 lumens for cooking and group meals. Large open areas may need 500 to 1,000 lumens, but you will likely trade runtime.
Is a taller telescoping lantern always better?
No. Taller poles raise light above eye level and reduce hard shadows, but match the height to your camp footprint. A 10-foot pole lights a broader area, while a 6.3-foot pole is easier to manage around a table and less likely to flex in wind.
What is amber light used for on a camping lantern?
Amber light placed away from seating draws insects away from your cook area and table. Red is not an insect repellent; it protects night vision for midnight tent checks.
How can I keep a telescoping lantern from tipping over in camp?
Stake or weight the base on soft ground and place the legs outside walkways. On sandy or rocky surfaces, use a small sandbag or bundle of tent stakes to keep it steady.



