Backpacking Pack Liner vs Dry Bags: What to Use and When
Pack liners waterproof your whole main compartment for less weight, while dry bags give separate waterproof pockets at the cost of bulk. Learn when each system fits your trip and how to pack and seal them fast.
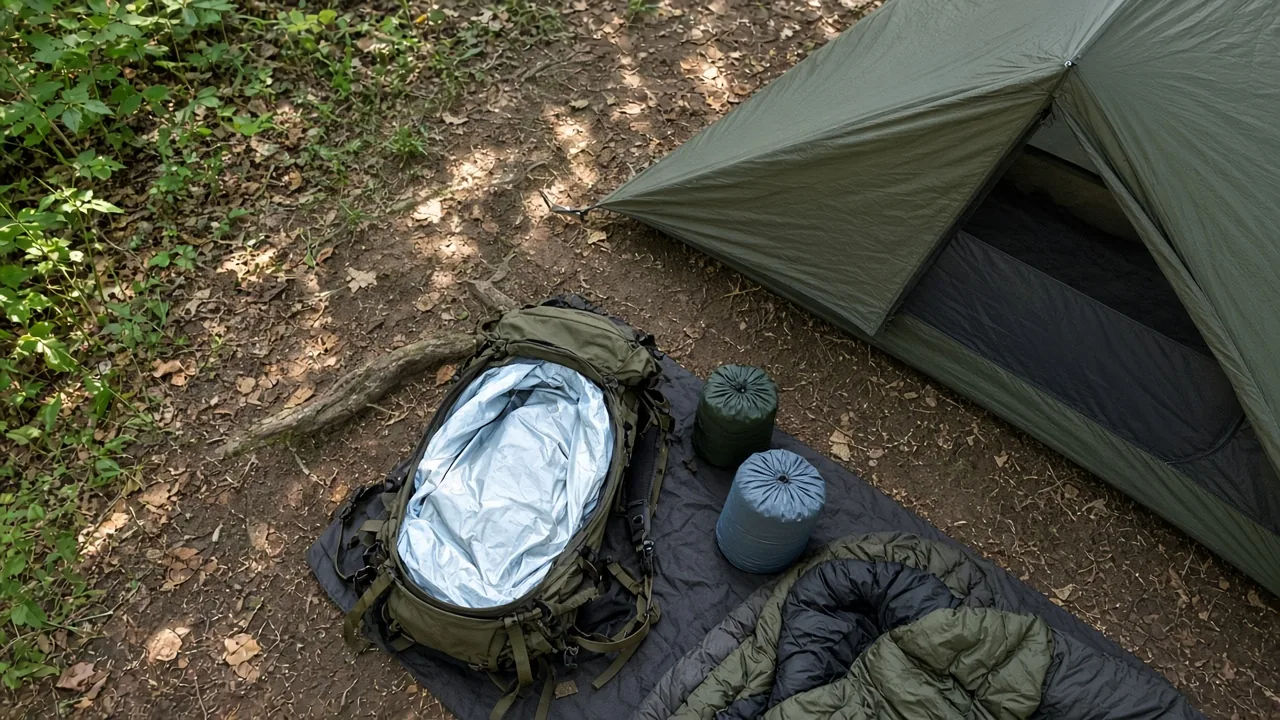
When weighing a backpacking pack liner vs dry bags, the simplest answer is that a pack liner waterproofs your whole main compartment for less weight, while dry bags give you separate waterproof pockets at the cost of extra bulk. Figuring out which system fits your trip comes down to what must stay dry, how much rain you expect, and how much weight you're willing to carry. You'll learn when a single pack liner beats multiple dry bags, how to seal a liner quickly, and how to decide based on trip type, overnight temperatures, and rain likelihood; no special tools are needed beyond your own pack.
Backpacking Pack Liner vs Dry Bags: Compare Before You Pack
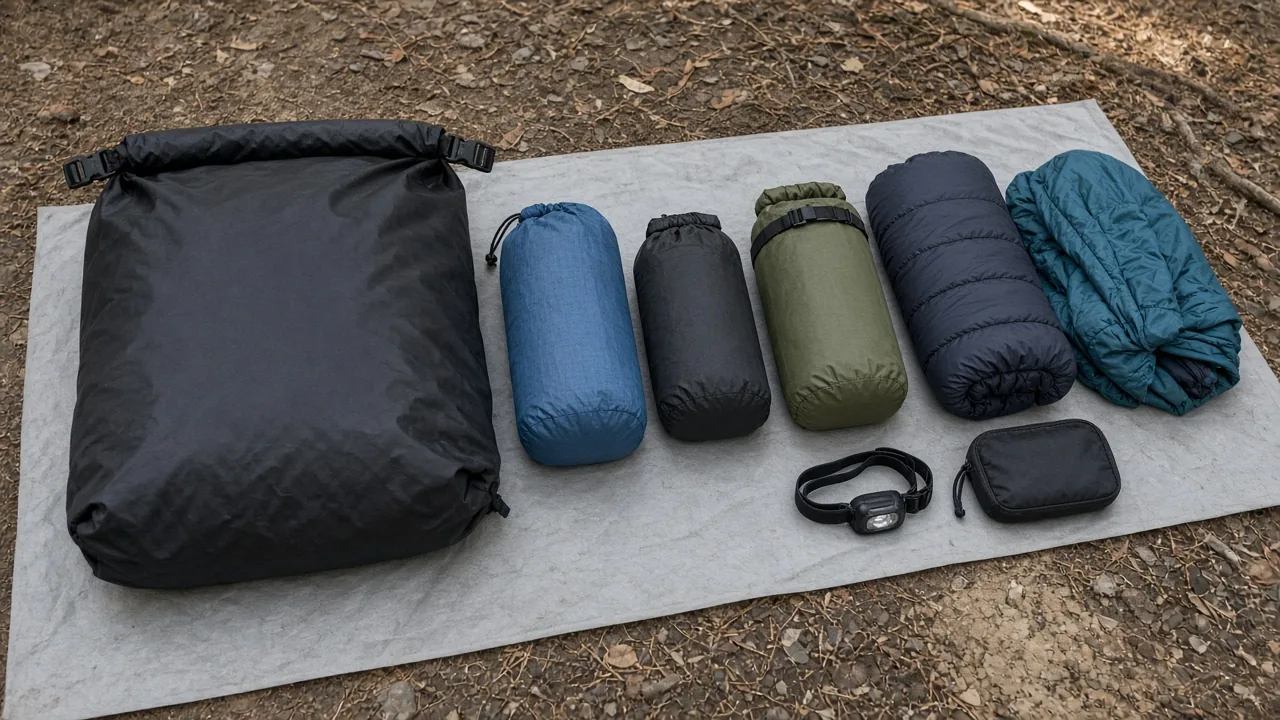
A pack liner waterproofs the entire main compartment and compresses more easily, while dry bags let you separate wet gear but add weight and bulk; understand this trade-off before choosing one system or a hybrid. The choice is not always either-or—many backpackers run one large liner for insulation and one or two small dry bags for items that need absolute protection.
| Feature | Pack Liner | Dry Bags |
|---|---|---|
| Weight | 0.9–2 oz for one liner | 2–6 oz per bag, adds up fast |
| Waterproof coverage | Whole main compartment | Individual items or groups |
| Compression | Twist-and-tuck pushes air out | Bulky, hard to compress tightly |
| Organization | Single open space | Color-coded, separate compartments |
| Best for | Ultralight backpacking, full-pack protection | Wet gear separation, quick access in rain |
| Failure mode | One small hole affects everything | One bag failing leaves others dry |
When a Pack Liner Makes More Sense
Use one when you want the lightest waterproofing and need to compress a full pack; the twist-and-tuck seal pushes air out and keeps gear close to your back. A single liner weighs around an ounce, far less than three or four dry bags that might total half a pound or more. For long-distance backpacking where every ounce matters, that weight saving is hard to argue with.
A liner also simplifies packing. You open it once, stuff everything that must stay dry inside, seal it, and move on. There is no juggling multiple roll-tops or deciding which color-coded bag holds your puffy. The liner conforms to whatever shape your pack needs, while dry bags create stiff cylinders that leave gaps around the edges.
When Dry Bags Are Worth the Extra Weight
Choose dry bags when you often carry wet tents, wet clothes, or need quick access to small dry items in rain without opening the whole pack. A rain-soaked tent body stuffed inside a pack liner will transfer moisture to your sleeping bag; a separate dry bag isolates that wet fabric.
Dry bags also let you grab one item without exposing everything else. If you need your headlamp or phone charger during a downpour, opening a single small dry bag beats unsealing and resealing your entire pack liner while water runs off your hood. Some backpackers have used dry bags for years as their primary organization system and find the visual separation—red bag for first aid, blue for electronics, yellow for camp clothes—worth the weight penalty.
Decide What Must Stay Dry and How Wet Your Route Might Be
List your non-negotiables—sleeping bag, puffy, baselayers, electronics—and check the forecast; the more rain or creek crossings you expect, the more waterproofing coverage you need. Start with the gear that fails if wet: down insulation collapses and loses warmth, electronics short out, and wet base layers can make a cold night dangerous.
A dry desert route with zero rain in the forecast and no water crossings may need only minimal protection. A shoulder-season trip through the Pacific Northwest with rain likely every afternoon calls for a full liner plus a small dry bag for electronics. Think through the worst realistic scenario, not the best case.
Consider overnight temperatures too. At 40°F with light rain, damp gear is uncomfortable but usually manageable if you keep moving. At 20°F, a wet sleeping bag is a serious problem that can end a trip. The colder the nights, the more redundancy you want around your sleep system and insulation.
Pack and Seal a Pack Liner the Fast, Low-Stress Way
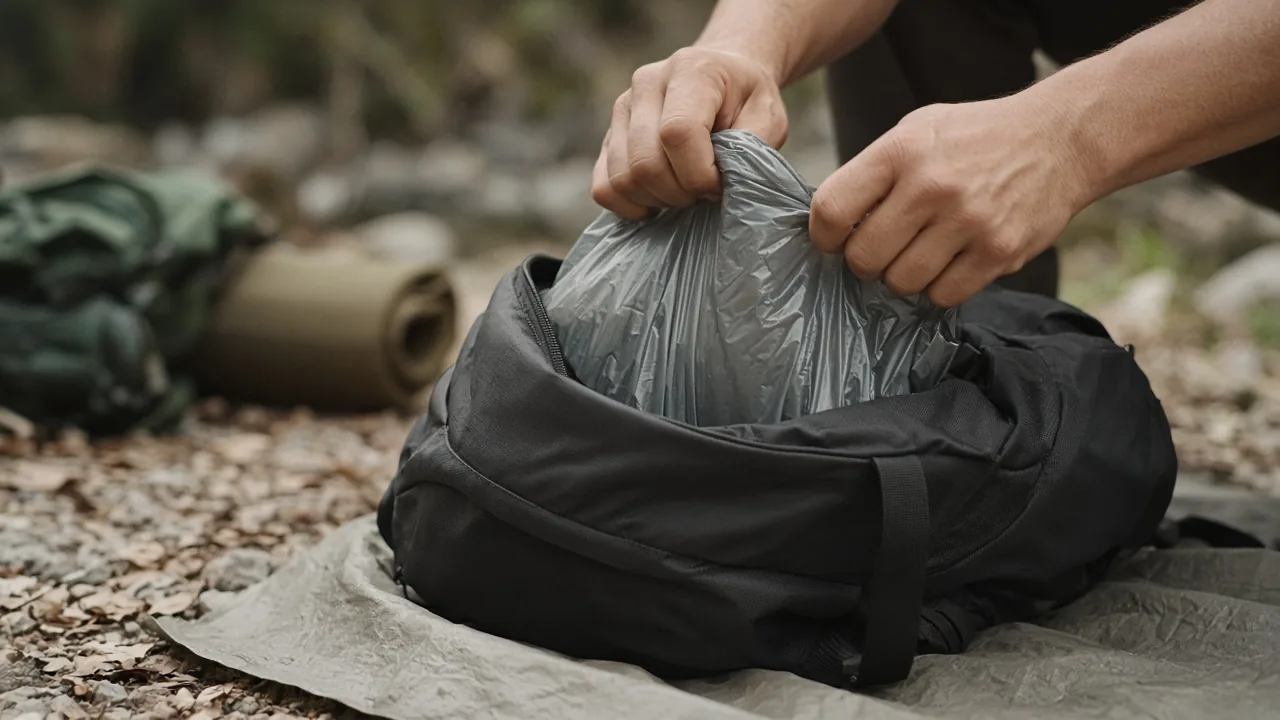
Grab the extra bag opening, press down to push air out, twist the neck several times, then tuck it down the side of your pack; this seals faster than many Velcro roll-tops and compresses more completely. The key is leaving enough loose material at the top of the liner to grip and twist without fighting the contents.
Start by lining your empty pack with the liner, then load gear directly into it. When full, gather the opening with both hands, press downward firmly to force trapped air out through the top, twist the gathered neck three or four times, and fold the twisted tail down alongside the pack wall. The twist holds itself in place under the weight of your gear.
This method works best with bags that have extra length to spare. A liner that barely reaches the top of your pack leaves little room to gather and twist. When choosing a liner, err toward a size larger than your pack volume rather than a tight fit.
Avoid the Biggest Liner Failure: Small Punctures
Keep sharp or hard items away from the liner's inner wall because one small hole can let moisture reach your gear during long rain, stream crossings, or a wet tent. Thin plastic compactor bags and even tougher Nylofume liners puncture more easily than heavy dry bag fabric. Tent poles, stove legs, trekking pole tips, and even stiff-edged stuff sacks can wear through a liner over the course of a trip.
Pack sharp objects inside their own protective sleeves or place them outside the liner entirely. If your pack has side pockets or a front stretch pocket, use those for items with hard edges. For gear that must stay inside the liner, wrap pointed ends in clothing or a small stuff sack before loading.
If You Have a Velcro Roll-Top Liner, Consider a Simple Modification
Cutting off a fussy Velcro closure and using the twist-and-tuck method can speed up packing, but only if the bag remains long enough to close with room to spare. Some waterproof liners come with a roll-top and Velcro system meant to mimic dry bag closures. In practice, the Velcro catches on fabric during packing, springs open while you try to squeeze out air, and adds friction against other gear.
The fix is straightforward: trim the Velcro strip off the top, leaving a plain open mouth, then use the standard twist-and-tuck seal. This works well on liner materials like Cuban fiber that hold a twist reliably. Test the modification at home before a trip to confirm the bag still has enough length to twist and tuck comfortably after loading your full kit. If the liner was already borderline short, keep the original closure and accept the slower packing process rather than risk an unsealable bag.
Use Dry Bags as a Second Layer, Not Always a Replacement
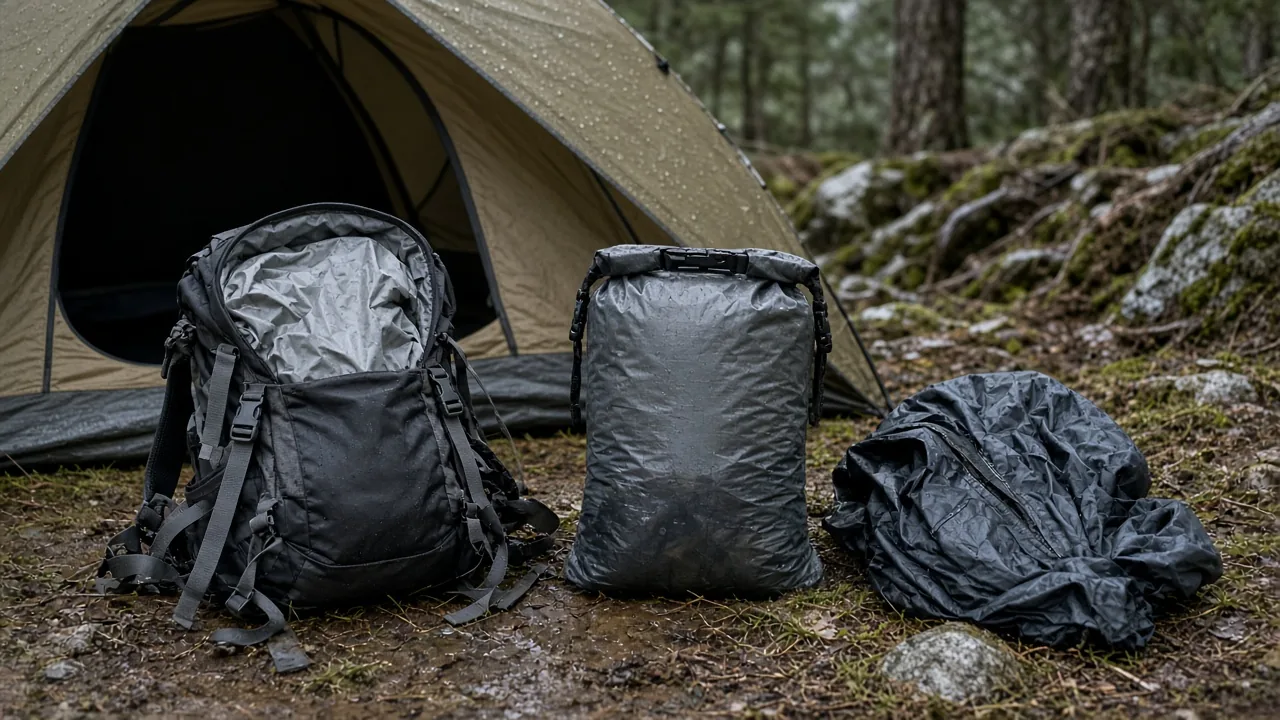
Put truly wet items like a rain shell or tent in a small dry bag, then place that inside or outside your pack liner; this keeps moisture from spreading while you keep the liner's weight and compression advantages. The hybrid approach gives you the best of both systems: a light main waterproofing layer plus targeted isolation for problem items.
A wet tent body goes into its own dry bag, which then sits either on top of your liner or in a front pocket. A damp rain jacket gets wrung out, stuffed in a small dry bag, and tucked along the side. Your sleeping bag, puffy, and base layers stay sealed inside the liner, never touching anything damp.
This also lets you access wet items without opening your dry layers. If rain picks up mid-day, you pull out the dry bag holding your rain shell, open it outside the pack, and put it on—all while your insulation stays protected. A single small dry bag for a water filter that drips after use keeps everything else dry without requiring a full dry-bag system.
Pack the Rest of Your Gear Around the Waterproofing System
Keep heavy items close to your back and over your hips, put frequently used items on top or in hipbelt pockets, and balance side to side so neither a liner nor a dry bag shifts inside the pack. A poorly balanced pack hurts after the first few miles, and waterproofing layers can make that worse if they slide around.
Once your liner or dry bags are loaded, place the heaviest remaining items—stove, fuel, food, water—close to your spine in the middle of the pack, roughly between your shoulder blades and hips. This keeps the load over your hips where your legs carry most of the weight. Light, compressible items like a spare fleece or camp shoes go lower and farther from your back.
Check side-to-side balance before you close the pack. A full water bottle on one side and nothing on the other will pull you off center. Move gear around until the pack feels even when you lift it, not just when you look at it.
Where to Put Water Containers and Wet Gear
If your pack has a separate hydration sleeve or outside pockets, use them for water; otherwise place wet gear in a dry bag at the bottom or side, away from your sleeping bag. Water containers leak more often than most people expect—caps crack, bite valves fail, threads cross. A dedicated hydration sleeve isolates that risk from the main compartment entirely.
For packs without a sleeve, use side pockets for bottles and bladders where possible. A leaking bottle inside a side pocket wets the outside of your pack, not your gear. If you must carry water inside the main compartment, put it in a small dry bag or double-bag it, and keep it below and away from your sleep system so any leak drains downward instead of soaking into your sleeping bag.
Safety Reminder: Stoves and Heaters Never Go Inside Your Tent
Whether you rely on a pack liner, dry bags, or both, never run a stove, heater, grill, or charcoal inside a tent or closed space because of carbon monoxide and fire risk. This rule applies to every camping setup, no matter how cold the night gets or how well you think the tent ventilates.
Carbon monoxide is odorless and builds up quickly in an enclosed space, and tent fabrics, sleeping bags, and pack liners are all flammable. Cook outside, away from your tent door, and follow the manufacturer's instructions for your stove or fuel appliance. Before any trip, check fire restrictions for your route and confirm where cooking is allowed.
Troubleshooting Common Pack Liner and Dry Bag Problems
If gear still gets damp, check for liner holes; if dry bags add too much bulk, reserve them only for the worst offenders like wet clothes or a water filter. Moisture problems usually trace back to a single failure point—one small puncture in a liner, one dry bag that was not sealed fully, or one wet item that got loaded into the wrong layer.
To find a liner hole, inflate the liner partially by trapping air inside, then squeeze it against your ear or hold it up to a bright light and look for pinholes. Small punctures are often invisible when the bag is empty but show up under pressure. Mark any holes with tape so you can patch or replace the liner before the next wet trip.
My Liner Has a Hole—Is It Ruined?
Small pinholes often matter only in sustained rain or submersion; patch with tape in the field, but replace a heavily punctured liner before a wet trip. A tiny hole from a sharp edge may never cause problems on a dry weekend. On a rainy multi-day route with creek crossings, that same hole can wick moisture into your compressed sleeping bag over several hours.
Field repair is straightforward: dry the area around the hole, apply a piece of tenacious tape or similar repair tape to both sides, and press firmly. This works for most liner materials and holds well enough to finish a trip. At home, a liner with multiple small holes or any tear longer than an inch has reached the end of its useful life.
Dry Bags Make My Pack Bulky and Heavy
Use one large liner for your main sleep system and insulation, then add only one or two small dry bags for items that must stay absolutely dry. The bulk problem with dry bags comes from carrying too many of them. Each bag adds fabric, roll-top bulk, and dead air space between items that could otherwise compress into a tight load.
A 5-liter dry bag for electronics and a small one for a wet tent or rain shell covers most needs. Everything else goes inside the pack liner. This cuts the dry bag weight from perhaps 12 ounces for a full system down to 3 or 4 ounces, while keeping the protection where it matters.
When to Skip the Pack Liner Completely
If you backpack mostly in dry climates or do frequent water crossings where you already separate every item, multiple dry bags may work without a full pack liner, though total weight rises. Desert backpackers who see rain once a season and cross few streams often find a liner unnecessary overhead. Their gear stays dry by default, and the main risk is an unexpected splash, not sustained rain.
Frequent river-crossing trips present a different calculation. If you need to keep each item individually protected because you may have to remove and carry gear through waist-deep water, dry bags give you modular coverage. A single pack liner works only while the pack stays mostly upright and sealed; once you open it mid-crossing or float it, everything inside shares the same fate.
The tradeoff is weight and pack volume. A full dry bag system easily adds 8 to 12 ounces and eats interior space. For most backpackers in most conditions, one reliable liner plus a targeted dry bag or two is the lighter, simpler answer.
Before each trip, ask whether you're car camping or backpacking, how cold it gets at night, and if rain is forecast; wet conditions mean at least one reliable waterproof layer—liner, dry bags, or both—belongs in your pack. If you are just getting your system dialed, start with a basic pack liner and add dry bags only as specific needs appear. The goal is not more waterproofing than you need, but enough that a wet forecast does not change how you sleep.
Camp Kit Journal
This article is general information about camping gear, not professional safety, medical, or wilderness training. Check fire restrictions, weather, and campsite rules before you go, and follow the manufacturer's instructions for your own equipment.
FAQ
When should I choose a pack liner over dry bags?
Use a pack liner when you want the lightest waterproofing and need to compress a full pack; it weighs about an ounce and simplifies packing by covering the whole main compartment.
Are dry bags worth the extra weight?
Dry bags are worth it when you often carry wet gear like a tent or need quick access to small dry items in rain without opening the whole pack; they isolate moisture and help organize.
How do I seal a pack liner quickly?
Gather the opening, press down to push air out, twist the neck three or four times, then tuck the twisted tail down the side of your pack; leaving extra length at the top helps.
Can I use both a pack liner and dry bags together?
Yes, many backpackers run one large liner for insulation plus one or two small dry bags for items that need absolute protection or for wet gear, giving a light but waterproof system.
What should I do if my pack liner gets a small hole?
Small pinholes often matter only in sustained rain or submersion; patch with repair tape on both sides in the field, but replace a heavily punctured liner before a wet trip.



